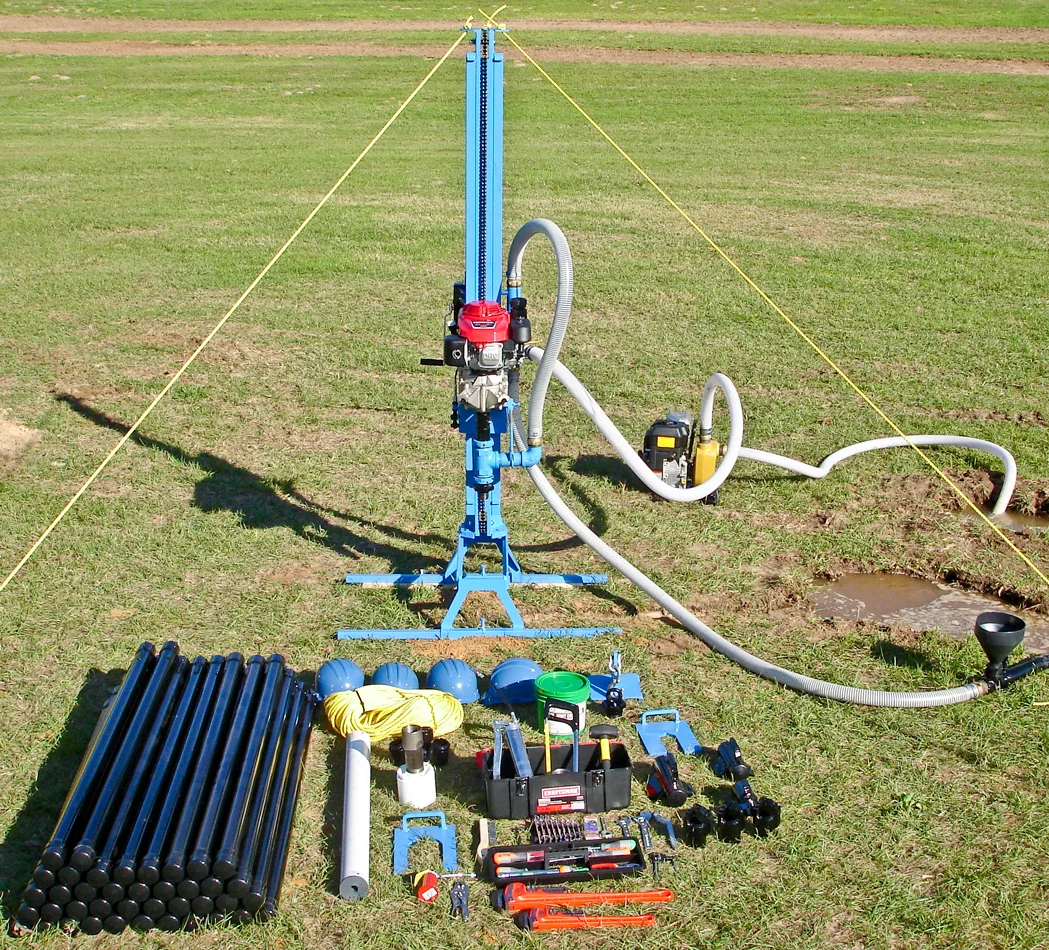
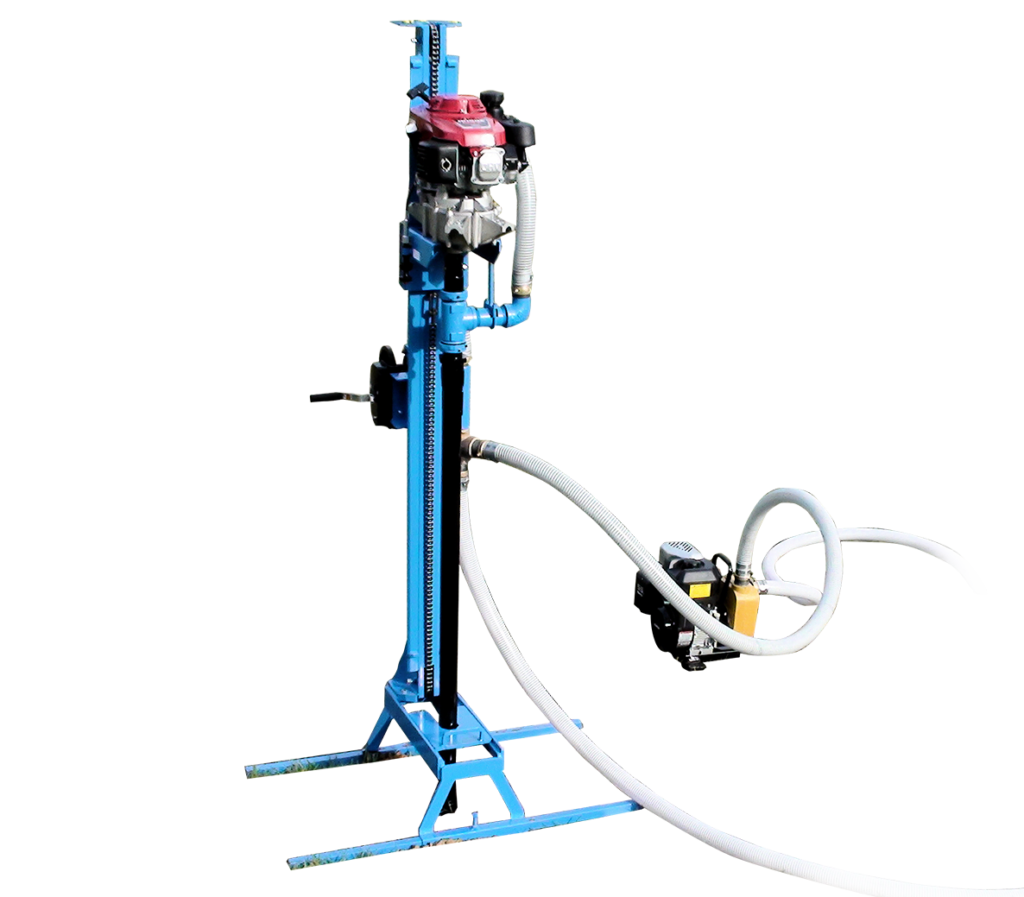
Making a water well drilling machine can seem complex. But with the right guidance, it’s achievable.
Building a water well drilling machine involves understanding various components and their functions. This process combines basic engineering skills with hands-on assembly work. Whether you need it for personal use or community projects, a homemade drilling machine can save money.
It’s also an empowering project, helping you gain new skills. By breaking down each step, this guide aims to make the task simple and accessible. Dive in to learn how you can create your own water well drilling machine. Your journey to self-sufficiency and skill-building starts here.

Credit: au.pinterest.com
Gathering Materials
Creating a water well drilling machine requires careful planning. The first step is gathering all necessary materials. This ensures you have everything you need for a smooth process. Below, we will break down the essential tools and safety gear required.
Essential Tools
Having the right tools is crucial. These tools help you build the machine efficiently. Here is a list of essential tools:
- Drill bits: Choose durable and high-quality bits.
- Pipe wrenches: Necessary for tightening and loosening pipes.
- Welder: For joining metal parts securely.
- Cutting torch: Helps cut through metal easily.
- Measuring tape: Ensures accurate measurements.
- Power drill: A reliable power drill is a must-have.
Required Safety Gear
Safety is a top priority. Using the right safety gear can prevent injuries. Here is a list of required safety gear:
- Safety glasses: Protect your eyes from debris.
- Work gloves: Keep your hands safe from cuts and burns.
- Hard hat: Protects your head from falling objects.
- Steel-toe boots: Safeguards your feet from heavy objects.
- Ear protection: Reduces noise from loud machinery.
- Face shield: Provides extra protection for your face.
By gathering these materials, you are one step closer to building your water well drilling machine. Always prioritize safety and use high-quality tools for the best results.
Preparing The Drill Site
Preparing the drill site is a critical step in making a water well drilling machine. Ensuring the right location and a clear site helps the process run smoothly and safely.
Choosing A Location
Selecting the right location is crucial. The spot should be close to a water source. Use a dowsing rod or consult local records to find water underground. Avoid areas near septic tanks or industrial waste. This prevents contamination.
Clearing The Area
Clear the drill site of any obstacles. Remove rocks, debris, and vegetation. Create a flat surface to set up your equipment. Mark the area with stakes or flags. This ensures safety and organization during the drilling process.
Constructing The Drill
Constructing a water well drilling machine involves several crucial steps. One of the most important steps is building the drill. This part of the process requires careful planning and execution. By following the right steps, you can ensure that your drill is effective and durable. Below, we will explore how to build the frame and assemble the drill bit.
Building The Frame
The frame is the backbone of your drilling machine. Start by gathering all necessary materials. You will need steel pipes, bolts, and welding tools. Cut the steel pipes to the desired length. Ensure the cuts are straight for a stable frame.
Next, weld the pipes together to form a rectangle. This structure will support the drill and other components. Make sure all joints are secure. Use bolts to strengthen the connections. The frame must be sturdy to handle the drilling pressure.
After welding, inspect the frame for any weak spots. Reinforce these areas with additional steel plates if needed. A solid frame ensures the longevity of your drilling machine.
Assembling The Drill Bit
The drill bit is the component that penetrates the ground. Choose a suitable drill bit for the soil type in your area. You can purchase pre-made bits or create your own.
If making your own, use high-quality steel. Shape the steel into a spiral or cone form. Sharpen the edges to enhance cutting efficiency. Attach the drill bit to the drill rod securely.
Ensure the connection is tight to prevent wobbling. Test the drill bit by rotating it manually. It should move smoothly without resistance. If there are any issues, adjust the alignment.
Finally, lubricate the drill bit to reduce friction. This step improves performance and extends the life of the bit.
Setting Up The Machine
Set up the machine by securing the frame on stable ground. Attach the drill bit and connect the power source. Ensure all parts are tightly fastened before starting.
Setting up your water well drilling machine is a crucial step. This process ensures your machine works efficiently and safely. Follow the steps below to get your machine ready for action.Installing The Motor
First, place the motor on the machine’s designated mount. Ensure it sits securely. Tighten the bolts to keep it in place. Check the alignment with the drill shaft. Misalignment can cause damage. Next, connect the drive belt. The belt links the motor to the drill. Make sure it is tight but not overly stretched. This maintains the right tension for smooth operation.Connecting Power Sources
Start by identifying the power source for your machine. Usually, this is a generator or a direct electrical supply. Ensure the power source is reliable and stable. Connect the power cables to the motor. Follow the manufacturer’s instructions for wiring. Double-check all connections to avoid any loose wires. Loose connections can lead to malfunctions. Turn on the power source. Test the motor briefly to ensure everything works. If the motor runs smoothly, your setup is complete. If not, recheck the connections and alignment. “`Drilling The Well
Drilling a well requires careful planning and execution. The process includes several steps. Each step is crucial to ensure a successful outcome. Let’s explore the key steps involved.
Starting The Drill
Begin by positioning the drill rig over the chosen spot. Ensure the area is clear of any obstructions. Secure the drill rig firmly to avoid any movement. Attach the drill bit to the drill string. This component breaks through the soil and rock layers. Start the drill slowly to create a pilot hole. Increase the speed gradually as the drill goes deeper.
Monitoring Progress
Keep a close watch on the drilling process. Check the drill bit regularly for signs of wear. Replace it if necessary to maintain efficiency. Monitor the depth of the well using a measuring tool. Note the soil and rock layers encountered. This information helps in understanding the underground structure. Ensure the drill rig remains stable throughout the process. If the drill encounters any resistance, stop and assess the situation.

Credit: www.youtube.com
Finishing The Well
Completing your water well drilling machine project is a rewarding experience. The final steps ensure your well is functional and safe. Follow these guidelines to finish the well properly.
Reaching The Water Table
First, you need to drill until you reach the water table. The water table is the level at which water saturates the ground. Use your drilling machine to penetrate this level. Monitor the depth carefully. The depth varies depending on the region.
Use a casing pipe to prevent collapse. Insert the pipe as you drill deeper. This pipe also helps to keep debris out. Continue drilling until water starts to flow into the casing.
Securing The Well
Once you reach the water table, secure the well. Place a well cap on top of the casing. This prevents contaminants from entering. Seal around the casing with grout. This ensures a tight seal and further prevents contamination.
Install a pump to draw water. Choose a pump that suits the depth and flow rate of your well. Test the water quality. Make sure it is safe for use. Regularly maintain your well to ensure it remains in good condition.
Maintenance Tips
Keeping your water well drilling machine in good condition is crucial. Regular maintenance ensures its efficiency and extends its lifespan. Here are some essential maintenance tips to help you keep your machine running smoothly.
Routine Checks
Perform routine checks on your drilling machine. Inspect the machine before and after each use. Look for any signs of wear or damage. Check the hydraulic system for leaks. Ensure that all bolts and nuts are tight. Clean the machine regularly to prevent dirt buildup. Lubricate moving parts to reduce friction. Replace worn-out parts promptly to avoid further damage.
Troubleshooting Common Issues
Even with regular maintenance, issues can arise. Here are some common problems and their solutions. If the machine does not start, check the power supply. Ensure that all connections are secure. If the machine overheats, check the cooling system. Clean or replace the air filters. If the machine vibrates excessively, inspect the drill bit. Replace it if necessary. Regularly check for unusual noises. They can indicate underlying problems. Address these issues quickly to prevent major breakdowns.

Credit: www.lonestardrills.com
Frequently Asked Questions
How Do You Start Drilling A Water Well?
Begin by selecting an appropriate location. Use a drill bit to penetrate the ground. Ensure all safety measures are in place.
What Materials Are Needed For A Drilling Machine?
You need a drill rig, drill bits, pipes, and a water pump. Additionally, you will require a power source.
How Deep Should A Water Well Be?
The depth depends on the water table level. Typically, residential wells range from 100 to 500 feet deep.
How To Maintain A Water Well Drilling Machine?
Regularly check and replace worn-out parts. Lubricate moving parts and ensure the machine is clean and rust-free.
Conclusion
Building a water well drilling machine is a rewarding project. It saves money and provides reliable water access. Start with basic tools and materials. Follow each step carefully. Safety is very important. Always wear protective gear. Test the machine before actual use.
Check for any issues. Make adjustments as needed. Enjoy the benefits of your hard work. Share your success with others. Happy drilling!
