
Yes, most air compressors can be repaired! Common issues like leaks, pressure problems, or motor troubles often have straightforward fixes. With a little know-how and the right approach, you can often get your air compressor back to working order, saving you money and hassle.
Is your trusty air compressor suddenly acting up? Maybe it’s not building pressure like it used to, or perhaps you’re hearing a strange noise. It’s a common frustration, especially when you’ve got a project waiting. Before you think about replacing it, let’s talk about repair. Many air compressor problems are surprisingly simple to fix, and with a little guidance, you can tackle them yourself. We’ll walk through the most frequent issues and how to get your compressor humming again.
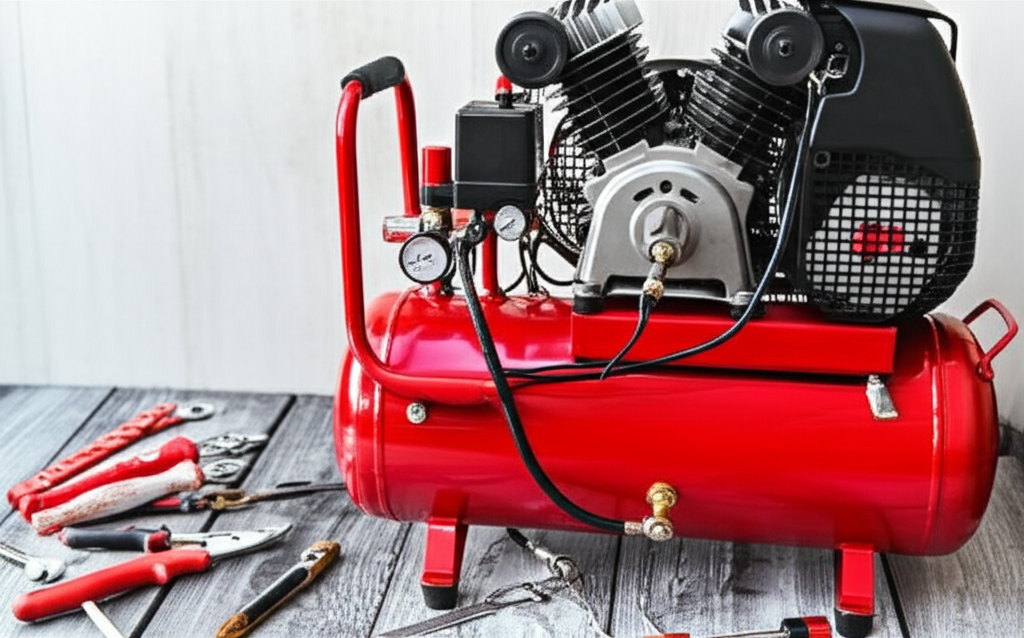
Understanding Common Air Compressor Problems
Air compressors are built to be robust, but like any mechanical tool, they can develop issues over time. Understanding what might be going wrong is the first step to fixing it. Here are some of the most common culprits:
- Not Building Pressure: This is a big one. It could be a simple leak, a faulty check valve, or even a problem with the unloader valve.
- Leaking Air: You might hear a hiss, or notice the compressor cycling on and off more than it should. Leaks can come from fittings, hoses, or even the tank itself.
- Motor Not Starting or Running Hot: This can point to electrical issues, a seized motor, or problems with the capacitor.
- Water in the Tank: Condensation is normal, but excessive water can cause rust and damage.
- Strange Noises: Grinding, knocking, or rattling can indicate worn-out bearings, loose parts, or internal damage.
Can Air Compressor Be Repaired? The Short Answer: Yes!
The good news is that can air compressor be repaired is almost always a resounding yes, at least for many common issues. Think of your air compressor like a car; it has various parts that can wear out or malfunction. The key is to identify the specific problem and then apply the correct solution. Many repairs are within the reach of a DIYer with basic tools and a willingness to learn. For more complex internal engine or motor issues, professional help might be needed, but don’t rule out DIY fixes first!
Essential Tools for Air Compressor Repair
Before you dive into any repairs, make sure you have the right tools on hand. Having these basics will make the process smoother and safer:
- Wrench Set (Metric and SAE): For tightening or loosening fittings and bolts.
- Screwdriver Set: Both Phillips and flathead are essential.
- Pliers: Standard, needle-nose, and possibly locking pliers.
- Adjustable Wrench: Handy for various bolt sizes.
- Teflon Tape (Pipe Thread Sealant): Crucial for sealing threaded connections to prevent leaks. You can find this at most hardware stores.
- Thread Sealant Compound: An alternative or supplement to Teflon tape for sealing threads.
- Safety Glasses: Always protect your eyes!
- Work Gloves: To protect your hands.
- Shop Towels or Rags: For cleaning up.
- Multimeter: If you suspect electrical issues.
- Air Pressure Gauge: To check pressure readings.
- Owner’s Manual: This is your best friend for specific model information.
Proven Fixes for Common Air Compressor Problems
Let’s get down to business. Here are some of the most frequent air compressor problems and how you can fix them:
1. The Compressor Isn’t Building Pressure
This is a frustrating issue, but often has a simple cause. First, check the basics:
- Ensure the Drain Valve is Closed: A simple oversight, but if the tank’s drain valve is open, air will escape.
- Check for Leaks: Listen for hissing sounds. You can also use soapy water on fittings and hoses; bubbles indicate a leak.
If the basics are fine, consider these components:
a) Faulty Check Valve
The check valve is a one-way valve that prevents air from flowing back from the tank into the pump when the compressor stops. If it fails, air will leak back out, and the compressor won’t build pressure.
How to Fix:
- Safety First: Disconnect power to the compressor.
- Locate the Check Valve: It’s usually screwed into the tank where the air line from the pump enters.
- Remove the Old Valve: Use a wrench to unscrew it. Be prepared for a small rush of residual air.
- Install the New Valve: Apply Teflon tape or sealant to the threads of the new check valve and screw it in securely. Ensure it’s the correct type for your compressor. You can often find replacement parts at specialized online stores or by contacting the manufacturer. For example, Grainger offers a wide variety of industrial fittings, including check valves.
b) Unloader Valve Issues
The unloader valve releases pressure from the pump head when the motor stops. If it’s stuck open or leaking, the compressor won’t build pressure.
How to Fix:
- Disconnect Power.
- Inspect the Unloader Valve: It’s often located near the pressure switch or on the pump itself. Look for any debris or signs of damage.
- Clean or Replace: Sometimes, debris can cause it to stick. Carefully clean the valve. If it appears damaged or corroded, replacement is necessary. Consult your owner’s manual for specific instructions on removing and replacing the unloader valve for your model.
2. Air Leaks
Air leaks are one of the most common problems and can significantly impact performance and efficiency. They can also cause your compressor to cycle more frequently.
a) Leaking Fittings and Hoses
This is often due to loose connections or worn-out seals.
How to Fix:
- Safety First: Ensure the compressor is off and the tank is depressurized.
- Use Soapy Water: Mix dish soap and water in a spray bottle. Spray it onto all connections, hoses, and fittings.
- Identify Leaks: Look for bubbles forming at any connection point.
- Tighten Connections: For minor leaks at threaded fittings, try tightening them slightly with a wrench.
- Apply Teflon Tape: If tightening doesn’t work, or if you’re re-sealing a fitting, turn off the compressor, release pressure, and unscrew the fitting. Clean the threads thoroughly. Apply new Teflon tape (wrap it clockwise around the threads) or pipe thread sealant. Re-tighten the fitting.
- Replace Hoses/Fittings: If a hose is cracked or a fitting is damaged, it needs to be replaced. Ensure you get the correct size and type of replacement part.
b) Leaking Tank Valve or Safety Relief Valve
These valves can also develop leaks over time.
How to Fix:
- Safety First: Power off and depressurize the tank.
- Check the Drain Valve: Ensure it’s fully closed. If it’s still leaking, you might need to replace the valve itself.
- Safety Relief Valve: If the safety relief valve is hissing, it might be faulty. Gently try to pull the ring on the valve to see if it reseats. If it continues to leak, it will need to be replaced. This is a critical safety component, so ensure it’s functioning correctly.
3. Motor Not Starting or Running Hot
These symptoms can be a bit more concerning, but often have manageable causes.
a) Overheating
Compressors can overheat due to poor ventilation, continuous running, or internal issues.
How to Fix:
- Check Ventilation: Ensure the compressor has plenty of space around it for air circulation. Don’t place it in a confined, hot space.
- Reduce Duty Cycle: Avoid running the compressor continuously for extended periods. Allow it to cool down between uses, especially for demanding tasks.
- Clean Air Intake/Filters: A clogged air intake can strain the motor. Refer to your manual for cleaning or replacing air filters.
- Check Oil Level (if applicable): For oil-lubricated compressors, an incorrect oil level can cause overheating.
b) Motor Not Starting
This could be an electrical issue.
How to Fix:
- Check Power Supply: Ensure the unit is properly plugged in and the circuit breaker hasn’t tripped.
- Inspect the Power Cord: Look for any damage to the cord or plug.
- Capacitor Issues: Many electric motors use a start capacitor to help them get going. If the capacitor is bad, the motor might hum but not start, or it might struggle. Replacing a capacitor is a relatively common DIY repair, but it involves working with electricity, so extreme caution is advised. If you’re not comfortable, call an electrician or repair technician. You can learn more about motor capacitors from resources like Energy.gov, which discusses electrical components in HVAC systems, giving context to motor function.
- Thermal Overload Protection: Some motors have a thermal overload switch that trips if the motor gets too hot. Let it cool down completely, and it might reset automatically.
4. Water in the Tank
Condensation is a natural byproduct of compressing air. As air cools, moisture turns into liquid water. If not drained, it can lead to rust.
How to Fix:
- Regular Draining: The most important step is to drain the tank regularly. Do this after every use, or at least daily. Most compressors have a manual drain valve at the bottom of the tank.
- Automatic Drain Valves: Consider installing an automatic drain valve. These can be set to release water at timed intervals or when pressure drops below a certain point, ensuring you don’t forget.
- Tank Flushing: Periodically, you may need to flush the tank more thoroughly. With the tank empty and power off, you can use a hose to rinse out sediment and rust particles.
5. Strange Noises
Unusual noises can be a sign of wear and tear.
a) Grinding or Knocking
This often indicates worn bearings in the motor or pump, or loose internal components.
How to Fix:
- Safety First: Disconnect power.
- Check for Loose Parts: Inspect the motor mounts, pump housing, and any external components for looseness. Tighten as needed.
- Bearing Replacement: If the noise persists and seems to come from the motor or pump shaft, the bearings may be worn. This is a more advanced repair that often requires specialized tools and knowledge of motor or pump disassembly. Consulting your manual or a professional is recommended here.
b) Hissing from the Pump Head
This can indicate worn piston rings or valves within the pump itself.
How to Fix:
- Consult Manual: For internal pump issues, your owner’s manual is crucial. It will detail if the pump is designed for service or if it’s a sealed unit.
- Pump Rebuild Kits: Some pumps can be rebuilt using kits that include new valves, seals, and sometimes piston rings. These kits are available from manufacturers or specialized parts suppliers.
- Professional Repair or Replacement: If the pump is severely damaged or not designed for repair, you might need to replace the entire pump assembly or the compressor unit.
When to Call a Professional
While many repairs are DIY-friendly, there are times when it’s best to seek professional help:
- Complex Electrical Issues: If you suspect problems with the motor windings, internal wiring, or the pressure switch itself, and you’re not comfortable with electrical work, call a qualified technician.
- Internal Pump Damage: If you hear severe grinding or knocking sounds that suggest major internal wear or damage to the pump assembly, it might be beyond a simple fix.
- Safety Concerns: If you’re unsure about any step, especially those involving pressurized tanks or electrical components, it’s always safer to get expert advice.
- Lack of Tools or Confidence: If you don’t have the necessary tools or feel uncomfortable performing the repair, a professional can save you time and potential further damage.
Air Compressor Maintenance for Longevity
The best way to avoid repairs is through regular maintenance. Here’s a simple checklist:
| Maintenance Task | Frequency | Notes |
|---|---|---|
| Drain Tank | After each use / Daily | Removes moisture and prevents rust. |
| Check Oil Level (Oil-Lubricated) | Weekly / As per manual | Ensures proper lubrication and cooling. Use recommended oil. |
| Clean Air Filter | Monthly / As needed | Improves efficiency and reduces strain on the motor. |
| Inspect Hoses and Fittings | Monthly | Check for cracks, wear, and leaks. |
| Clean Exterior | Monthly | Keeps vents clear and prevents dust buildup. |
| Check Safety Relief Valve | Annually | Ensure it’s not stuck or corroded. |
Proper maintenance, like keeping your air filters clean, can significantly improve your compressor’s efficiency. For instance, a dirty air filter can reduce airflow by up to 50% according to some industry sources, making your compressor work harder.
Frequently Asked Questions (FAQ)
Q1: My air compressor won’t turn on. What should I check first?
First, ensure it’s properly plugged into a working outlet. Check your circuit breaker or fuse box to see if the breaker has tripped or a fuse has blown. Also, inspect the power cord for any visible damage.
Q2: How often should I drain the air compressor tank?
It’s best practice to drain the tank after every use or at least once a day. This removes condensation, preventing rust and potential damage to the tank and internal components.
Q3: My compressor runs constantly and never shuts off. What’s wrong?
This usually indicates a problem with the pressure switch or a significant air leak. The pressure switch tells the motor when to turn off. If it’s faulty, it won’t signal the motor. Alternatively, a large leak in the system will prevent the pressure from reaching the cut-off point. Check for leaks first, then inspect the pressure switch.
Q4: Can I use any type of oil in my air compressor?
No, you should always use the specific type of oil recommended in your owner’s manual. Using the wrong oil can lead to overheating, poor lubrication, and premature wear. There are specific compressor oils designed for different operating conditions.
Q5: My compressor is making a loud, unusual noise. What could it be?
Loud noises like grinding or knocking often point to worn bearings in the motor or pump, or loose internal parts. It’s important to investigate this promptly, as it can indicate more serious damage.
Q6: Is it safe to repair a leak on the air tank itself?
Repairs to the air tank itself are generally not recommended for DIYers due to safety concerns. Tanks are pressurized vessels, and improper repairs can lead to catastrophic failure. If your tank is leaking, it’s usually best to replace the entire tank or the compressor unit.
Conclusion
So, can air compressor be