
Quick Summary:
Filling drill holes in walls, wood, or fiberglass is surprisingly simple! With the right filler and a few easy steps, you can achieve smooth, invisible repairs. This guide provides proven, effortless methods for DIYers of all levels to make those holes disappear like magic.
Ever look at a wall and see a constellation of old drill holes? Maybe you’re redecorating, moving furniture, or just tidying up after a project. Those little holes can make a space feel unfinished, but fixing them is easier than you think! You don’t need to be a master craftsman to get a smooth, seamless finish. We’ll walk through the best ways to fill drill holes, whether they’re in drywall, wood, or even the fiberglass on your boat. Get ready to make those imperfections vanish!
Why Fill Drill Holes? The Little Things That Make a Big Difference
Drill holes, while often small, can detract from the overall look and feel of a room or a project. In homes, they’re a common sign of past decorations, shelves, or hanging fixtures. For boat owners, unneeded holes in fiberglass can be more than just an eyesore; they can be entry points for moisture, potentially leading to bigger problems down the line. Properly filling these holes not only improves the aesthetics but also preserves the integrity of the material you’re working with. It’s a small step that shows attention to detail and can make a significant impact on the finished appearance of your project.
Choosing Your Filler: The Right Stuff for the Job
The best filler depends on what you’re filling and where. Here’s a quick rundown of common options:
1. Lightweight Spackling/Spackle Paste
- Best For: Small to medium-sized holes in drywall.
- Pros: Easy to apply, dries quickly, sands smooth with minimal effort, often paintable immediately.
- Cons: Not very durable for larger holes or high-traffic areas. Can shrink slightly as it dries.
2. Joint Compound (All-Purpose or Lightweight)
- Best For: Larger holes in drywall, repairing cracks, or when you need a bit more durability than spackle.
- Pros: Stronger than spackle, good for larger repairs, available in different types (lightweight dries faster).
- Cons: Takes longer to dry than spackle, may require multiple coats for larger holes, can shrink.
3. Wood Filler
- Best For: Holes and gouges in wood.
- Pros: Designed to bond with wood, often stains or paints well to match surrounding wood, available in various colors and types (e.g., stainable, exterior).
- Cons: Can be harder to sand than spackle, some types shrink significantly.
4. Epoxy Putty
- Best For: Larger holes, structural repairs, and materials like fiberglass, metal, and even concrete.
- Pros: Extremely durable and strong, waterproof once cured, doesn’t shrink, can be drilled and sanded.
- Cons: Requires mixing two parts, has a limited working time, can be harder to sand than other fillers.
5. Bondo (or similar automotive body filler)
- Best For: Significant damage on fiberglass, metal, or even some plastics.
- Pros: Very strong, durable, and waterproof. Excellent for marine applications.
- Cons: Requires careful mixing, has a short working time, can be messy, requires specific sanding techniques.
Essential Tools You’ll Need
Before you start, gather these basic tools. Having the right equipment makes the job much smoother:
- Your chosen filler
- Putty knife or spackling knife (flexible blade is best for drywall)
- Fine-grit sandpaper (120-220 grit is usually sufficient)
- A clean cloth or tack cloth
- Optional: Small brush or applicator for epoxy putty
- Optional: Drop cloth or newspaper to protect your work surface
- Optional: Primer and paint to match your wall/surface
How to Fill Drill Holes in Drywall: A Step-by-Step Guide
This is the most common scenario for many homeowners. Let’s tackle those wall imperfections!
Step 1: Clean the Area
Start by wiping around the drill hole with a damp cloth. This removes any dust or debris that might prevent the filler from adhering properly. For slightly larger holes, you might need to gently scrape away any loose paper or drywall material around the edges with your putty knife. You want a clean, stable surface.
Step 2: Apply the Filler
For small holes (like from a nail or small screw), use your putty knife to scoop a small amount of spackle or joint compound. Press the filler firmly into the hole, slightly overfilling it to account for shrinkage. Use the putty knife to smooth the surface, feathering the edges out onto the wall. The goal is to make it as flush as possible with the surrounding wall. For larger holes, you might need to apply the filler in thin layers, allowing each layer to dry slightly before applying the next. This helps prevent excessive shrinkage and cracking.
Tip: For holes larger than a quarter inch, you might consider using a drywall patch or mesh tape behind the filler for added strength, especially if the wall material around the hole is compromised. For very deep holes, a second application after the first has dried might be necessary.
Step 3: Let it Dry
Drying times vary depending on the filler and humidity. Lightweight spackle can dry in as little as 30 minutes to a few hours, while all-purpose joint compound might take several hours or even overnight. Check the product packaging for specific drying times. You’ll know it’s dry when it’s no longer cool to the touch and has changed to a uniform color (usually white or off-white).
Step 4: Sanding for Smoothness
Once completely dry, use your fine-grit sandpaper to gently sand the filled area. The aim is to make it perfectly smooth and flush with the surrounding wall. Don’t over-sand, as you don’t want to create a dip. Sand in a circular motion, applying light pressure. After sanding, wipe away the dust with a clean, dry cloth or a tack cloth to remove all sanding residue. This is crucial for a clean paint finish.
Step 5: Prime and Paint
If you’re painting, apply a coat of primer to the repaired area. Primer helps the paint adhere better and prevents the filler from showing through as a different sheen. Once the primer is dry, paint the area to match the rest of your wall. You might need two coats of paint for a perfect match. For tips on matching paint colors, you can check out resources like Sherwin-Williams’ color selection guide, which offers helpful advice on achieving a seamless look.
How to Fill Drill Holes in Wood: A Step-by-Step Guide
Whether it’s furniture, trim, or a wooden deck, filling holes in wood requires a slightly different approach.
Step 1: Prepare the Hole
Clean out any loose wood or debris from the drill hole using a small brush or compressed air. If the edges are splintered, you can gently sand them smooth with fine-grit sandpaper. For larger holes or gouges, you might want to slightly widen the opening with a utility knife to create a better surface for the wood filler to adhere to.
Step 2: Apply Wood Filler
Choose a wood filler that matches your wood or is designed to be stained or painted. For most small holes, a paste-style wood filler is ideal. Use a putty knife to press the filler firmly into the hole, ensuring it’s packed in completely. Slightly overfill the hole, as wood filler often shrinks a bit as it dries. For larger holes, you might need to apply it in layers, allowing each layer to become firm before adding the next.
Tip: If you plan to stain the wood after filling, use a stainable wood filler and test the stain on a scrap piece of wood with the filler first to ensure a good color match. Some fillers accept stain better than others.
Step 3: Allow to Cure
Wood filler drying times can vary significantly based on the product and the depth of the hole. Refer to the manufacturer’s instructions. Generally, it’s best to let it dry thoroughly, which can range from 30 minutes to several hours. It should be hard to the touch and not feel cool or damp.
Step 4: Sanding and Shaping
Once cured, use sandpaper to sand the filled area smooth and flush with the surrounding wood. Start with a medium grit (around 100-120) if needed to shape the filler, then move to a finer grit (180-220) for a smooth finish. Sand with the grain of the wood. After sanding, wipe away all dust with a clean cloth or tack cloth.
Step 5: Finishing (Stain or Paint)
Now you can stain or paint the repaired area to match the surrounding wood. If staining, apply your chosen stain and wipe off any excess. You may need multiple coats to achieve the desired color. If painting, apply primer first, then your matching paint color. For an excellent guide on wood finishing techniques, the Wood Magazine website offers a wealth of helpful articles.
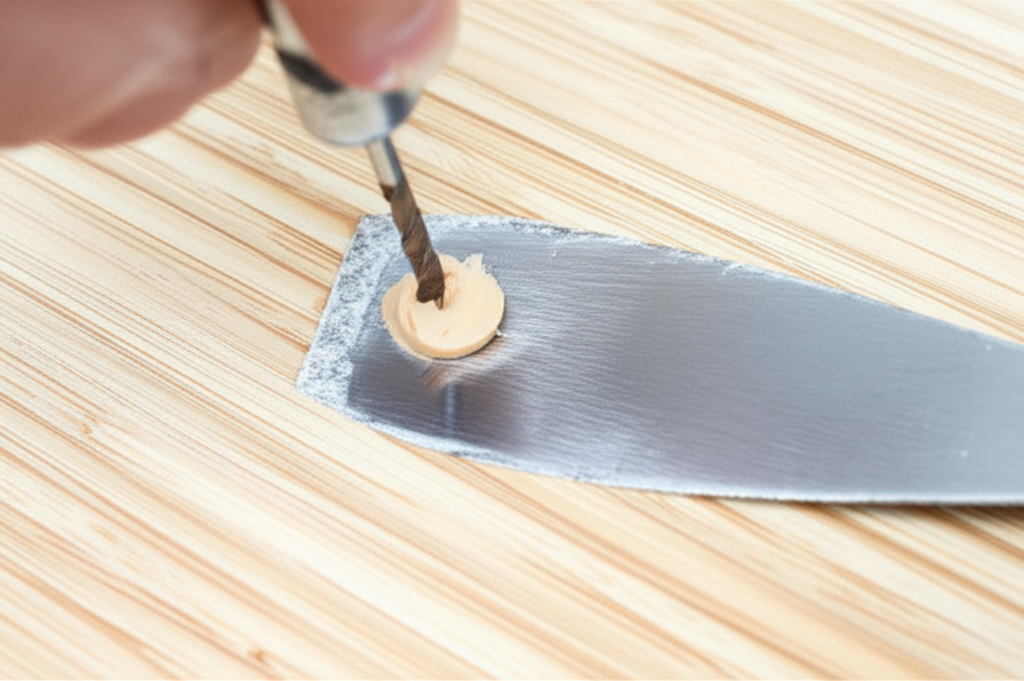
How to Fill Drill Holes in Fiberglass (Boats & More): A Step-by-Step Guide
Repairing holes in fiberglass, especially on boats, requires a durable and waterproof solution. Epoxy is often the go-to, but for smaller holes, a two-part epoxy putty can be very effective and easier for beginners.
Step 1: Prepare the Fiberglass Surface
Clean the area around the hole thoroughly with a degreaser or acetone to remove any wax, grease, or contaminants. For structural integrity, especially on a boat hull, you’ll want to create a slight bevel or countersink around the hole using sandpaper or a rotary tool. This gives the filler more surface area to grip. Remove any loose or damaged fiberglass. For larger holes, you might need to back the hole with a temporary patch (like tape or cardboard) on the backside to prevent the filler from oozing through.
Step 2: Mix and Apply Epoxy Putty or Resin
For Epoxy Putty: Cut off the required amount of putty. Knead the two parts together until you achieve a uniform color. This activates the curing process. Quickly but carefully press the putty into the hole, ensuring it’s packed tightly and slightly overfilled. Use a plastic spreader or gloved finger to smooth it as much as possible.
For Two-Part Epoxy Resin: Follow the manufacturer’s instructions precisely for mixing the resin and hardener. This is critical for proper curing. You can apply the mixed epoxy using a small brush or spatula. For larger holes, you might need to apply it in layers, or use fiberglass cloth or matting saturated with epoxy for added strength. Ensure the epoxy fills the hole completely and is smoothed flush with the surface.
Important Note: Always work in a well-ventilated area when using epoxy products and wear appropriate personal protective equipment (PPE), including gloves and eye protection. Refer to the OSHA guidelines on hazardous chemicals for safety information.
Step 3: Allow to Cure
Epoxy curing times are critical. They depend heavily on the product and ambient temperature. Epoxy putty typically cures within a few hours, while two-part epoxy resin can take 24 hours or more to fully harden. Do not disturb the repair until it is completely cured. Check the product packaging for specific curing times.
Step 4: Sanding and Finishing
Once fully cured, sand the repaired area smooth. Start with a coarser grit sandpaper (e.g., 80-100 grit) if there’s a significant bulge, then progress to finer grits (180-220 grit) for a smooth finish. Feather the edges of the repair into the surrounding fiberglass. Wipe away all dust. You can then prime and paint the area to match the surrounding surface. For marine applications, ensure you use marine-grade primers and paints for durability and UV resistance.
Troubleshooting Common Issues
Even with the best intentions, you might run into a snag. Here’s how to handle them:
- Shrinkage: If the filler shrinks significantly after drying, leaving a noticeable indentation, simply apply another thin coat of filler, let it dry, and sand again.
- Cracking: Cracks usually happen when filler is applied too thickly in one go or when the underlying surface isn’t stable. For drywall, use mesh tape or a patch for larger holes. For wood, ensure the wood is dry and stable before filling.
- Sanding Difficulty: If the filler is too hard to sand, you might have used a product not meant for your material, or it may not be fully cured. Ensure you’re using the correct grit sandpaper and don’t force it.
- Poor Adhesion: If the filler is peeling or not sticking, the surface was likely not clean or dry before application. You’ll need to remove the old filler, clean the area thoroughly, and reapply.
Frequently Asked Questions (FAQ)
What’s the easiest way to fill a small drill hole in a painted wall?
For small holes in painted walls (drywall), lightweight spackle is your best bet. Apply it with a putty knife, smooth it flush, let it dry, sand lightly, and then prime and paint to match.
Can I use wood filler on drywall?
While you can, it’s generally not recommended. Wood filler can be harder to sand than drywall compounds and may not adhere or finish as smoothly. Stick to spackle or joint compound for drywall.
How do I fill a hole that’s larger than an inch in drywall?
For larger holes, you’ll need more than just filler. Consider using a self-adhesive drywall patch or a piece of drywall mesh tape to bridge the hole before applying joint compound. You’ll likely need multiple coats of joint compound, allowing each to dry and sanding between coats.
What if I want to fill a hole in a metal surface?
For metal, a two-part epoxy putty or a metal-specific filler is usually best. Ensure the metal surface is clean and free of rust before applying the filler. After curing, you can sand and paint it to match.
Do I really need to prime before painting a filled hole?
Yes, it’s highly recommended. Primer seals the filler and ensures that the paint has a uniform surface to adhere to, preventing the filled spot from looking different in sheen or texture compared to the surrounding area.
How long does it take for fillers to dry?
Drying times vary greatly by product. Lightweight spackle can be ready to sand in 30-60 minutes, while joint compounds and wood fillers can take several hours. Epoxies can take 24 hours or more to fully cure. Always check the product label for specific drying times.
Conclusion: Your Walls (and Projects) Will Thank You!
See? Filling drill holes isn’t a daunting task at all. With the right filler and a little patience, you can easily restore the smooth, flawless finish to your walls, wood projects, or even your boat’s fiberglass. Whether you’re tackling a few nail holes or a more significant repair, these methods will help you achieve professional-looking results. So grab your tools, choose your filler, and get ready to enjoy a beautifully finished space. Happy DIYing!