
Does the drill bit need to be bigger than the anchor? No, typically the drill bit should be the SAME size as the anchor’s diameter, not bigger. Using a bit that’s too large will create a hole too big for the anchor to grip, compromising its holding power.
Ever stared at a wall anchor and a drill bit, wondering if you’re about to make a costly mistake? You’re not alone! Getting the right drill bit size for your wall anchors is super important for making sure whatever you hang stays put. Using the wrong size can lead to wobbly shelves or even damage to your walls. But don’t worry, it’s actually pretty simple once you know the secret. We’re going to break down exactly which drill bit to use for your anchors, step-by-step. You’ll be hanging with confidence in no time!
Why Anchor Size Matters for Drill Bits
Choosing the right drill bit for your wall anchors is like picking the perfect key for a lock. Too small, and it won’t fit. Too big, and it won’t turn or hold anything. Wall anchors are designed to expand or grip the inside of a pre-drilled hole. This expansion or grip is what gives them their strength.
If you use a drill bit that’s too large, the hole will be too wide. The anchor won’t be able to expand properly or wedge itself securely into the material. This means it won’t be able to support the weight it’s rated for, and your project could fail. On the flip side, a bit that’s too small will make the hole too tight. You might struggle to get the anchor in, and forcing it could damage the anchor or the wall.
Understanding Wall Anchors: The Basics
Wall anchors are unsung heroes in the DIY world. They’re little helpers that let you attach things to walls made of materials like drywall, plaster, or masonry. Without them, you’d be limited to drilling directly into studs, which aren’t always where you need them.
There are many types of anchors, and each has its own way of working. Knowing your anchor type is the first step to picking the right drill bit.
Common Anchor Types and How They Work
Let’s look at a few popular types:
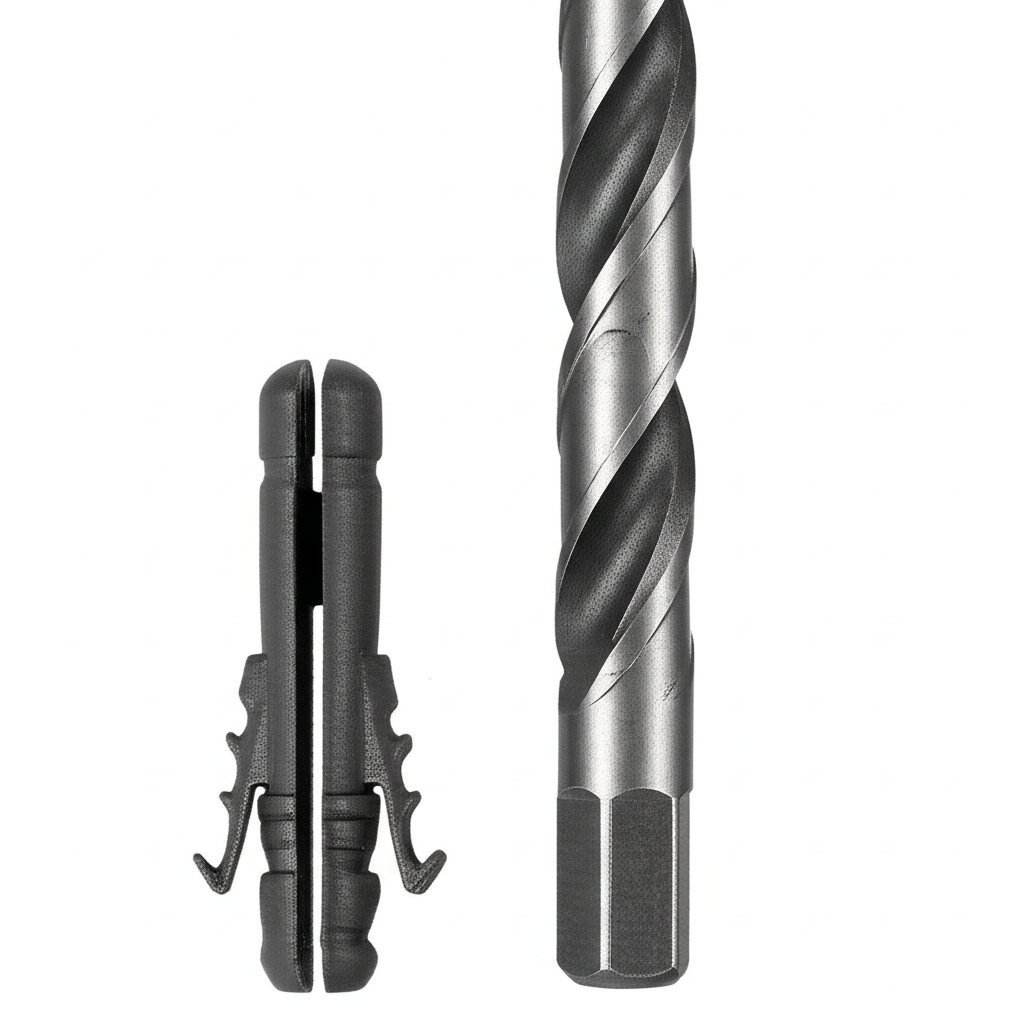
Plastic Expansion Anchors (or “Screws”): These are usually tapered plastic sleeves. When you screw a screw into them, the anchor expands outwards, gripping the drywall. They are often color-coded, and the packaging usually tells you the recommended drill bit size.
Self-Drilling Anchors (or “E-Z Ancor”): These anchors have a sharp point and screw-like threads. You screw them directly into the drywall without pre-drilling a pilot hole. Some might require a small starter hole, but they are designed to cut their own path.
Toggle Bolts: These have a spring-loaded wing that folds to go through a hole and then springs open behind the wall. They provide very strong holding power but require a larger hole.
Molly Bolts: Similar to toggle bolts, molly bolts have a metal sleeve that expands and grips the back of the wall as you tighten the screw. They also require a specific hole size.
Understanding how these anchors work helps us understand why the drill bit size is so critical. The anchor needs a specific-sized cavity to do its job effectively.
The Golden Rule: Match the Drill Bit to the Anchor
So, to answer the big question directly: Does the drill bit need to be bigger than the anchor? No. In almost all common DIY scenarios, the drill bit should be the same diameter as the anchor itself, or more precisely, the diameter specified by the anchor manufacturer.
Think of it this way: the anchor is designed to fit snugly into a hole of a specific size. If the hole is too big (because you used a larger drill bit), the anchor won’t have enough material to grip against.
Where to Find the Correct Drill Bit Size
The absolute best place to find the correct drill bit size is on the packaging of your wall anchors. Manufacturers print this information clearly because they want their anchors to work correctly and safely.
Look for instructions that might say:
“Drill a 1/4-inch hole.”
“Use a 6mm drill bit.”
“Recommended drill bit: 5/16 inch.”
This information is usually found on the back of the blister pack or the small bag the anchors come in. If you’ve lost the packaging, a quick online search for the brand and type of anchor will usually bring up the specifications.
Why Manufacturers Specify Drill Bit Sizes
Manufacturers test their anchors thoroughly to determine the optimal hole size for maximum holding power and ease of installation. Using their recommended drill bit ensures you get the performance they designed the anchor for. Deviating from this can significantly weaken the anchor’s grip.
For example, a common plastic expansion anchor might be designed to fit into a 1/4-inch hole. If you use a 5/16-inch drill bit, the hole will be too large, and the anchor won’t expand effectively.
Step-by-Step: How to Drill the Right Hole for Your Anchor
Ready to get drilling? Here’s how to do it right.
Step 1: Identify Your Anchor Type and Size
First, look at your anchor. Is it a plastic expansion anchor, a self-drilling anchor, a toggle bolt, or a molly bolt? Then, find the packaging and locate the recommended drill bit size.
Example: You have plastic expansion anchors that say “Drill 1/4 inch hole.”
Step 2: Gather Your Tools
You’ll need:
Your Wall Anchor: The one you plan to use.
The Correct Drill Bit: Make sure it’s the size specified on the anchor packaging. For our example, a 1/4-inch drill bit.
A Drill: Corded or cordless.
A Measuring Tape: To mark where you’ll drill.
A Pencil: To mark your spot.
Safety Glasses: Always protect your eyes!
A Stud Finder (Optional but Recommended): To check for studs.
A Level (Optional but Recommended): To ensure your item is hung straight.
Step 3: Mark Your Drilling Spot
Decide exactly where you want to hang your item. Use your level to make sure it’s straight. Then, use your pencil to make a clear mark on the wall.
Step 4: Select the Correct Drill Bit
Ensure you have the correct size drill bit. For most common plastic anchors, you’ll need a bit that matches the diameter of the anchor’s body. For toggle bolts or molly bolts, the required hole size is often larger and is clearly stated.
Table: Common Anchor Types and Corresponding Drill Bit Sizes (General Guidance)
| Anchor Type | Typical Anchor Diameter | Recommended Drill Bit Size (Approximate) | Notes |
| :————————– | :———————- | :————————————— | :—————————————————————– |
| Plastic Expansion Anchor | 1/4″ – 3/8″ | 1/4″ – 3/8″ | Match the bit size to the anchor’s diameter. |
| Self-Drilling Anchor | N/A (Self-tapping) | No pre-drilled hole needed | Some may recommend a small pilot hole for ease. |
| Toggle Bolt | Varies widely | 1/2″ – 1″ | Hole size depends on the toggle bolt’s size and wing mechanism. |
| Molly Bolt (Sleeve Type) | 1/4″ – 1/2″ | 1/4″ – 1/2″ | Match the bit size to the sleeve diameter. |
| Screw-In / Grip-Toggles | Varies | 1/4″ – 3/8″ | Often self-drilling or require a specific pilot hole size. |
Note: Always refer to the anchor manufacturer’s specific instructions for the most accurate drill bit size.
Step 5: Set Up Your Drill
For most anchors: You’ll be drilling a straight hole. Ensure your drill bit is securely tightened in the chuck.
For drywall: You typically don’t need to set your drill to a hammer drill setting. A standard drilling mode is sufficient. Hammer drills are for harder materials like concrete or brick.
Step 6: Drill the Hole
1. Position the drill: Place the tip of the drill bit directly on your pencil mark.
2. Start slowly: Begin drilling at a slow speed to create a small indent. This helps keep the bit from wandering.
3. Drill straight: Keep the drill perpendicular to the wall. Try to maintain a consistent angle.
4. Apply steady pressure: Don’t force the drill. Let the bit do the work.
5. Drill to the correct depth: Most anchors will specify how deep the hole needs to be. You can often gauge this by the length of the anchor itself, or by marking your drill bit with a piece of tape.
6. Clear the dust: Periodically pull the drill bit out of the hole while it’s still spinning slowly. This helps clear out the drywall dust and makes drilling easier.
Step 7: Insert the Anchor
Once the hole is drilled to the correct size and depth, gently insert the anchor.
Plastic Anchors: They should fit snugly. You might need to tap them lightly with a hammer to get them flush with the wall surface.
Toggle Bolts/Molly Bolts: Follow the specific instructions for inserting these, as they often involve a unique mechanism.
If the anchor doesn’t go in easily, stop. Check if you used the correct drill bit size. If the hole is too small, you might need to re-drill with a slightly larger bit (again, check the anchor packaging). If the hole is already too big, the anchor won’t hold well.
Common Mistakes to Avoid
Even with the best intentions, DIYers can sometimes make a few common slip-ups. Knowing these can save you a lot of frustration.
Using a Bit That’s Too Big: We’ve covered this extensively, but it’s worth repeating. This is the most common mistake and leads to weak anchor points.
Using a Bit That’s Too Small: This makes it hard to insert the anchor, potentially damaging it or the wall. If you have to force it, it’s probably too small.
Not Checking the Anchor Packaging: Always defer to the manufacturer’s recommendations. Their testing is your best guide.
Drilling at an Angle: This can create an oval-shaped hole that the anchor won’t fit into properly, or it can make it difficult to insert the screw straight.
Not Drilling Deep Enough: The anchor needs enough space to expand or grip behind the wall.
Using the Wrong Drill Setting: For drywall, avoid the hammer drill function unless you’re drilling into a very thick, dense plaster or a wall with a hidden hard layer.
When to Use a Different Drill Bit Size (and Why)
While the general rule is to match the drill bit to the anchor’s diameter, there are a couple of nuanced situations:
1. Self-Drilling Anchors
Some anchors, like certain types of self-drilling anchors (often called “E-Z Ancor” or similar), are designed to screw directly into drywall without a pilot hole. They have sharp points and cutting threads.
Do they need a bigger bit? No, they typically don’t need a pre-drilled hole at all. You just drive them in with a drill set to a low speed and high torque.
When might you use a bit? Some people find it easier to drill a very small starter hole (much smaller than the anchor itself) to help guide the self-drilling anchor and prevent the drywall from cracking, especially if the drywall is old or brittle. However, this is usually not required by the manufacturer.
2. Toggle Bolts and Heavy-Duty Anchors
Toggle bolts and some heavy-duty molly bolts require larger holes. For example, a large toggle bolt might need a 1-inch hole. In this case, the anchor’s packaging will clearly state the required hole size, and you’ll use a drill bit of that specific size.
Do they need a bigger bit? Yes, but only because the anchor itself is designed to pass through a larger hole. The drill bit size still matches the required hole size, not a size bigger than the anchor’s main body.
3. Drilling into Different Wall Materials
Drywall: Standard drill bits are fine.
Plaster: Plaster can be harder and more brittle than drywall. You might need to drill slowly and steadily. Some plaster walls have a lathe backing (wood strips) or even a metal mesh, which can be tough.
Concrete/Brick/Masonry: For these materials, you must use a masonry drill bit and your drill’s hammer drill setting. The anchor packaging will specify the correct masonry bit size. The principle of matching the bit to the anchor’s required hole size still applies.
For a deeper dive into drill bits for various materials, you can check out resources like This Old House.
Tips for a Professional Finish
Want your work to look as good as it holds? Here are a few extra tips:
Use a Level: Always use a level to ensure shelves or fixtures are hung straight. This makes a huge difference in the final appearance.
Clean Up Dust: Drywall dust gets everywhere! Have a vacuum handy to clean up as you go, or use a dust collection attachment for your drill.
Test the Anchor: Before loading a shelf with heavy items, give it a gentle tug to ensure the anchor is holding firm.
Consider Studs: If possible, always try to anchor into a wall stud. This provides the strongest possible support. A stud finder can help you locate these.
Practice: If you’re new to drilling, try practicing on a scrap piece of drywall or a spare piece of wood to get a feel for the drill and the bit.
Frequently Asked Questions (FAQ)
Q1: What happens if I use a drill bit that is too big for the anchor?
If you use a drill bit that is too big, the hole will be too wide. The anchor won’t be able to expand or grip the wall material properly, significantly reducing its holding strength. Your item could fall, or the anchor could spin freely in the hole.
Q2: What happens if I use a drill bit that is too small for the anchor?
If the drill bit is too small, the hole will be too tight. You’ll have difficulty inserting the anchor, and you might damage the anchor or the wall trying to force it in. It can also prevent the anchor from expanding correctly.
Q3: Do I need a special drill bit for drywall anchors?
For most standard plastic drywall anchors, a regular twist drill bit is perfectly fine. If you are drilling into masonry (brick or concrete), you will need a masonry drill bit and your drill should be set to the hammer drill function.
Q4: My anchor packaging doesn’t say what size drill bit to use. What should I do?
This is rare, but if it happens, try to visually match the drill bit to the diameter of the anchor’s body. You can also search online for the brand and type of anchor you have; the manufacturer’s website or product listings should provide the correct drill bit size. When in doubt, start with a slightly smaller bit and test the fit.
Q5: Can I use a drill bit that is the same size as the screw I’m using?
No, not usually. The drill bit size needs to match the anchor, not the screw. The screw needs to be able to thread into the anchor. If you drill a hole the size of the screw, the anchor won’t fit.
Q6: How do I know if I’ve drilled the hole deep enough for the anchor?
Most anchor packaging will specify the required hole depth. You can also measure the length of the anchor itself and use that as a guide. Some people mark their drill bit with a piece of tape at the desired depth.
Q7: What is a “stud finder” and why is it recommended?
A stud finder is a tool that helps you locate the wooden or metal studs behind your drywall. Anchoring into a stud provides much greater support than anchoring into drywall alone. It’s recommended to check for studs first, as they are the strongest mounting points.
Conclusion
So, there you have it! The answer to whether your drill bit needs to be bigger than the anchor is a clear “no” for most common DIY anchors. The key is to match the drill bit size to the anchor’s specified diameter. Always check the packaging for the exact recommendation. By following these simple steps and avoiding common pitfalls, you can ensure your anchors hold securely, your projects look great, and you build confidence with every nail and screw you drive. Happy hanging!