
A hacksaw blade should be tensioned until it’s tight enough to make a sharp “ping” sound when plucked, but not so tight that it risks breaking. Proper tension is crucial for clean cuts and blade longevity. This guide will show you exactly how to achieve it.
Ever grabbed a hacksaw for a quick cut and ended up with a wobbly blade, a jagged mess, or worse, a snapped blade? You’re not alone! Many DIYers wonder about the “right” way to tension a hacksaw. It’s a common question because it’s not always obvious. Get it wrong, and your cuts suffer. Get it right, and you’ll be cutting through metal, plastic, or even wood like a pro. Don’t worry, it’s simpler than you think. We’ll break down exactly how much tension your hacksaw needs, step-by-step, so you can get those clean, efficient cuts you’re looking for.
Understanding Hacksaw Tension: Why It Matters
Think of a hacksaw blade like a guitar string. If it’s too loose, it won’t cut well, and the sound will be dull. If it’s too tight, it might snap. The sweet spot for hacksaw tension is all about finding that perfect balance. When a hacksaw blade is properly tensioned, it stays straight and rigid during the cutting stroke. This means the teeth engage the material consistently, leading to smoother, cleaner cuts. It also prevents the blade from bending or “walking” off course, which is a common frustration for beginners.
Proper tension is also key to blade life. A blade that’s too loose will chatter and vibrate, dulling the teeth much faster. On the other hand, over-tensioning can stress the blade, making it prone to snapping, especially when you apply pressure or twist the saw. So, understanding and achieving the correct tension is a fundamental skill for anyone using a hacksaw.
How to Tension a Hacksaw: A Step-by-Step Guide
Tensioning a hacksaw is a straightforward process. Most hacksaws have an adjustable mechanism, usually a screw or lever, at the end of the handle. Here’s how to use it:
Step 1: Select the Right Blade
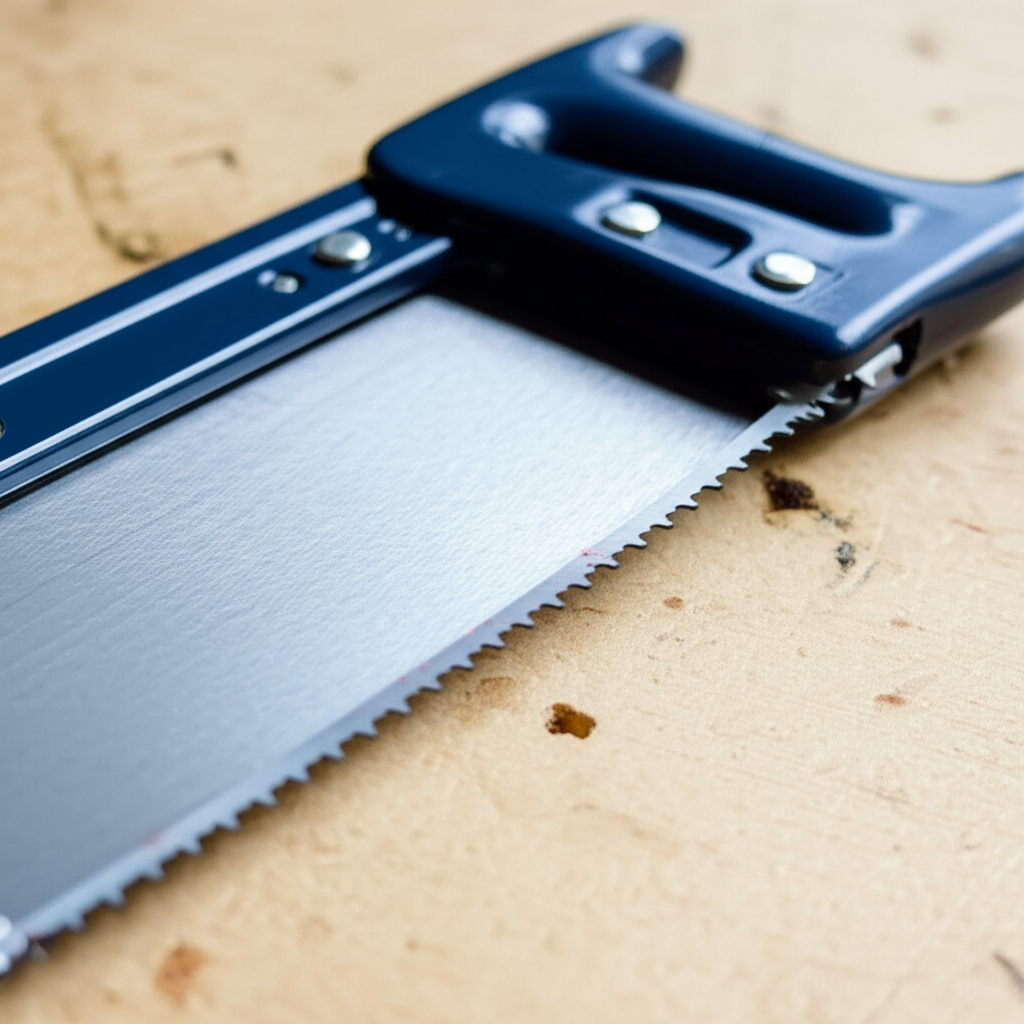
Before you even think about tension, make sure you have the right blade for the job. Hacksaw blades come in different lengths, tooth counts (TPI – Teeth Per Inch), and materials. For general-purpose cutting of metal and plastic, a blade with 18-24 TPI is a good starting point. For harder metals, you’ll want more TPI, and for softer materials like plastic or conduit, fewer TPI might be better. Ensure the blade you choose is compatible with your hacksaw frame’s length.
You can find a great overview of blade selection from resources like Popular Mechanics, which covers blade types and their uses.
Step 2: Install the Blade Correctly
Hacksaw blades have teeth that should always face away from the handle, towards the front of the saw. This is because hacksaws cut on the push stroke. Place the blade into the frame, ensuring the holes at each end of the blade fit securely onto the pins or hooks on the hacksaw frame.
Step 3: Begin Applying Tension
Once the blade is in place, it’s time to tension it. Most hacksaws have a wingnut or a screw mechanism at the end of the handle. Turn this screw clockwise. You’ll feel resistance as the frame starts to stretch and pull the blade taut.
Step 4: The “Ping” Test – The Secret to Perfect Tension
This is the most important part! As you tighten the screw, you’ll reach a point where the blade is snug. To check if it’s tight enough, gently flick the blade with your finger, much like plucking a guitar string. Listen to the sound. You’re aiming for a clear, sharp “ping” or “ring.” A dull thud means it’s too loose. If the sound is very high-pitched or you feel excessive strain on the frame, you might be over-tensioning.
General Guideline for Tensioning:
| Blade Condition | Sound When Plucked | Action |
|---|---|---|
| Too Loose | Dull thud, no distinct sound | Continue tightening |
| Just Right | Clear, sharp “ping” or “ring” | Stop tightening |
| Too Tight | Very high-pitched squeal, frame feels strained | Slightly loosen |
Step 5: Check and Adjust
After the “ping” test, give the blade a gentle push sideways with your thumb. It should feel firm and not noticeably flexible. If it feels too floppy, tighten it a bit more and repeat the ping test. If the frame feels like it’s bowing significantly or you’re worried about snapping the blade, ease up the tension slightly. It’s always better to be slightly under-tensioned than to snap a new blade.
Step 6: Re-tensioning After Use
After you’ve finished cutting, it’s a good practice to slightly loosen the blade tension. This reduces stress on the blade and the hacksaw frame, prolonging their lifespan. When you’re ready to use the saw again, simply re-tension it using the “ping” test.
How Much Tension Does a Hacksaw Have? The Science Behind the “Ping”
The “ping” test is a simple, effective way to gauge tension because it relates to the natural frequency of the blade. When you pluck a taut object, it vibrates at a specific frequency. The tighter it is, the higher the frequency (and the higher the pitch of the sound). A hacksaw blade is designed to operate at a tension that allows it to vibrate at a frequency that keeps it rigid and the teeth biting into the material efficiently.
According to engineering principles, the frequency of vibration (f) for a stretched string or blade is related to its tension (T), length (L), and mass per unit length (μ) by the formula: ( f = frac{1}{2L} sqrt{frac{T}{mu}} ). While you don’t need to calculate this, it explains why the “ping” sound is a reliable indicator. A higher tension (T) results in a higher frequency (f), which we perceive as a higher-pitched sound.
The ideal tension ensures that the blade remains straight and doesn’t deflect excessively under the cutting load. This optimal rigidity prevents the teeth from skipping or binding, which are common causes of blade breakage and poor cuts. The goal is to have enough tension to keep the blade stiff, but not so much that it overstresses the material of the blade or the frame itself.
Common Hacksaw Tensioning Mistakes to Avoid
Even with the “ping” test, beginners can sometimes run into trouble. Here are a few common mistakes:
- Over-tensioning: This is the most common mistake. It leads to snapped blades, especially on thinner blades or when the frame is made of lighter material. Always err on the side of slightly less tension if you’re unsure.
- Under-tensioning: This results in a wobbly blade that chatters, cuts poorly, and dulls quickly. You’ll get a rough, uneven cut, and the blade will feel like it’s dancing around instead of cutting.
- Not checking tension regularly: Blades can stretch slightly during use, and frames can flex. It’s good practice to re-check and adjust tension periodically, especially during long cutting sessions.
- Using the wrong blade for the material: Even with perfect tension, the wrong blade will give you poor results. Always match the TPI to the material you’re cutting. For example, using a coarse blade (14 TPI) on thin sheet metal will rip and tear rather than cut cleanly.
- Ignoring the frame: Some older or cheaper hacksaw frames might not be able to hold as much tension as modern, high-quality ones. Be aware of your tool’s limitations.
Factors Affecting Hacksaw Tension Needs
While the “ping” test is a universal method, a few factors can influence how much tension you might apply:
- Blade Material: High-speed steel (HSS) blades can generally handle more tension than carbon steel blades.
- Blade Thickness: Thicker blades are more rigid and can often tolerate slightly higher tension than very thin, flexible blades.
- Hacksaw Frame Quality: A sturdy, well-built hacksaw frame (often made of steel or a strong alloy) can withstand higher tension than a lighter, less robust frame (like some plastic or aluminum ones). High-quality frames are designed to maintain tension effectively.
- Type of Cut: For very fine, precise cuts, you might want to ensure the blade is perfectly rigid, which means leaning towards the higher end of the tension range. For general rough cutting, a bit less tension is usually fine.
Here’s a quick look at common blade types and their typical TPI ranges:
| Blade Type | Typical TPI Range | Best For |
|---|---|---|
| All-Hard High-Speed Steel (HSS) | 24-32 TPI | Hard metals, pipe, conduit, general-purpose metal cutting |
| High-Speed Steel (HSS) Bi-Metal | 18-24 TPI | Versatile for various metals, including harder alloys and thicker stock |
| Carbon Steel | 14-20 TPI | Softer metals, plastics, wood (though specialized wood saws are better) |
| Specialty Blades | Varies widely | Specific materials like tile, glass, or delicate plastics |
For beginners, sticking to bi-metal blades in the 18-24 TPI range is often the most forgiving and versatile option. They offer a good balance of durability and cutting performance across a range of common materials.
When to Replace Your Hacksaw Blade
Even with perfect tension, hacksaw blades wear out. You’ll know it’s time to replace your blade when:
- The “ping” sound becomes dull: The blade is likely worn out or has lost its temper.
- You have to push much harder: The teeth are no longer sharp and are skipping or dragging.
- The cut is rough and uneven: The teeth are dull or damaged.
- The blade is visibly damaged: Cracked, bent, or missing teeth.
A worn-out blade will make your work much harder and can lead to frustration. Replacing a blade is inexpensive and will make a huge difference in your cutting experience.
Frequently Asked Questions (FAQ)
Q1: How tight should a hacksaw blade be?
A hacksaw blade should be tensioned until it makes a clear, sharp “ping” sound when flicked, indicating it’s taut but not over-stressed. It should feel firm and not wobble.
Q2: Can I over-tension a hacksaw blade?
Yes, you can. Over-tensioning can cause the blade to snap, especially if it’s a thinner blade or if you apply excessive force. Listen for the “ping” and feel the frame for signs of strain.
Q3: What happens if my hacksaw blade is too loose?
A loose blade will chatter, skip, and cut poorly. It will lead to rough, uneven cuts, dull the blade teeth much faster, and can even cause the blade to break due to excessive vibration.
Q4: Do I need to loosen the blade after every use?
It’s a good practice to slightly loosen the tension after you finish using the saw. This reduces stress on the blade and the frame, helping them last longer. You’ll re-tension it the next time you use it.
Q5: How do I know if I have the right blade for the material?
The number of teeth per inch (TPI) on the blade is key. For hard metals, use a higher TPI (24-32). For softer metals and plastics, a lower TPI (18-24) is often better. Generally, at least two teeth should always be in contact with the material being cut for the cleanest results.
Q6: My hacksaw frame is bending. Is that normal?
A slight flex in a quality metal frame is normal when tensioning. However, if the frame is bending significantly or you hear creaking sounds, you are likely over-tensioning. Back off the tension to avoid damaging the frame or snapping the blade.
Q7: What is the “ping” test?
The “ping” test is a simple method to check hacksaw blade tension. Gently flick the blade with your finger. A correctly tensioned blade will produce a clear, sharp “ping” or ringing sound, similar to a guitar string. A dull thud means it’s too loose.
Conclusion
Mastering hacksaw tension is a small skill that makes a big difference in your DIY projects. By understanding the “ping” test and following these simple steps, you can ensure your hacksaw blade is always ready to deliver clean, efficient cuts. Remember to choose the right blade for your material, tension it until you hear that satisfying “ping,” and always loosen it slightly when you’re done. With a little practice, you’ll be cutting with confidence, achieving professional-looking results, and enjoying the process of making and repairing. So, grab your hacksaw, tension that blade correctly, and get to work!