
Removing scratches from plexiglass using a heat gun is effective and quick. This method can restore clarity and smoothness to your plexiglass surfaces.
Scratches on plexiglass can be unsightly and frustrating. They not only affect the appearance but can also impact the functionality of the material. While there are various ways to remove these scratches, one effective method involves using a heat gun.
This technique works by heating the scratched area just enough to soften the plexiglass, allowing the material to reflow and fill in the scratches. In this blog post, we will guide you through the steps to achieve a smooth, scratch-free surface using a heat gun. Whether you’re dealing with minor scuffs or deeper scratches, this approach can help restore your plexiglass to its original condition.

Credit: www.youtube.com
Materials Needed
Removing scratches from plexiglass with a heat gun requires specific materials. Proper tools and safety equipment ensure a smooth process. This section covers everything you need.
Essential Tools
First, gather the essential tools. You will need a heat gun. Make sure it has adjustable heat settings. Next, get a clean, soft cloth. It helps in wiping and polishing the plexiglass. Also, have some fine-grit sandpaper. It is useful for initial scratch removal. Finally, keep a bucket of water handy. It helps in cooling down the plexiglass after heating.
Safety Equipment
Safety is important. Wear heat-resistant gloves to protect your hands. Use safety goggles to shield your eyes from any splinters. Work in a well-ventilated area to avoid inhaling fumes. Keep a fire extinguisher nearby for emergencies. These precautions ensure a safe scratch removal process.

Credit: www.wikihow.com
Preparing The Surface
Before using a heat gun, clean the plexiglass surface thoroughly. Remove any dirt, debris, or grease to ensure smooth results.
Before using a heat gun to remove scratches from plexiglass, it’s crucial to prepare the surface properly. This ensures the heat treatment is effective and prevents further damage to the material. Proper preparation involves two main steps: cleaning the plexiglass and assessing the scratch depth. Let’s dive into each step.Cleaning The Plexiglass
Start by cleaning the plexiglass to remove any dirt or debris. Use a soft cloth or sponge with mild soap and water. Avoid using abrasive cleaners or rough materials. These can create new scratches. Rinse the plexiglass with clean water. Then, dry it thoroughly with a lint-free cloth. Ensure there are no water spots or residues left on the surface.Assessing The Scratch Depth
Examine the plexiglass to determine the depth of the scratches. Light scratches are usually shallow and can be treated easily. Deep scratches may require more effort and careful handling. Run your fingernail over the scratch to feel its depth. If your nail catches, the scratch is likely deep. Knowing the depth helps you decide how much heat to apply. It also informs you about the necessary precautions to take. “`Using The Heat Gun
Removing scratches from plexiglass using a heat gun is effective. This method is quick and restores the clear look of your plexiglass. Let’s dive into the steps and techniques to make it work.
Setting Up The Heat Gun
First, ensure you have a quality heat gun. It should have adjustable temperature settings. Place the plexiglass on a stable surface. Make sure the area is well-ventilated. Safety is important. Wear heat-resistant gloves and safety goggles.
| Equipment Needed | Purpose |
|---|---|
| Heat Gun | Applies heat to the plexiglass |
| Heat-Resistant Gloves | Protects your hands |
| Safety Goggles | Protects your eyes |
Proper Heat Gun Techniques
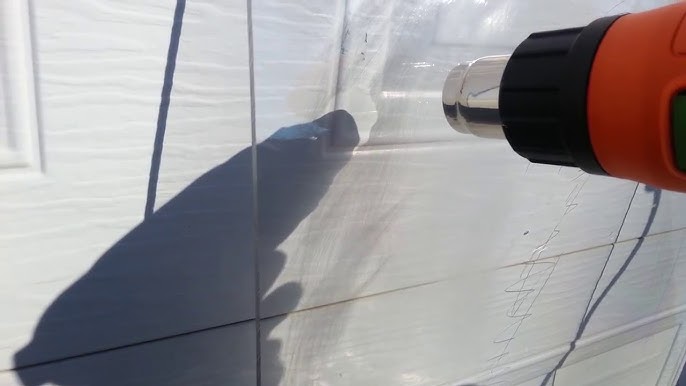
Set the heat gun to a low temperature. Start with around 200°F. Hold the heat gun 4-6 inches away from the plexiglass. Move it in a circular motion. Do not stay in one spot too long. This avoids warping the plexiglass.
Keep heating until the scratch starts to disappear. Let the plexiglass cool. Check the result. If the scratch is still visible, repeat the process. Use patience and avoid using high heat.
Practice these techniques on a small piece first. This helps you get comfortable with the process. With care, you can remove scratches and make your plexiglass look new again.
Credit: www.youtube.com
Polishing The Surface
Removing scratches from plexiglass is easier with a heat gun. Gently apply heat to the scratched area until it softens, then let it cool.
Polishing the plexiglass surface is essential. It restores clarity and shine. After removing scratches with a heat gun, focus on polishing. This step ensures the plexiglass looks new again.Applying Polish
Choose a polish suitable for plexiglass. Apply a small amount to a soft cloth. Gently rub the polish onto the surface. Use circular motions for even coverage. Ensure all areas are covered.Buffing To Perfection
After applying polish, it’s time to buff. Use a clean, dry cloth. Buff the plexiglass in circular motions. This removes excess polish and adds shine. Continue buffing until the surface gleams. Polishing the surface brings back its original look. Follow these steps for a clear, scratch-free finish. “`Safety Precautions
Removing scratches from plexiglass with a heat gun can be effective. But, it’s essential to follow safety precautions. This ensures you avoid accidents and achieve the best results. Below, we cover key safety tips for using a heat gun and handling plexiglass.
Heat Gun Safety Tips
Always start by reading the heat gun’s manual. This provides specific safety guidelines. Make sure the area is well-ventilated. Heat guns can emit fumes. Wear protective gear, including gloves and safety goggles. This protects your skin and eyes from heat and debris.
Keep the heat gun moving. Avoid focusing on one spot for too long. This prevents overheating. Never point the heat gun at yourself or others. Keep a safe distance. Use the heat gun on a low setting first. Gradually increase the temperature as needed.
Handling Plexiglass Safely
Handle plexiglass with care. It can crack or chip easily. Use a soft cloth to clean the surface before starting. This removes any dust or dirt. Hold the plexiglass firmly but gently. This prevents accidental drops or slips. Keep the heat gun at least a few inches away from the surface. Too close, and you risk burning the plexiglass.
Work in a well-lit area. This helps you see the scratches clearly. Avoid using excessive force. Let the heat do the work. After heating, allow the plexiglass to cool naturally. Do not touch it immediately. It will be very hot.
Common Mistakes
Using a heat gun to remove scratches from plexiglass can be tricky. Many people make common mistakes that can damage the material further. Knowing these mistakes helps you avoid them and achieve better results.
Overheating The Plexiglass
One of the most common mistakes is overheating the plexiglass. Heat guns generate high temperatures quickly. If you hold the gun too close or in one spot for too long, it can cause the plexiglass to warp or melt. Always move the heat gun in a steady, sweeping motion. Keep it at a safe distance from the surface.
Check the temperature setting on your heat gun. Start with the lowest setting and gradually increase if needed. This prevents overheating and potential damage.
Inadequate Cleaning
Another common mistake is not cleaning the plexiglass properly before using the heat gun. Any dirt or debris left on the surface can get embedded into the material. This makes the scratches worse and harder to remove. Clean the plexiglass thoroughly with a mild soap and water solution. Dry it completely before using the heat gun.
Use a soft, lint-free cloth to avoid scratching the surface during cleaning. Proper cleaning ensures a smooth surface for the heat gun to work on. This leads to better results and a clearer finish.
Additional Tips
Removing scratches from plexiglass using a heat gun can be tricky. To ensure the best results, follow these additional tips. They help maintain the clarity and integrity of the plexiglass.
Maintaining Scratch-free Plexiglass
Clean plexiglass regularly with a soft cloth. Use mild soap and water. Avoid harsh chemicals. They can damage the surface. Store plexiglass in a cool, dry place. Keep it away from direct sunlight. Heat can cause the material to warp. Always handle plexiglass with care. Use gloves to prevent fingerprints and scratches. Apply a protective coating. This helps reduce the risk of future scratches.
Alternative Methods
Try using a plastic polish. It can help reduce minor scratches. Apply the polish with a soft cloth. Rub in a circular motion. Buff the area until smooth. Another method is using a scratch removal kit. These kits are available at hardware stores. Follow the instructions carefully. Sandpaper can also be an option. Use fine-grit sandpaper. Wet the sandpaper before use. Gently sand the scratched area. Finish with a polish to restore shine.
Frequently Asked Questions
Can Heat Guns Remove Scratches From Plexiglass?
Yes, heat guns can effectively remove scratches from plexiglass. The heat softens the material, allowing scratches to blend.
Is Using A Heat Gun On Plexiglass Safe?
Using a heat gun is safe if done correctly. Ensure to use at a low setting and keep it moving.
What Precautions To Take With Heat Guns?
Always wear protective gloves and goggles. Keep the heat gun moving to avoid damaging the plexiglass.
How Long Should I Apply Heat To Scratches?
Apply heat for a few seconds at a time. Check frequently to avoid overheating and damaging the plexiglass.
Conclusion
Removing scratches from plexiglass using a heat gun is effective and simple. Follow the steps carefully to avoid damage. Always use proper safety gear. Practice on a small area first. This method restores clarity and smoothness. Enjoy a scratch-free plexiglass surface.
Remember, patience and precision are key. Thank you for reading. Stay tuned for more useful tips. Happy repairing!