
Shortening a chainsaw chain might seem tricky. But it is a task you can handle with the right guidance.
Chainsaws are powerful tools, but sometimes the chain can become too long or loose. Knowing how to shorten a chainsaw chain can save you time and money. It also keeps your chainsaw running smoothly and safely. In this guide, we will walk you through the steps to shorten your chainsaw chain.
It is simpler than you think and can be done with basic tools. Read on to learn how to do it yourself.
Introduction To Chainsaw Chains
Chainsaws are essential tools for cutting wood quickly and efficiently. At the heart of every chainsaw is its chain. The chain does the actual cutting, moving at high speeds around the bar. Understanding the chain’s design, maintenance, and adjustments is crucial for safe and effective use. This guide will help you learn how to shorten a chainsaw chain.
Importance Of Proper Chain Length
The length of the chainsaw chain is vital for several reasons. A properly sized chain ensures optimal performance and safety. An overlong chain can slip off the bar, causing accidents. A chain that’s too short might not fit the saw, leading to inefficiency.
| Proper Chain Length | Benefits |
|---|---|
| Correct Fit | Ensures Safety |
| Optimal Performance | Maximizes Efficiency |
| Prevents Slipping | Reduces Accident Risk |
Common Reasons For Shortening
There are several reasons why you might need to shorten your chainsaw chain. One common reason is wear and tear. Over time, the chain can stretch due to constant use. Another reason is the need to fit a different bar length.
- Chain Stretching: Prolonged use can cause the chain to stretch.
- Changing Bar Length: A different bar may require a shorter chain.
- Broken Links: Removing damaged links can shorten the chain.
Shortening a chainsaw chain can save you money. It extends the life of your current chain instead of buying a new one. Always ensure the shortened chain fits snugly on the saw.
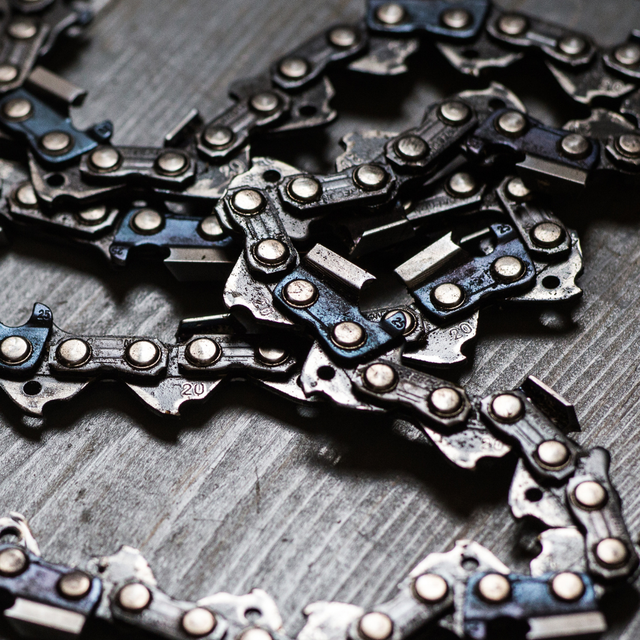
Credit: www.sweetnewearth.com
Tools And Materials Needed
When shortening a chainsaw chain, having the right tools and materials is essential. Using the correct equipment ensures safety and efficiency. Below is a list of what you need to get the job done properly.
Essential Tools
You will need several tools for this task. First, get a chain breaker tool. This tool helps to separate the chainsaw links. Next, you need a rivet spinner. This tool reassembles the chain after shortening it. A flat file is also useful. It helps to smooth out rough edges. Lastly, have a pair of pliers handy. They assist in gripping and pulling the chain.
Safety Equipment
Safety is crucial when working with chainsaws. Always wear safety gloves. They protect your hands from sharp edges. Safety goggles are also a must. They keep debris out of your eyes. Consider using ear protection. Chainsaws can be very loud. Lastly, wear a long-sleeve shirt and sturdy pants. They provide additional protection.
Preparing Your Chainsaw
Preparing your chainsaw before shortening the chain is crucial. This ensures safety and efficiency. Follow these steps to get your chainsaw ready.
Safety Precautions
Your safety should be the top priority. Wear protective gear. This includes gloves, safety goggles, and ear protection. Make sure you work in a well-lit area. Have a first aid kit nearby. Disconnect the chainsaw’s power source. This prevents accidental starts. Ensure the chainsaw is stable before you begin.
Cleaning The Chainsaw
A clean chainsaw works better and lasts longer. Begin by removing any dirt or debris. Use a brush to clean the surface. Pay attention to the chain and bar. Wipe them down with a clean cloth. Check the air filter and clean it if necessary. Make sure the chainsaw is dry before proceeding. This helps in getting accurate measurements.

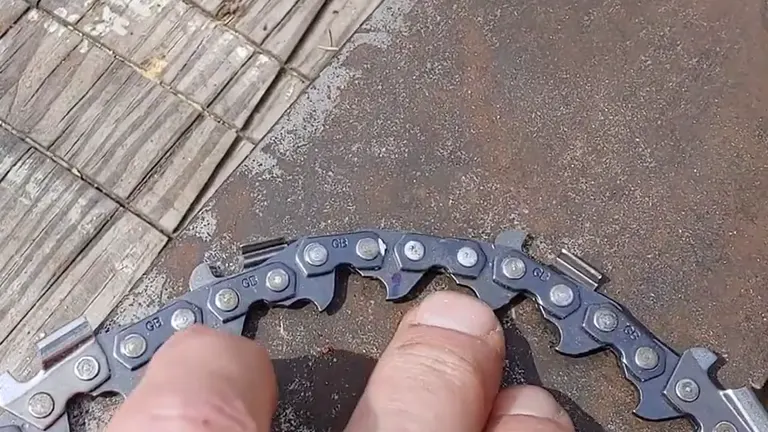
Credit: www.youtube.com
Removing The Chainsaw Chain
Shortening a chainsaw chain might seem complex, but it’s manageable. Start by removing the chain. This process involves two main steps: loosening the tension and detaching the chain. Follow these steps to safely remove your chainsaw chain.
Loosening The Tension
Before removing the chain, you need to loosen its tension. Find the tension adjustment screw. It’s usually near the guide bar. Use a screwdriver to turn it counterclockwise. This will loosen the chain.
Once the chain is loose, you can move it freely. This makes the next step easier. Be cautious. The chain and bar edges are sharp.
Detaching The Chain
After loosening the tension, it’s time to detach the chain. Start by removing the side panel. This covers the guide bar and chain. Use a wrench to unscrew the nuts holding the panel in place. Set the panel and nuts aside.
Next, carefully slide the guide bar away from the chainsaw body. The chain will become free from the sprocket. Gently lift the chain off the guide bar. You can now inspect, clean, or shorten your chainsaw chain as needed.
Measuring The Chain
Shortening a chainsaw chain requires accurate measurements. This ensures the chain fits perfectly and functions efficiently. The first step is to measure the chain properly.
Determining The Correct Length
To determine the correct length, you need to count the drive links. Drive links are the teeth that run along the inside of the chain. They fit into the guide bar of the chainsaw. Use a marker to mark the first drive link. This helps you keep track of which links you have already counted.
| Step | Action |
|---|---|
| 1 | Identify the drive links. |
| 2 | Mark the first drive link. |
| 3 | Count all drive links until you return to the first mark. |
Once you have counted the drive links, write down the total number. This helps you ensure the new chain length matches the original.
Marking The Links
After determining the correct length, the next step is to mark the links you need to remove. Use a marker to highlight the drive links you will cut. This helps you avoid mistakes while shortening the chain.
- Use a permanent marker to avoid smudging.
- Make sure the marks are clear and visible.
After marking, double-check the marked links. Ensure they match the correct length you calculated. Accurate marking is crucial for a properly fitted chain.
Removing Excess Links
To keep your chainsaw running smoothly, it’s essential to maintain the chain. Sometimes, you may need to shorten it by removing excess links. This process involves breaking the chain and removing the required links. Here’s how to do it.
Breaking The Chain
First, find the master link on your chainsaw chain. This link looks different from the others. Use a flat-head screwdriver to remove the clip holding it together. Place the chain on a solid surface. Use a punch tool to push the pin out of the master link. Now, the chain is open and ready for the next step.
Removing The Links
Count the number of links you need to remove. Take care not to remove too many links. Use a chain breaker tool for this step. Place the chain in the tool and line up the pin with the tool’s punch. Turn the handle to push the pin out. Repeat this for each link you need to remove. After removing the links, reconnect the chain using the master link. Ensure it is secure before using your chainsaw again.
Note: Always wear safety gloves and goggles during this process. Working with chains can be dangerous. Stay safe and follow these steps carefully.
Reassembling The Chain
Reassembling your chainsaw chain after shortening it is crucial. This ensures the chainsaw runs smoothly and safely. Proper assembly guarantees optimal performance and longevity of the tool. Below is a step-by-step guide on reassembling the chain with a focus on reconnecting the chain and ensuring proper tension.
Reconnecting The Chain
First, place the shortened chain onto the chainsaw bar. Ensure the cutting edges face forward on the top side of the bar. Align the chain drive links with the grooves in the bar. This step is critical for a smooth operation.
Next, fit the chain around the drive sprocket. Keep the chain tight against the bar. This prevents any slack that could cause the chain to derail.
Once the chain is in place, reattach the side plate. Use a screwdriver to secure it firmly. Double-check the alignment before tightening the screws completely.
Ensuring Proper Tension
Proper tension is key to the safe operation of your chainsaw. Ensure the chain is snug against the bar but still allows for slight movement.
To adjust the tension, locate the tensioning screw on the side of the chainsaw. Turn the screw clockwise to tighten the chain. Turn counterclockwise to loosen it. Check the tension by pulling the chain away from the bar. It should snap back into place with minimal slack.
If the chain is too tight, it may break. Too loose, and it could derail. Aim for a balance where the chain moves freely but stays secure.
Here is a quick reference table to help you with the tensioning process:
| Step | Action |
|---|---|
| 1 | Place the chain on the bar |
| 2 | Align drive links with bar grooves |
| 3 | Fit chain around drive sprocket |
| 4 | Reattach and secure side plate |
| 5 | Adjust tensioning screw |
| 6 | Check chain tension |
Following these steps ensures your chainsaw is ready for use. Proper reassembly and tensioning are vital for safety and performance.
Testing The Chainsaw
Once you have shortened your chainsaw chain, it’s crucial to test it. Ensuring the chain works well and is safe is important. Testing involves checking the chain and performing a test cut. Let’s dive into the details.
Checking The Chain
First, examine the chain for any visible issues. Look closely for loose or damaged links. Make sure the chain is properly tensioned. A loose chain can be dangerous.
- Turn off the chainsaw and disconnect the spark plug.
- Inspect the chain for tightness. It should not sag.
- Check the chain lubrication system. Ensure it’s working.
Spin the chain by hand. It should move smoothly without catching. If there are any issues, address them before moving on.
Performing A Test Cut
After checking the chain, perform a test cut. This helps ensure the chain cuts effectively and safely.
- Find a safe location with a suitable piece of wood.
- Secure the wood firmly to avoid movement.
- Start the chainsaw and let it warm up for a few minutes.
- Make a controlled cut through the wood. Avoid forcing the chainsaw.
Observe the cutting process. The chainsaw should cut smoothly and efficiently. Listen for any unusual noises. If the saw struggles or makes odd sounds, recheck the chain tension and condition.
Once you are satisfied with the test cut, your chainsaw is ready for regular use. Safety first!
Maintenance Tips
Proper maintenance ensures your chainsaw operates efficiently and lasts longer. Regular upkeep can prevent issues and maintain peak performance. Let’s explore some essential maintenance tips for your chainsaw chain.
Regular Chain Inspection
Inspect the chain before and after each use. Look for signs of wear and tear. Check for loose or damaged links. A well-maintained chain ensures safe and smooth operation.
Keep an eye on the tension. A loose chain can slip off, posing a danger. A tight chain can cause excessive wear. Adjust the tension as needed for optimal performance.
Sharpening The Chain
A sharp chain cuts more efficiently and safely. Dull chains can cause the saw to jump and kick back. Use a file to sharpen the cutting teeth. Follow the manufacturer’s guidelines for the correct angle.
Check the depth gauges. These control the depth of the cut. If they are too high, the saw will cut slowly. If they are too low, the saw can become stuck. File the depth gauges to the recommended height.
Credit: forestry.com
Frequently Asked Questions
How Do I Shorten A Chainsaw Chain?
To shorten a chainsaw chain, you need a chain breaker tool. Remove the link by pushing out the rivet. Reassemble the chain with a chain rivet tool.
Can I Shorten A Chainsaw Chain Myself?
Yes, you can shorten a chainsaw chain yourself. Use a chain breaker and rivet tool. Follow safety precautions and guidelines.
What Tools Are Needed To Shorten A Chainsaw Chain?
You need a chain breaker tool and a chain rivet tool. These tools help remove and reattach the chain links effectively.
Why Shorten A Chainsaw Chain?
Shortening a chainsaw chain can improve cutting efficiency. It provides better performance and extends the chain’s lifespan. It also ensures a snug fit on the chainsaw.
Conclusion
Shortening a chainsaw chain is simpler than it seems. Follow the steps carefully. Use the right tools for safety. Regular maintenance keeps your chainsaw efficient. Always double-check your work. A well-maintained chainsaw ensures smooth and safe cutting. Practice makes the process easier.
Remember, safety first! Properly shortening your chainsaw chain saves time and money. It also extends the life of your equipment. Happy cutting!