
Wondering how to tell if a cordless drill battery is bad? Look for a rapid loss of power, a complete inability to charge, or a battery that overheats excessively during use. These are common signs that your battery’s lifespan is over and it’s time for a replacement.
Hey there, DIYers and tool enthusiasts! Samuel H. Murphy here, your go-to guy for all things power tools. Nothing kills the momentum of a great project quite like a cordless drill that suddenly gives up the ghost. You’re in the middle of hanging a shelf, assembling furniture, or tackling that weekend DIY, and your drill just… stops. Before you blame the drill itself, let’s talk about the heart of your cordless tool: the battery. It’s a common frustration, but the good news is, spotting a failing battery isn’t rocket science. We’ll walk through the simple signs and tests to help you figure out if your battery is truly past its prime. Let’s get your drill back in action!
Why Your Cordless Drill Battery Might Be Failing
Cordless drill batteries, much like the batteries in your phone or laptop, have a finite lifespan. They’re packed with rechargeable cells that store and deliver power. Over time, and with repeated charging and discharging cycles, these cells degrade. This degradation is a natural process, but certain factors can speed it up, leading to a battery that seems to die prematurely.
Think of it like this: every time you use and recharge your battery, it’s a little workout. Eventually, even with the best care, the “muscles” (the battery cells) get tired and can’t hold as much “energy” (charge) as they used to. This is especially true for lithium-ion batteries, which are the standard for most modern cordless tools.
Common culprits that can shorten a battery’s life include:
- Extreme Temperatures: Storing or using your battery in very hot or very cold conditions can significantly impact its performance and longevity.
- Overcharging: While most modern chargers have safeguards, leaving a battery on the charger long after it’s full can still cause some stress.
- Deep Discharges: Letting a battery completely drain to zero repeatedly can also be harmful.
- Physical Damage: Dropping a battery or exposing it to moisture can cause internal damage.
- Manufacturing Defects: Though less common, sometimes a battery might have an issue from the start.
Understanding these factors can help you prolong the life of your batteries, but eventually, even the best ones will show signs of wear. Let’s dive into how to identify those signs.
Common Signs of a Bad Cordless Drill Battery
Spotting a dying battery is often more about observing its behavior than performing complex diagnostics. Your drill will usually give you clear signals when its power source is faltering. Here are the most common indicators:
1. Rapid Loss of Power (Short Runtime)
This is perhaps the most obvious sign. If your drill used to last for an hour of consistent work and now struggles to make it through 15 minutes, even after a full charge, the battery is likely losing its capacity. The cells simply can’t hold as much energy as they once did.
2. Inability to Hold a Charge
Does the battery seem to die almost immediately after you take it off the charger? Or perhaps the charge indicator lights on the battery or charger show it’s full, but the drill has no power or only a tiny bit of runtime? This is a strong indicator that the battery can no longer store a charge effectively.
3. Overheating During Use or Charging
While batteries can get warm during normal use, excessive heat is a red flag. If the battery becomes uncomfortably hot to the touch, either while you’re using the drill or while it’s charging, it could signal internal damage or a failing cell. Be cautious; a dangerously hot battery can be a safety hazard.
4. The Drill Works Only When the Battery is Jiggled or Held at an Angle
This symptom often points to a poor connection between the battery pack and the drill’s terminals, or sometimes within the battery pack itself. While it could be dirty contacts, if cleaning the contacts doesn’t help, it might mean the internal connections within the battery are loose or damaged, a sign of a failing battery.
5. The Battery Won’t Charge at All
If you place the battery on its designated charger, and the charger’s indicator lights don’t come on, or they flash an error code (check your drill’s manual for specific codes), it’s a strong possibility the battery is the problem. Make sure the charger itself is working by testing it with a known good battery if possible.
6. Visible Damage to the Battery Pack
Inspect the battery casing. Cracks, swelling, leaks, or corroded terminals are all signs of physical damage that can render a battery unusable and potentially dangerous. If you see any of these, stop using the battery immediately.
How to Test a Cordless Drill Battery: A Step-by-Step Guide
When you suspect your battery might be bad, a few simple tests can help confirm your suspicions. These are beginner-friendly and don’t require specialized tools beyond your drill and charger.
Step 1: Perform a Visual Inspection
Before anything else, give the battery a good look. Check for:
- Cracks or Dents: Any physical damage to the casing.
- Swelling: If the battery pack looks bloated or misshapen, it’s a serious issue.
- Corrosion: Look for any white or greenish powdery substance on the metal contacts.
- Leaks: Any liquid seeping from the battery casing.
If you find any of these, it’s safest to assume the battery is bad and needs replacement. Do not attempt to use or charge a physically damaged battery.
Step 2: Test the Charging Cycle
Place the suspect battery onto its compatible charger. Observe the charger’s indicator lights.
- Normal Behavior: Lights indicate charging, then turn solid or off when fully charged.
- Problematic Behavior:
- Lights don’t come on at all.
- Lights flash an error code (consult your manual).
- The battery charges extremely quickly, but also drains quickly.
- The battery gets excessively hot during charging.
If the charging cycle is abnormal, it points towards a battery issue.
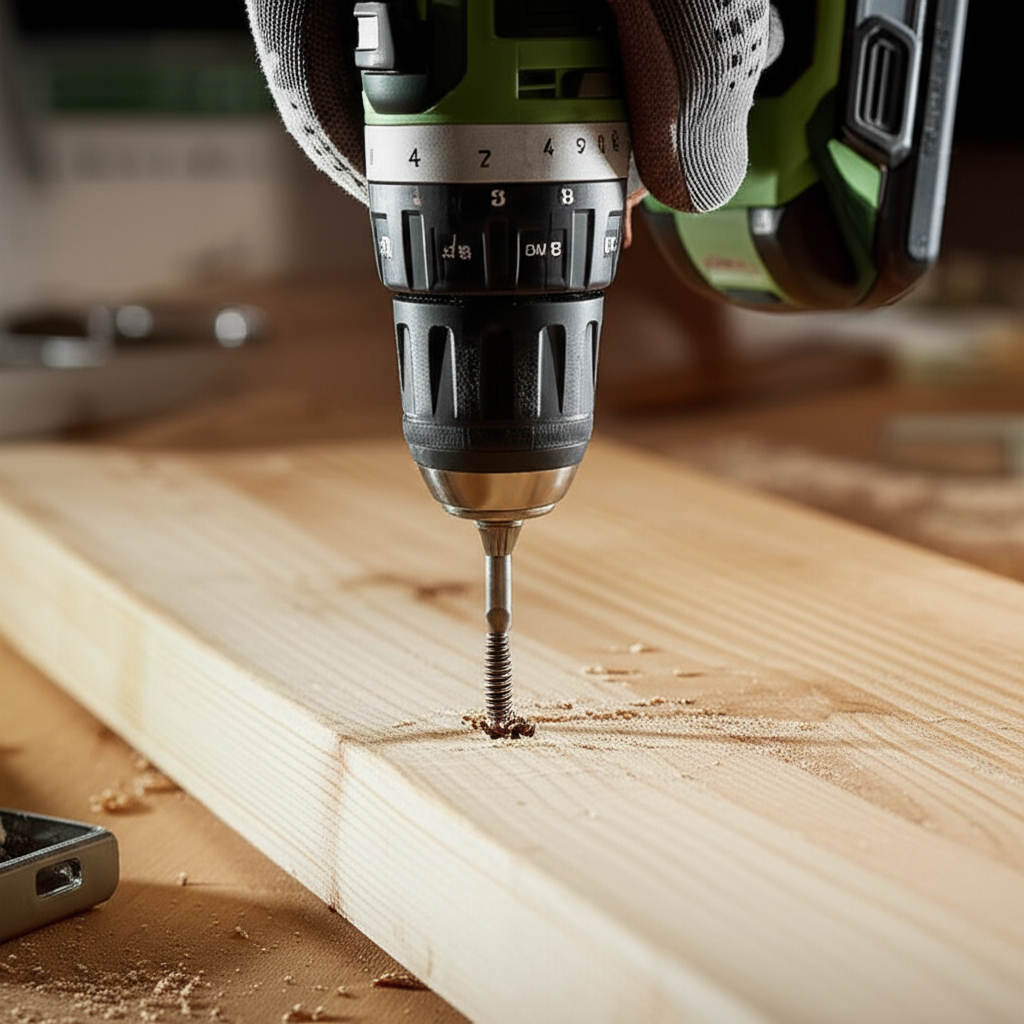
Step 3: Test the Battery’s Runtime
Once the battery is charged (or indicates it’s charged), attach it to your cordless drill. Perform a consistent task, like driving screws into a piece of wood at medium speed. Time how long the drill runs effectively before its power noticeably drops.
- Compare to New/Good Battery: If the runtime is significantly shorter than what you’re used to, or much less than a comparable new battery, it’s a sign of degradation.
- Sudden Power Drop: Does the drill start strong and then immediately bog down or stop? This is a classic symptom of a failing battery.
Step 4: Check for Overheating During Use
While using the drill for the runtime test, pay attention to the battery’s temperature. After a few minutes of moderate use, carefully touch the battery pack.
- Normal Warmth: A battery will naturally get slightly warm.
- Excessive Heat: If it’s too hot to comfortably hold for more than a second or two, this is a warning sign. It could indicate internal resistance or a short circuit within the battery.
Step 5: Test with Another Tool (If Applicable)
If you have another cordless tool that uses the same battery system (e.g., another drill, a circular saw, or a sander), try the suspect battery in that tool. If it performs poorly or not at all in the second tool, it further confirms the battery is the problem, not the drill.
Step 6: Test a Known Good Battery in Your Drill
This is a crucial step to rule out the drill itself. If you have a battery that you know is working well, put it in the drill. If the drill then performs as expected, it strongly suggests the original battery was the issue.
Understanding Battery Voltage and Capacity
When dealing with cordless drill batteries, you’ll often see two key numbers: voltage (V) and amp-hours (Ah). Understanding these can help you when it’s time for a replacement.
Voltage (V)
Voltage is like the “pressure” of the electricity. Higher voltage means more power. Common drill voltages include 12V, 18V, and 20V MAX (which is essentially the same as 18V when under load). You must use batteries with the correct voltage for your drill. Using a lower voltage battery won’t provide enough power, and using a higher voltage battery can damage the drill.
Amp-Hours (Ah)
Amp-hours measure the battery’s capacity – essentially, how much energy it can store. A higher Ah rating means the battery can power your tool for a longer time on a single charge. For example, a 4.0 Ah battery will generally run longer than a 2.0 Ah battery of the same voltage.
When a battery is “bad,” it often means its capacity (Ah) has significantly decreased, or its ability to deliver voltage under load has diminished. This is why a battery that used to last for hours now only lasts minutes.
When to Consider Replacing Your Battery
Deciding when to replace a battery isn’t always black and white, but here are some clear indicators:
- Runtime is Less Than 50% of Original: If your battery’s runtime has been cut in half or worse, it’s likely not worth the frustration anymore.
- Inconsistent Power Delivery: If the drill bogs down unexpectedly or the power fluctuates wildly, even on a full charge.
- Safety Concerns: Any sign of overheating, swelling, or physical damage means immediate replacement.
- Cost of Replacement vs. New Tool: Sometimes, the cost of a new battery can be a significant percentage of a new drill’s price. If you have an older drill and a battery costs nearly as much as a new, more advanced tool, it might be time to upgrade.
For instance, if a replacement 18V 3.0 Ah battery for your drill costs $70, but you can get a brand new 18V drill kit (including a battery and charger) for $99, it’s often a better deal to buy the new kit.
Troubleshooting Common Battery Issues
Before you declare a battery dead, consider these troubleshooting steps:
1. Clean the Battery and Tool Contacts:
- Use a pencil eraser or a clean, dry cloth to gently wipe the metal contacts on both the battery and the drill.
- For stubborn grime, a cotton swab lightly dampened with isopropyl alcohol can work, but ensure the contacts are completely dry before reinserting the battery.
- Corroded contacts can impede power flow, mimicking a bad battery.
2. Ensure Proper Charging:
- Make sure you are using the correct charger for your battery type and voltage.
- Check that the charger is plugged in securely and receiving power.
- Try charging the battery in a different outlet.
3. Check the Charger Itself:
- If possible, test your charger with a different, known-good battery. If the known-good battery also doesn’t charge, the charger might be the issue.
- Many chargers have diagnostic lights. Consult your tool’s manual to understand what these lights mean.
4. Avoid Extreme Storage Conditions:
- Store batteries in a cool, dry place, away from direct sunlight or freezing temperatures.
- Don’t leave batteries in a hot car or unheated garage for extended periods.
For more in-depth information on battery care and maintenance, resources like those from the U.S. Department of Energy offer valuable insights into battery technology.
Battery Types and Lifespan Expectations
Most modern cordless drills use lithium-ion (Li-ion) batteries. Older tools might have used Nickel-Cadmium (NiCd) or Nickel-Metal Hydride (NiMH) batteries. Each has different characteristics and lifespans.
| Battery Type | Typical Lifespan (Charge Cycles) | Pros | Cons |
|---|---|---|---|
| Nickel-Cadmium (NiCd) | 500-1000 | Durable, good power at low temperatures | Heavy, suffer from “memory effect,” contain toxic cadmium |
| Nickel-Metal Hydride (NiMH) | 500-1000 | Higher energy density than NiCd, less memory effect | Can be sensitive to overcharging, lower voltage per cell |
| Lithium-Ion (Li-ion) | 1000-2000+ | Lightweight, high energy density, no memory effect, fast charging | Sensitive to extreme temperatures, can be more expensive |
Lithium-ion batteries are the current standard due to their excellent performance and longevity. However, even Li-ion batteries will eventually degrade. A typical Li-ion battery might start to show noticeable performance degradation after 2-5 years of regular use, depending on how it’s treated.
When to Buy a New Battery vs. a New Tool
This is a common dilemma for DIYers. Here’s a quick breakdown to help you decide:
- Buy a New Battery If:
- Your drill is still in good condition and you like its performance.
- The cost of a replacement battery is significantly less than a new tool kit.
- You need to extend the life of your existing tool for a few more years.
- Buy a New Tool If:
- The cost of a replacement battery is close to or more than the cost of a new drill kit (often the case with older battery technologies or less common brands).
- Your drill is old, worn out, or you’re looking for upgraded features (like brushless motors, better ergonomics, or higher torque).
- You’ve already replaced the battery once, and it’s failing again – this might indicate the tool itself is nearing the end of its useful life.
Always check prices. Sometimes, manufacturers offer deals on battery-and-charger kits, or even bundle batteries with new tools, making it a great time to upgrade.
Frequently Asked Questions (FAQs)
Q1: Can I use a battery from a different brand in my cordless drill?
A: Generally, no. Cordless tool batteries are designed to work with specific tool systems. While some brands might share battery platforms (like DeWalt’s 20V MAX system), you should always use batteries designed for your specific tool brand and voltage. Using an incompatible battery can damage your tool or the battery itself.
Q2: How long should a cordless drill battery last?
A: This varies greatly depending on the battery type (Li-ion, NiCd, NiMH), usage, and care. A well-maintained lithium-ion battery can last anywhere from 2 to 5 years or even longer, often providing 1000-2000+ charge cycles before significant degradation. NiCd and NiMH batteries typically have shorter lifespans.
Q3: Is it bad to leave my battery on the charger all the time?
A: Modern lithium-ion batteries and chargers have built-in protection to prevent overcharging. Once the battery reaches full capacity, the charger will typically stop or switch to a trickle charge. However, leaving any battery in a hot environment (like on a charger in direct sun) can still degrade it over time. It’s best practice to remove the battery once it’s charged, but it’s usually not catastrophic for Li-ion batteries.
Q4: My drill works, but it feels weak. Is the battery bad or is the drill?
A: A weak-feeling drill on a full charge is often a sign of a degrading battery. The battery might not be able to deliver the necessary voltage and current to the drill’s motor. To test this, try a known good battery in the drill. If the drill then performs strongly, the original battery is likely the culprit. If it still feels weak with a good battery, the drill’s motor or internal components