
Mastering the hole saw is simple! This guide shows you how to use a hole saw effectively and safely for clean, precise holes in wood, metal, tile, and more. Learn about choosing the right saw, proper drill technique, and common troubleshooting for perfect results every time.
Ever stared at a project and thought, “I need a perfectly round hole, but how?” That’s where the humble hole saw shines! These clever attachments turn your drill into a precision cutting tool, ideal for everything from hanging shelves to plumbing installations. But with so many types and sizes, using one for the first time can feel a bit daunting. Don’t worry! We’re going to break down exactly how to use a hole saw, step-by-step, so you can tackle any project with confidence and achieve those clean, professional-looking holes you’re after.
Get ready to transform your DIY capabilities – we’ll cover everything from picking the right saw to keeping your tools in top shape.
What is a Hole Saw and Why You Need One
A hole saw is essentially a cylindrical saw blade attached to an arbor, which is a shank that fits into your drill. It’s designed to cut large-diameter holes in materials like wood, metal, plastic, drywall, and even tile or concrete, depending on the type of hole saw you choose. Think of it as a super-efficient cookie cutter for your projects!
Why are they so useful?
- Efficiency: They cut much larger holes than standard drill bits, saving you a ton of time and effort.
- Precision: When used correctly, they create clean, perfectly round holes with minimal splintering or chipping.
- Versatility: With the right type, you can cut through a surprising range of materials.
- Specific Applications: They’re perfect for creating openings for pipes, electrical boxes, vents, speakers, and more.
Choosing the Right Hole Saw for Your Material
This is the most crucial step! Using the wrong type of hole saw can lead to dull teeth, broken blades, poor results, and even safety hazards. Here’s a breakdown of the most common types:
Types of Hole Saws
Understanding the material of the hole saw itself is key to success.
| Hole Saw Type | Best For | Key Features | Considerations |
|---|---|---|---|
| Bi-Metal Hole Saws | Wood, plastic, drywall, non-ferrous metals (aluminum, brass), thin sheet metal | High-speed steel teeth welded to a flexible steel body. Durable and versatile. | Good for general-purpose DIY. May struggle with thicker or harder metals. |
| Carbide-Tipped Hole Saws | Wood (especially with nails), plastic, drywall, tile, brick, concrete block | Carbide teeth brazed onto a steel body. Harder and more heat-resistant than bi-metal. | Excellent for tougher materials. Can chip brittle materials like ceramic tile if not used carefully. |
| Diamond Grit Hole Saws | Glass, ceramic tile, porcelain, stone, concrete, marble | No teeth; uses diamond particles embedded in a metal rim. Cuts by grinding. | Requires water for cooling and lubrication to prevent overheating and extend life. Slower cutting but very effective for hard, brittle materials. |
| Tungsten Carbide Grit Hole Saws | Drywall, plaster, soft brick, light concrete | Similar to diamond grit but uses tungsten carbide particles. Less aggressive than diamond. | Good for softer masonry and composites. |
| Sub-Category: Plug Cutters | Wood | Cuts a solid plug of wood, leaving a clean hole. Often used for dowel holes or to create wooden plugs. | Not typically used for making holes for pipes or wires, but for creating specific wood components. |
Matching Saw to Material: A Quick Guide
Here’s a simplified way to think about it:
- Soft Materials (Drywall, Wood, Plastic): Bi-metal is your go-to. It’s affordable and effective.
- Harder Wood or Wood with Nails: Carbide-tipped will handle this better.
- Thin Sheet Metal: Bi-metal is usually sufficient.
- Tile, Brick, Concrete Block: Carbide-tipped or Diamond Grit are necessary. For very hard materials like porcelain or granite, diamond grit is essential.
- Glass: Diamond grit is the only option.
Pro Tip: Always check the manufacturer’s recommendations for the hole saw and the material you’re cutting. Reputable brands like Milwaukee Tool or DEWALT often provide detailed compatibility charts.
Essential Tools and Safety Gear
Before you start cutting, make sure you have everything you need:
Tools You’ll Need
- Drill: A corded drill is often preferred for its consistent power, especially for tougher materials. A powerful cordless drill can also work, but ensure it has sufficient torque and a fully charged battery. Look for drills with variable speed settings.
- Hole Saw Kit: This usually includes several common hole saw sizes and an arbor (or multiple arbors for different shank types).
- Pilot Drill Bit: Most arbors come with a pilot drill bit. This bit sits in the center of the hole saw and guides it, preventing the saw from wandering.
- Adjustable Wrench or Allen Key: To tighten the hole saw onto the arbor.
- Hammer: To tap out the cut plug.
- Safety Glasses or Goggles: Non-negotiable for eye protection.
- Work Gloves: To protect your hands from sharp edges and debris.
- Dust Mask: Especially important when cutting drywall, wood, or masonry.
- Clamps: To secure your workpiece if it’s not already stable.
- Measuring Tape and Pencil/Marker: For accurate hole placement.
- Center Punch (for metal): To create a small indentation for the pilot bit to start in metal.
- Lubricant/Coolant (for metal/tile): Cutting fluid for metal, or water for diamond grit saws.
Safety First!
Hole saws spin at high speeds and can create a lot of debris. Always prioritize safety:
- Wear safety glasses at all times.
- Secure your workpiece.
- Keep your hands and fingers away from the cutting area.
- Ensure the hole saw is securely attached to the arbor and the arbor is firmly in your drill chuck.
- Start slowly and let the tool do the work.
- Be aware of kickback – if the saw binds, the drill can twist violently.
- If cutting tile or metal, use appropriate cooling methods to prevent overheating.
Step-by-Step Guide: How to Use a Hole Saw
Ready to make that hole? Follow these steps for a clean, successful cut.
Step 1: Mark Your Spot
Use your measuring tape and pencil or marker to accurately mark the center of the hole you need to cut. For metal, use a center punch to create a small divot for the pilot bit to grip. This prevents the drill bit from skittering across the surface.
Step 2: Attach the Hole Saw to the Arbor
Most arbors have a threaded shaft. Screw the hole saw onto the arbor until it’s snug. Then, use an adjustable wrench or Allen key to tighten the set screw that secures the hole saw to the arbor. Ensure it’s tight enough that it won’t slip during operation.
Arbor Types: Note that some arbors are designed for specific shank types (e.g., hex shank for better grip in impact drivers, round shank for standard drills). Make sure your arbor is compatible with your drill chuck.
Step 3: Insert the Arbor into Your Drill
Open the chuck of your drill and insert the arbor shank. Tighten the chuck firmly around the arbor to ensure it’s held securely. A loose arbor can cause the hole saw to wobble or detach, which is dangerous.
Step 4: Position the Drill
Hold the drill perpendicular to the surface you are cutting. The pilot bit should be centered on your mark. For wood, the pilot bit will naturally start the cut. For tile or harder materials, ensure the pilot bit is firmly seated.
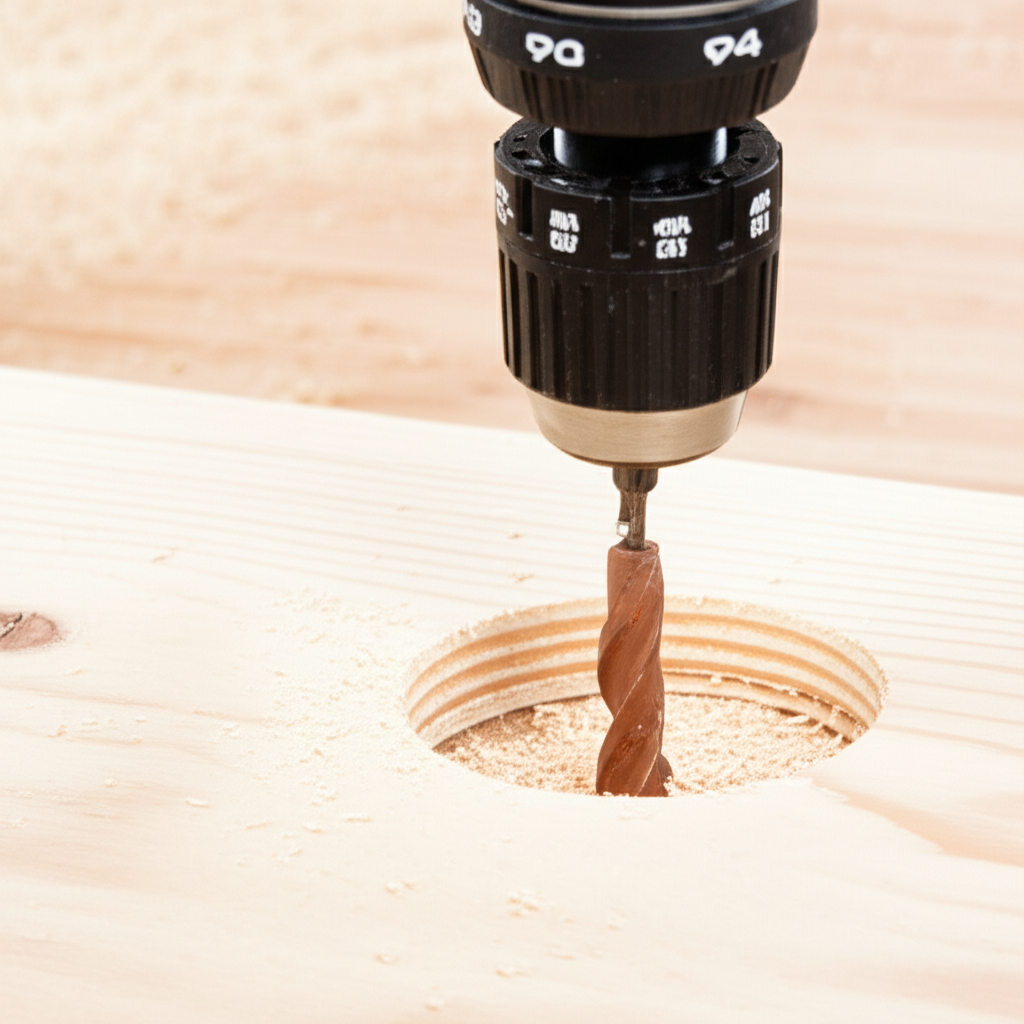
Step 5: Start Cutting
Begin drilling at a slow speed. This allows the pilot bit to create a starting point and the teeth of the hole saw to engage the material gradually. Once you feel the saw biting into the material, you can increase the speed slightly, but avoid forcing the tool.
For Wood:
- Start slow.
- As the pilot bit breaks through the other side, you might want to switch to a lower speed or even finish by hand if possible to prevent blowout (splintering) on the exit side.
- If cutting through thick wood, you may need to periodically back the saw out to clear the wood chips (plugs) that accumulate inside the saw.
For Metal:
- Use a slow speed and plenty of cutting fluid or lubricant.
- Apply steady, even pressure.
- Let the teeth do the cutting; don’t push too hard.
- Back out occasionally to clear chips and reapply lubricant.
For Tile/Glass/Masonry:
- Diamond Grit Saws: These require water! Either submerge the area in water (if possible) or have someone pour water onto the cutting area as you work. This cools the diamond grit and washes away debris.
- Start at a slight angle to create a notch, then gradually bring the saw to a perpendicular position.
- Use very light pressure and a slow to moderate speed.
- Allow the water to lubricate and cool the cutting surface.
- Be patient; these materials cut much slower than wood or metal.
Step 6: Finish the Cut
Continue cutting, maintaining consistent pressure and speed. As you approach the end of the cut, ease up on the pressure to prevent the hole saw from grabbing and damaging the material on the exit side. For thin materials, you might feel the saw suddenly break through.
Step 7: Remove the Hole Saw and Plug
Once the hole is complete, stop the drill and carefully remove it from the workpiece. The cut-out piece (the plug) will likely be inside the hole saw. You can usually push it out from the back, or tap the arbor gently with a hammer to release it. Be careful, as the plug and saw can be hot.
Troubleshooting Common Hole Saw Problems
Even with the best intentions, you might run into a snag. Here are solutions to common issues:
| Problem | Cause | Solution |
|---|---|---|
| Hole Saw Not Cutting / Slow Cutting | Dull teeth, wrong saw type for material, insufficient drill speed/power, forcing the cut. | Ensure you have the correct hole saw type. Sharpen or replace dull saws. Use appropriate drill speed and pressure. Let the tool do the work. Use lubricant for metal/tile. |
| Material Chipping or Blowout | Drilling too fast on exit, forcing the cut, wrong saw type. | Slow down as you near the exit. Support the back of the material if possible. Use a pilot hole if needed for smoother entry. For wood, consider scoring the exit side or using painter’s tape. |
| Hole Saw Wandering on Start | Pilot bit not centered, no pilot hole started, slippery surface. | Use a center punch on metal. Ensure the pilot bit is perfectly centered. For very smooth surfaces, you can create a small starter notch with a knife or file. |
| Drill Overheating | Cutting too fast, prolonged use without breaks, insufficient cooling (metal/tile). | Reduce drill speed. Take breaks to let the drill cool down. Use lubricant/water for metal and diamond grit saws. Ensure the hole saw isn’t binding. |
| Hole Saw Binding or Stalling | Cutting too fast, forcing the cut, plugged with debris, material too thick. | Slow down. Back out the saw periodically to clear debris. Ensure you’re using a powerful enough drill for the material. |
Maintaining Your Hole Saws for Longevity
Proper care ensures your hole saws perform well and last longer:
- Clean After Each Use: Remove any wood plugs, metal shavings, or debris from inside the hole saw and the arbor threads. A brush or compressed air works well.
- Lubricate Threads: Apply a small amount of oil to the arbor threads to prevent seizing and make it easier to change saws.
- Store Properly: Keep hole saws in their original case or a dedicated toolbox to protect the teeth from damage. Avoid storing them loose with other metal tools where they can get chipped or dulled.
- Inspect Regularly: Before each use, check the teeth for damage, wear, or dullness. If teeth are broken or significantly worn, it’s time for a new hole saw.
- Sharpening (Limited): While professional sharpening services exist for some types, most DIYers find it more economical to replace bi-metal and carbide saws when they become dull. Diamond grit saws cannot be sharpened in the traditional sense; their cutting ability diminishes as the diamond particles wear down.
For more on tool maintenance, resources like Family Handyman offer great tips on keeping your arsenal in top condition.
FAQ: Your Hole Saw Questions Answered
Q1: Can I use a hole saw with my cordless drill?
A1: Yes, but ensure your cordless drill has enough power (torque) and a fully charged battery, especially for harder materials. Corded drills often provide more consistent power for demanding tasks.
Q2: How do I prevent wood from splintering when the hole saw exits?
A2: Slow down your drill speed significantly as you approach the exit. You can also try applying painter’s tape to the exit side of the wood to help hold the fibers together, or score the exit line with a utility knife before cutting.
Q3: What is the pilot bit for?
A3: The pilot bit is the small drill bit in the center of the arbor. Its job is to guide the hole saw and prevent it from wandering off-center as you start cutting.
Q4: How do I cut a hole in tile?
A4: Use a diamond grit hole saw specifically designed for tile. Start at a slight angle to create a notch, then bring the saw to a perpendicular position. Use plenty of water for cooling and lubrication, and apply light pressure at a moderate speed.
Q5: My hole saw is getting really hot. What should I do?
A5: Overheating can damage the hole saw teeth and the material. Slow down your drilling speed, take breaks to let the tool cool, and use a lubricant or water for metal and tile cutting. Ensure the hole saw isn’t binding in the material.
Q6: How do I remove the cut-out plug?
A6: Most hole saws have a spring-loaded mechanism or a slot in the back. You can usually push the plug out from the back with your finger or a screwdriver. Sometimes, a gentle tap on the arbor with a hammer will dislodge it.
Conclusion: Cut with Confidence!
You’ve now got the knowledge to wield a hole saw like a pro! Remember, choosing the right type of hole saw for your material is the first and most important step. Always prioritize safety by wearing your protective gear and securing your workpiece. Start slow, let the tool do the work, and don’t be afraid to use lubricants or water when needed.
With a little practice and by following these tips, you’ll be cutting clean, precise holes in no time, tackling projects that once seemed out of reach. So grab your drill, select the right hole saw, and get ready to make some perfectly round magic happen!