
Learn how to wire an air compressor pressure switch safely and effectively. This guide provides clear, step-by-step instructions for DIYers to ensure proper function and longevity of your air compressor system.
Are you staring at a tangle of wires and a new pressure switch for your air compressor, feeling a bit overwhelmed? You’re not alone! Many of us face this when it’s time to replace or upgrade this crucial component. A properly wired pressure switch is the brain of your air compressor, telling it when to turn on and off to maintain your desired air pressure. Getting it wrong can lead to frustrating performance issues or even damage to your equipment. But don’t worry, with a little guidance, you can tackle this yourself. We’ll walk through the process, making it simple and straightforward, so you can get back to using your compressor with confidence.
Why Your Air Compressor Needs a Pressure Switch
Think of the pressure switch as the thermostat for your air compressor. It monitors the air pressure inside the tank. When the pressure drops below a set point (the “cut-in” pressure), it signals the motor to turn on and start pumping air. Once the pressure reaches another set point (the “cut-out” pressure), it tells the motor to shut off, preventing over-pressurization and saving energy. This simple, yet vital, component protects your compressor from damage and ensures you always have air ready when you need it.
Understanding Your Air Compressor Pressure Switch
Before we dive into wiring, let’s get familiar with the star of our show. Air compressor pressure switches come in various forms, but most share common features.
Key Components of a Pressure Switch:
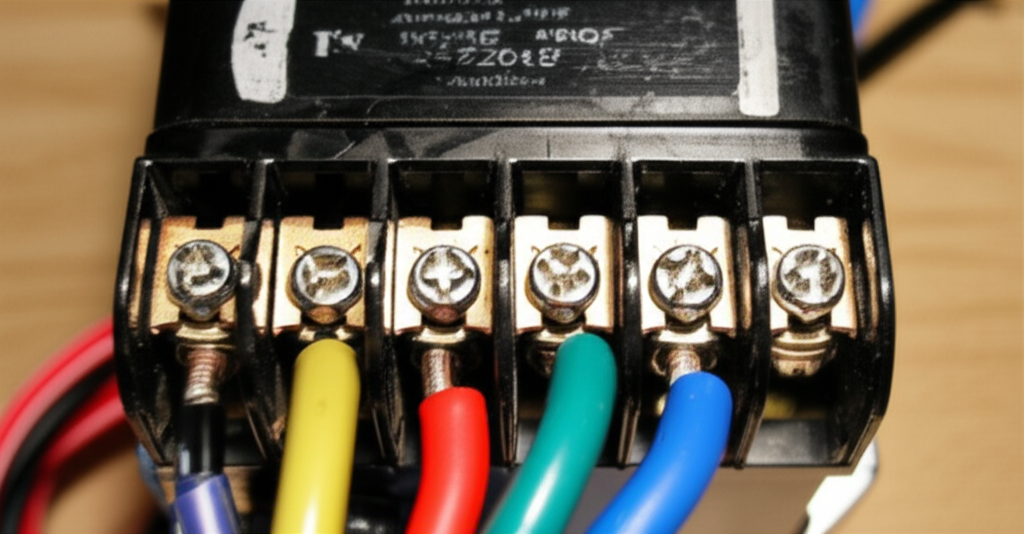
Terminals: These are the connection points for your wires. You’ll typically see screw terminals or spade connectors.
Pressure Adjustment Screws: These allow you to set the cut-in and cut-out pressures. Usually, there’s a larger screw for the cut-out pressure and a smaller one for the differential (the difference between cut-in and cut-out).
Lever or Button: This is often used to manually turn the compressor on or off, or to reset the overload protector if it trips.
Unloader Valve Port: Many switches have a port that connects to an unloader valve. This valve releases a small amount of air when the compressor shuts off, making it easier for the motor to restart against no load.
Safety First: Essential Precautions
Working with electrical components and pressurized air requires a serious commitment to safety. Always remember these crucial steps before you begin:
Disconnect Power: Absolutely the most important step. Ensure the air compressor is unplugged from the power source. Double-check that it’s not accidentally switched on.
Depressurize the Tank: Safely bleed all the air pressure from the tank. Open a drain valve or a connected air tool until no air is escaping.
Wear Safety Gear: Safety glasses are a must to protect your eyes from any stray debris or dust. Gloves can also be helpful.
Read the Manual: Always refer to your air compressor’s specific manual and the pressure switch manufacturer’s instructions. They will have model-specific details.
Know Your Voltage: Ensure the new pressure switch is rated for the voltage and amperage of your air compressor. Using an incompatible switch can be dangerous and damage your equipment.
Tools You’ll Need
Gathering the right tools beforehand will make the job much smoother.
Screwdriver Set: You’ll likely need Phillips and flathead screwdrivers for terminal screws and mounting bolts.
Wire Strippers/Cutters: For preparing the ends of the wires.
Pliers: Needle-nose pliers are useful for manipulating wires and holding small screws.
Multimeter (Optional but Recommended): To test for voltage and continuity, ensuring everything is wired correctly and safely.
New Pressure Switch: Make sure it’s compatible with your compressor.
Electrical Tape or Wire Nuts: For securing connections if necessary.
How to Wire an Air Compressor Pressure Switch: A Step-by-Step Guide
Now, let’s get down to business. This process involves connecting the electrical power to the switch and then connecting the switch to the motor.
Step 1: Identify the Existing Wiring (If Replacing)
If you’re replacing an old switch, take a clear picture of how the wires are currently connected. Note which wire goes to which terminal. This is your best reference.
Step 2: Remove the Old Pressure Switch
Disconnect Wires: Carefully loosen the screws on the terminals and remove the wires. If you didn’t take a picture, label each wire with tape before disconnecting.
Unscrew the Switch: Locate the mounting screws or nuts holding the old pressure switch in place and remove them.
Remove Unloader Line: If your switch has an unloader valve connection, gently disconnect the small copper or plastic tubing.
Step 3: Mount the New Pressure Switch
Position the New Switch: Place the new pressure switch in the same location as the old one.
Secure the Switch: Fasten it using the mounting screws or bolts. Ensure it’s snug but don’t overtighten, which could crack the housing.
Connect Unloader Line: Attach the unloader line to the designated port on the new switch.
Step 4: Connect the Electrical Wires
This is where we wire it up. Most basic single-phase air compressor pressure switches have four main terminals:
Line 1 (L1) / Incoming Power: This is where the main power from your electrical cord or circuit enters the switch.
Line 2 (L2) / Incoming Power: This is the other incoming power line.
Motor 1 (M1) / To Motor: This wire goes to the compressor motor.
Motor 2 (M2) / To Motor: This is the other wire going to the compressor motor.
Some switches might have additional terminals for overload protection resets or other functions. Always consult your switch’s diagram.
Here’s a common wiring scenario for a single-phase compressor:
| Terminal on Switch | Wire Source | Purpose |
| :—————– | :——————————————- | :————————————————————————- |
| L1 | Incoming power from electrical cord/circuit | Carries one leg of the main power supply. |
| M1 | Connected to L1 terminal | Carries power to the motor when the switch is closed. |
| L2 | Incoming power from electrical cord/circuit | Carries the second leg of the main power supply (often neutral). |
| M2 | Connected to L2 terminal | Carries power to the motor when the switch is closed. |
| (Optional) Overload | Often wired in series with L1 or L2 | Connects to the motor’s thermal overload protector reset button. |
Wiring Steps:
1. Incoming Power: Connect the two wires from your electrical power source (the cord that plugs into the wall or the wiring from your circuit breaker) to the L1 and L2 terminals. Typically, one is hot and the other is neutral. Ensure you connect them securely to the screw terminals.
2. Motor Power: Connect the two wires that lead to your compressor motor to the M1 and M2 terminals. Again, ensure these connections are tight.
3. Overload Protection (If applicable): If your switch has a terminal for the overload protector, connect the wire from the motor’s overload reset button to this terminal. The other side of the overload protector is usually wired in series with one of the power leads. Refer to your specific switch’s wiring diagram.
Important Note on Polarity: For most standard AC power, the L1 and L2 connections are interchangeable in terms of function (they both carry power). However, if your compressor motor has specific wiring requirements or if you have a capacitor start motor, consult the motor’s wiring diagram. The M1 and M2 connections are specific to how the motor is designed to run.
Step 5: Double-Check Your Connections
Before restoring power, meticulously check every connection.
Are all screws tight?
Are there any loose strands of wire that could touch other terminals?
Is the wiring diagram you followed correct for your switch and compressor?
If you used wire nuts, are they secure?
Step 6: Test the Pressure Switch
1. Restore Power: Plug the compressor back in or turn on the circuit breaker.
2. Listen and Watch: The motor should start if the tank pressure is low.
3. Monitor Pressure: Let the compressor run and build pressure. Listen for the distinct click as the pressure switch cuts out and shuts off the motor at the desired cut-out pressure.
4. Check for Leaks: Listen for any air leaks around the switch or unloader valve.
5. Test Cut-In: Wait for the pressure to drop. The switch should automatically turn the motor back on at the cut-in pressure.
Step 7: Adjust Pressure Settings (If Needed)
Your new pressure switch will have factory settings, but you might want to adjust them.
Cut-Out Pressure: Usually adjusted with the larger screw. Turning it clockwise increases pressure; counter-clockwise decreases it.
Differential Pressure: Adjusted with the smaller screw. This determines the pressure difference between when the compressor turns on and off. Turning it clockwise increases the differential.
Important Considerations for Adjustment:
Manufacturer Recommendations: Always check your air compressor manual for recommended pressure ranges. Exceeding the tank’s maximum rated pressure can be extremely dangerous.
Tool Requirements: Different air tools have different optimal pressure requirements. For example, impact wrenches often need higher pressure than spray guns.
Motor Strain: Setting the cut-out pressure too high can put excessive strain on the motor and may cause it to overheat or trip its thermal overload.
Tank Size: Larger tanks can maintain pressure longer, so the differential might be set wider.
A common setting for many home compressors is a cut-in pressure of around 95 PSI and a cut-out pressure of 125 PSI, with a differential of 30 PSI. However, this can vary significantly.
Troubleshooting Common Issues
Even with careful wiring, you might encounter a hiccup. Here are a few common problems and how to fix them:
Compressor Won’t Start:
Check power supply.
Ensure all connections are tight.
Verify the pressure in the tank isn’t already above the cut-out setting.
Test the switch for continuity with a multimeter (with power OFF!).
Compressor Runs Continuously:
Check the unloader valve connection – a leak here can prevent pressure buildup.
The pressure switch might be faulty and not opening the circuit.
Ensure the cut-out pressure isn’t set too high for the switch’s rating.
Compressor Cycles Too Frequently:
The differential pressure might be set too low. Adjust the smaller screw.
Check for air leaks in the system.
Compressor Doesn’t Shut Off:
The pressure switch is likely faulty and needs replacement.
Ensure the pressure isn’t exceeding the maximum safe operating pressure for the tank.
Understanding Pressure Switch Specifications
When selecting a new pressure switch, pay attention to these key specs:
Voltage Rating: Must match your compressor’s power supply (e.g., 110V, 120V, 220V, 240V).
Amperage Rating: Must be equal to or greater than the motor’s running amperage. Overloading the switch can cause it to fail or become a fire hazard.
Pressure Range: The minimum and maximum pressures the switch can accurately control. Ensure this range is suitable for your needs and compressor.
Differential: The difference between cut-in and cut-out pressures.
Unloader Port Size: If your compressor uses an unloader valve, ensure the port size matches.
When to Call a Professional
While many pressure switch replacements are straightforward DIY tasks, there are times when seeking professional help is the best course of action.
Uncertainty: If you’re ever unsure about any step or the wiring diagram, it’s safer to consult a qualified electrician or appliance repair technician.
Complex Systems: For larger industrial compressors or those with more intricate electrical controls, professional expertise is highly recommended.
Persistent Problems: If you’ve followed all the steps and are still experiencing issues, a professional can diagnose underlying problems with the motor, capacitor, or other components.
Frequently Asked Questions About Air Compressor Pressure Switch Wiring
Here are some common questions beginners have when tackling this project:
What happens if I wire the pressure switch incorrectly?
Wiring it incorrectly can lead to the compressor not running at all, running continuously, cycling erratically, or even posing a safety hazard. In severe cases, it could damage the motor or the pressure switch itself.
Can I use a pressure switch with a higher amperage rating?
Yes, using a pressure switch with a higher amperage rating than your motor requires is generally safe and often recommended, as it provides a greater safety margin. However, never use one with a lower rating.
Do I need to worry about the ground wire when wiring the pressure switch?
Yes, the ground wire is crucial for safety. It typically connects to the metal casing of the pressure switch and the compressor frame, providing a path for fault current to safely dissipate in case of a short circuit, preventing electric shock.
What is the purpose of the unloader valve connection on the pressure switch?
The unloader valve connection allows a small amount of air to escape from the compressor head when the motor shuts off. This reduces the back pressure, making it easier for the motor to start up again the next time it needs to build pressure.
How do I know which terminals are L1, L2, M1, and M2 on my switch?
Most pressure switches have these terminals clearly marked. If not, consult the manufacturer’s diagram that came with the switch or look for labels on the switch body. Often, L1 and L2 are grouped together, and M1 and M2 are grouped together.
Can I adjust the pressure settings on any pressure switch?
Most air compressor pressure switches are adjustable. They will have screws to set the cut-out pressure and the differential pressure. Always refer to the switch’s manual for specific adjustment instructions and recommended ranges.
Conclusion
Tackling the wiring of your air compressor pressure switch might seem daunting at first, but by following these steps and prioritizing safety, you can successfully get your compressor back in working order. Remember to always disconnect power, depressurize the tank, and double-check your connections. Understanding the role of the pressure switch and how it interacts with your compressor’s motor is key to ensuring efficient and safe operation. With a little patience and attention to detail, you’ll have your air compressor running like a champ, ready for all your DIY projects and tasks. Happy compressing!