
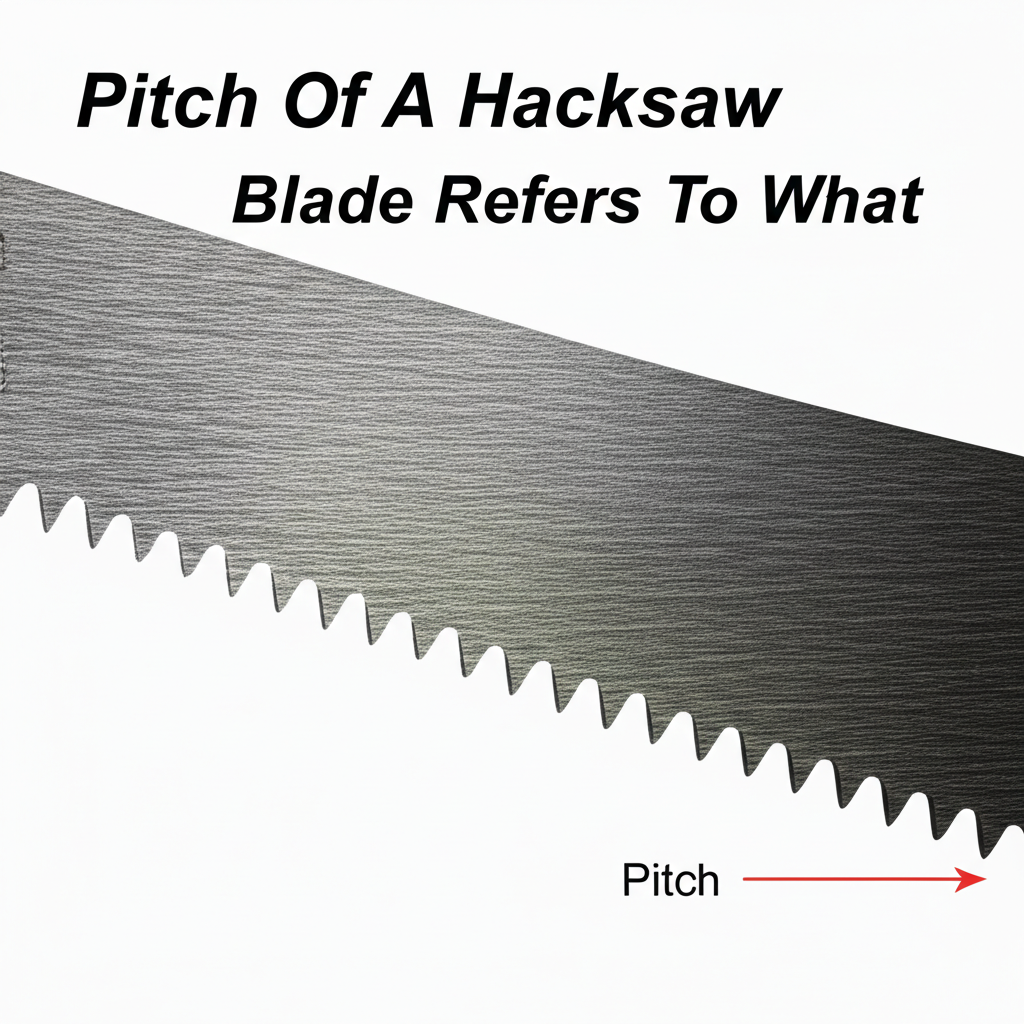
The pitch of a hacksaw blade refers to the number of teeth per inch (TPI). This crucial measurement determines how effectively the blade cuts different materials. Choosing the right TPI is key to achieving clean, efficient cuts and preventing frustration with your DIY projects.
Hey there, DIY enthusiasts! Samuel H. Murphy here from Capische, your friendly guide to all things cutting tools. Ever grabbed a hacksaw, ready to tackle a project, only to find yourself staring at a pile of blades, each looking a bit different? You might have noticed some have teeth packed in tight, while others have them spread out more. This difference, the spacing of those tiny teeth, is a big deal! It’s what we call the “pitch” of the blade, and understanding it can save you a whole lot of hassle. Getting it wrong can lead to jagged cuts, broken blades, or even injuries. But don’t worry! We’re going to break down exactly what the pitch of a hacksaw blade refers to, why it matters, and how to pick the perfect one for your next job. Let’s get cutting!
What Exactly is Hacksaw Blade Pitch?
At its core, the pitch of a hacksaw blade is a simple concept: it’s the measurement of how many teeth are on the blade within a one-inch section. We express this as “teeth per inch,” or TPI. So, a blade with a pitch of 18 TPI has 18 teeth packed into every inch of its cutting edge.
Think of it like this: the more teeth you have packed into that inch, the finer the cut will be. Conversely, fewer teeth spread further apart mean a coarser, more aggressive cut. This might sound straightforward, but the material you’re cutting makes all the difference in which pitch is best.
Why Does Hacksaw Blade Pitch Matter So Much?
Choosing the right TPI isn’t just about making a cut; it’s about making the best cut for the job. Using the wrong pitch can lead to several problems:
- Rough Cuts: A blade with too few teeth for a material can leave a very jagged, uneven edge.
- Blade Damage: If the teeth are too fine for a soft material, they can clog up and break off easily.
- Slow Cutting: Using a blade with too many teeth on a thick, hard material will make the cutting process incredibly slow and difficult.
- Safety Hazards: A blade that binds or breaks unexpectedly can cause injury.
The goal is to have the right amount of material being removed by each tooth, without overloading the blade or leaving too much material behind for the next tooth to handle. It’s a delicate balance that the TPI helps us achieve.
Understanding the Different Hacksaw Blade Pitches
Hacksaw blades come in a range of TPIs, typically falling into three main categories: coarse, medium, and fine. Each is designed for specific types of materials and cutting tasks.
Coarse Pitch Blades (14-18 TPI)
These blades have fewer teeth per inch, meaning the teeth are larger and spaced further apart. They are designed for aggressive cutting and are best suited for:
- Thick, soft metals: Such as aluminum, copper, and brass.
- Thick-walled tubing and pipes.
- Cutting larger stock material.
When you use a coarse blade on softer metals, the larger gullets (the space between teeth) help clear away the material chips efficiently, preventing the blade from clogging and binding. Trying to cut thin metal with a coarse blade would result in very rough, torn edges.
Medium Pitch Blades (24-28 TPI)
These are often considered the “all-around” or general-purpose blades. They offer a good balance between cutting speed and finish quality, making them versatile for a wide range of materials and thicknesses:
- Medium-thick metals: Like steel, iron, and mild steel.
- Plastics.
- Wood (though specialized wood saws are often better).
A 24 TPI blade is a common choice for many DIYers because it can handle a variety of common tasks without needing to switch blades constantly. They provide a reasonably smooth cut on most materials you’d encounter in a home workshop.
Fine Pitch Blades (32+ TPI)
These blades have the most teeth per inch, meaning the teeth are very small and closely spaced. They are ideal for making very precise, clean cuts on harder or thinner materials:
- Thin-walled metal tubing.
- Sheet metal.
- Hardened steel.
- Delicate plastics.
The fine teeth create smaller chips and leave a smoother finish. Using a fine-pitch blade on thick, soft metal would be incredibly slow and inefficient, as the fine teeth would clog up almost immediately.
The Golden Rule of Hacksaw Pitch
Here’s a simple, proven rule to help you choose the right TPI for any material:
Always ensure that at least two, and preferably three, teeth are in contact with the material you are cutting at any given time.
Let’s break this down with a visual example:
| Material Thickness | Recommended TPI | Why it Works |
|---|---|---|
| Very Thin (e.g., sheet metal, thin-walled tubing) | 32 TPI or higher | Many small teeth engage the thin material, preventing snagging and providing a smooth cut. |
| Medium (e.g., standard steel rod, pipe) | 24-28 TPI | A good balance for most common metals, allowing for efficient material removal without clogging. |
| Thick (e.g., thick aluminum stock, large pipes) | 14-18 TPI | Fewer, larger teeth with wider gullets clear chips effectively from thicker, softer materials. |
Imagine you’re cutting a thin piece of metal. If you use a coarse blade (say, 18 TPI), only about half a tooth might be touching the metal at any one time. This means the force is concentrated on that tiny section, which can easily lead to the teeth skipping over the material, tearing it, or breaking off.
Now, switch to a fine blade (say, 32 TPI). You’ll have multiple teeth engaged with that thin metal. Each tooth takes a smaller bite, distributing the force and ensuring a smooth, controlled cut. The gullets between these fine teeth are small, which is perfect for the small chips produced by thin materials.
Conversely, if you try to cut a thick piece of aluminum with a 32 TPI blade, you’ll have dozens of tiny teeth trying to remove a lot of material. The small gullets will quickly fill with aluminum shavings, causing the blade to bind, overheat, and potentially break. A coarse 18 TPI blade, with its larger teeth and wider gullets, will easily clear those shavings and cut efficiently.
How to Identify Hacksaw Blade Pitch
You can usually find the TPI of a hacksaw blade printed directly on the blade itself, often near the end where it mounts into the hacksaw frame. Look for a number followed by “TPI” or simply a number that corresponds to the common ranges (14, 18, 24, 28, 32).
If the marking is worn off or difficult to see, you can always count the teeth in a one-inch section of the blade yourself. Just be careful not to cut yourself!
Tools You Might Need (Beyond the Hacksaw)
While a hacksaw is the star, a few other items can make your cutting experience smoother and safer:
- Safety Glasses: Always protect your eyes from flying debris.
- Work Gloves: For a better grip and protection from sharp edges.
- Measuring Tape or Ruler: To mark your cut line accurately.
- Marker or Pencil: To draw your cut line.
- Bench Vise or Clamps: To securely hold your workpiece. This is crucial for safety and accuracy. A shaky workpiece is a recipe for disaster. For tips on securing your work, check out resources from organizations like OSHA on workplace safety, which emphasizes proper material securing.
- File: For deburring the cut edge if needed.
Step-by-Step: Using Your Hacksaw Correctly
Now that you know about pitch, let’s walk through how to use your hacksaw like a pro:
Step 1: Select the Right Blade
Refer back to our TPI guide. What are you cutting? Choose the blade with the TPI that best matches the material’s thickness and hardness. Remember the rule: at least two teeth in contact!
Step 2: Mount the Blade Correctly
Open the hacksaw frame by twisting the tensioning knob. Insert the blade with the teeth pointing away from the handle (this is the direction of the cut). Ensure the pins on the end of the blade seat firmly into the slots on the hacksaw frame. Tighten the tensioning knob until the blade is taut, like a guitar string. A loose blade will bend and break easily.
Step 3: Secure Your Workpiece
Use a bench vise or sturdy clamps to hold your material firmly in place. The workpiece should be positioned so that the cut line is just past the edge of the vise or clamp, allowing clearance for the blade to pass through without hitting the vise. A stable workpiece is paramount for both safety and a clean cut.
Step 4: Mark Your Cut Line
Use a marker or pencil to clearly mark the line where you want to cut. For extra precision, you can use a file to create a small notch on your mark. This notch will act as a guide for the blade to start.
Step 5: Start the Cut
Place the hacksaw blade on your marked line. To get started, you can use your thumb (carefully!) as a guide to keep the blade from slipping. Make a few gentle, short strokes with the blade to create a small groove, or “kerf.” This groove will help guide the rest of your cut.
Step 6: Saw with Proper Technique
Now, it’s time to saw! Use long, steady strokes. Apply gentle pressure on the forward stroke (when the teeth are cutting) and lift the pressure slightly on the backward stroke. Let the blade do the work. Avoid forcing the saw; this can break the blade or create a crooked cut.
Keep the hacksaw frame relatively perpendicular to the workpiece. Aim to use the full length of the blade for each stroke. This distributes wear evenly and makes cutting more efficient.
Step 7: Finishing the Cut
As you get close to the end of your cut, reduce the pressure and slow down your strokes. This prevents the piece from breaking off suddenly, which can leave a rough edge or damage the workpiece.
Step 8: Deburr and Clean Up
Once the cut is complete, use a file to smooth any rough edges or burrs. Wear your safety glasses while filing, as small metal filings can fly off. Clean up your workspace.
Common Mistakes to Avoid
Even with the right blade, a few common errors can trip up beginners:
- Using the wrong TPI: We’ve covered this, but it’s worth repeating!
- Not tensioning the blade properly: Too loose, and it bends and breaks. Too tight, and it can snap.
- Cutting with teeth pointing the wrong way: Teeth must point away from the handle.
- Forcing the saw: Let the blade and your steady strokes do the work.
- Not securing the workpiece: A wobbly piece leads to bad cuts and potential injury.
- Not wearing safety glasses: A must-have for any cutting task.
When to Use a Different Saw
While the hacksaw is incredibly versatile, it’s not always the best tool for every job. Sometimes, another saw might be a better choice:
- Woodworking: For most wood cutting, a handsaw (like a crosscut or rip saw), a jigsaw, or a circular saw will be much more efficient and provide cleaner results.
- Thick Metal Stock: For very thick metal bars or beams, a metal-cutting bandsaw or an angle grinder with a cut-off wheel might be necessary.
- Very Delicate Cuts: For intricate metalwork, a jeweler’s saw or a coping saw might be more appropriate.
Understanding the limitations of your tools is just as important as knowing how to use them. For more on selecting the right saw for wood, you can check out resources from woodworking experts like Popular Mechanics, which often cover the basics of various saw types.
Frequently Asked Questions (FAQ)
Q1: What does TPI stand for on a hacksaw blade?
A1: TPI stands for “Teeth Per Inch.” It tells you how many teeth are on one inch of the blade’s cutting edge.
Q2: Can I use a hacksaw blade on wood?
A2: While you can cut wood with a hacksaw, especially with a coarser blade (around 18-24 TPI), it’s not ideal. Hacksaw teeth are designed for harder materials and can leave a rough, splintered cut on wood. Specialized handsaws for wood will give you much better results.
Q3: How do I know if my hacksaw blade is too dull?
A3: A dull blade will require significantly more effort to cut, will produce a lot of heat, and will leave a rough, torn finish rather than a clean cut. If you find yourself really pushing hard and getting nowhere, it’s probably time for a new blade.
Q4: My hacksaw blade keeps breaking. What am I doing wrong?
A4: This is often due to a few common issues: the blade isn’t tensioned correctly (too loose), you’re using the wrong TPI for the material (too fine for thick metal, or too coarse for thin metal), you’re forcing the saw too hard, or the workpiece is not secured properly. Always ensure at least two teeth are in contact with the material.
Q5: Is there a difference between a hacksaw blade for metal and one for plastic?
A5: Yes, though often a medium-pitch blade (like 24 TPI) can handle both reasonably well. For very hard plastics, a finer pitch (like 32 TPI) might give a cleaner cut. For very soft or flexible plastics, you might want to experiment, but generally, a 24 or 28 TPI blade is a good starting point.
Q6: How long should a hacksaw blade last?
A6: The lifespan of a hacksaw blade depends heavily on the material being cut, how often you use it, and your technique. A blade used for occasional home repairs might last for years, while one used daily in a professional setting might need replacing weekly or monthly. If it’s not cutting effectively anymore, it’s time for a new one.
Conclusion
So there you have it! The pitch of a hacksaw blade, measured in Teeth Per Inch (TPI), is the key to unlocking efficient and clean cuts. By understanding whether you need a coarse, medium, or fine-toothed blade, and by following the simple rule of keeping at least two teeth in contact with your material, you’re well on your way to mastering the hacksaw.
Remember, choosing the right blade isn’t just about the tool; it’s about respecting the material and the process. With the correct TPI, proper tension, a secure workpiece, and a steady hand, you can tackle a wide range of cutting tasks with confidence. Don’t be afraid to experiment a little with different TPIs on scrap pieces to get a feel for how they perform. Happy cutting, and may your projects be smooth and successful!