
A 24 TPI hacksaw blade is your go-to for cutting medium-hard metals like steel pipe, conduit, and threaded rod. It offers a good balance of speed and a clean finish for many common DIY metalworking tasks.
Ever stared at a pile of metal and wondered which hacksaw blade to grab? It’s a common puzzle for DIYers! Using the wrong blade can lead to frustratingly slow cuts, jagged edges, or even a broken blade. But don’t worry, we’re here to demystify the world of hacksaw blades, specifically the versatile 24 TPI (Teeth Per Inch) blade. With this guide, you’ll be cutting with confidence, achieving cleaner results, and feeling like a pro in no time. Let’s get those projects moving!
Understanding Hacksaw Blades: The TPI Key
Hacksaws are fantastic tools for cutting various materials, but their real magic lies in the blade. The most important number to look at on a hacksaw blade is its TPI, or Teeth Per Inch. This tells you how many teeth are packed into every inch of the blade. Think of it like this: more teeth mean finer cuts, and fewer teeth mean faster, rougher cuts.
Why does this matter? Different materials need different tooth counts to cut effectively and cleanly. Using a blade with too few teeth on a thin material will cause the teeth to snag and tear. Conversely, using a blade with too many teeth on a thick material will clog up and cut incredibly slowly.
For a beginner, understanding TPI is the first big step to successful cutting. It’s the secret sauce to avoiding frustration and getting the job done right.
What Does 24 TPI Mean?
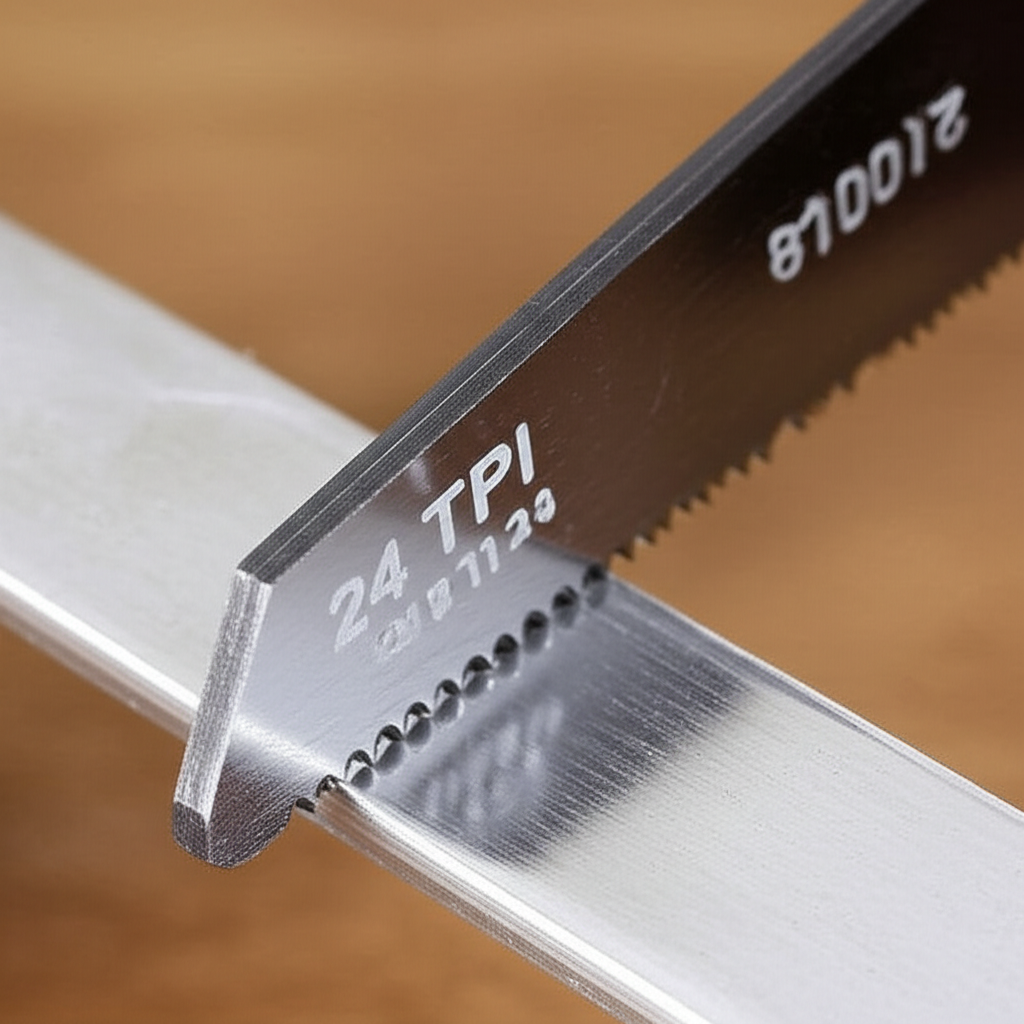
A 24 TPI hacksaw blade has 24 teeth packed into each inch of its cutting edge. This specific tooth count places it squarely in the “all-purpose” category for metal cutting. It’s a fantastic middle ground, not too coarse and not too fine.
Imagine the teeth. On a 24 TPI blade, you’ll see a consistent, relatively fine pattern of teeth. This design allows the blade to bite into the material effectively without getting bogged down, while also producing a reasonably smooth finish. It’s the workhorse blade for many common metal cutting jobs around the house or in the workshop.
The general rule of thumb for TPI is to ensure that at least two, and ideally three, teeth are in contact with the material you’re cutting at any given time. For a 24 TPI blade, this makes it ideal for materials that are about 1/8 inch thick and up.
What Is a 24 TPI Hacksaw Blade Used For?
So, what exactly can you tackle with a 24 TPI hacksaw blade? This is where it shines! It’s your go-to for a variety of common tasks involving medium-hard metals and some plastics. Here’s a breakdown:
- Metal Pipes: Cutting through copper, steel, or aluminum pipes for plumbing repairs or projects. This includes things like EMT conduit for electrical work or galvanized steel pipe for DIY furniture.
- Threaded Rods: Trimming threaded rods to custom lengths for various assembly or hanging applications.
- Metal Stock: Cutting metal bars, rods, and angles that are roughly 1/8 inch to 1/2 inch thick.
- Sheet Metal: While thinner sheet metal might benefit from a higher TPI, a 24 TPI blade can handle thicker gauge sheet metal effectively.
- Bolts and Screws: Cutting off rusted or stripped bolts and screws when they can’t be removed conventionally.
- Plastic Tubing and Rods: Many plastics, especially thicker PVC pipes or solid plastic rods, can also be cut cleanly with a 24 TPI blade.
Think of common household repairs or hobby projects. Need to shorten a metal shelf bracket? Cut a piece of electrical conduit? Trim a bolt? A 24 TPI blade is likely your best bet.
When to Choose a 24 TPI Blade vs. Other TPIs
Choosing the right TPI is crucial for efficiency and a clean cut. Here’s a quick comparison to help you decide:
| TPI (Teeth Per Inch) | Best For | Materials | Cut Quality | Cutting Speed |
|---|---|---|---|---|
| 14 TPI | Thick, hard metals | Thick steel, iron, aluminum (over 1/2 inch) | Coarse | Fast |
| 18 TPI | Medium-thick metals | Steel, aluminum, brass (1/4 inch to 1/2 inch) | Medium | Medium-fast |
| 24 TPI | Medium-hard metals & general purpose | Steel, aluminum, copper, brass (1/8 inch to 1/4 inch), thicker plastics | Good | Medium |
| 32 TPI | Thin metals & fine cuts | Thin steel, conduit, tubing, sheet metal, hard plastics | Fine | Slower |
As you can see, the 24 TPI blade sits comfortably in the middle. If you’re cutting something very thick and hard, like a large diameter steel pipe, you might opt for a 14 or 18 TPI blade for faster cutting. If you’re cutting very thin sheet metal or small-gauge wire, a 32 TPI blade will give you a much cleaner, snag-free cut.
For most home and hobbyist users, a 24 TPI blade is the most versatile and will handle the majority of metal cutting tasks you’ll encounter. It’s a great blade to have in your toolbox.
How to Use a Hacksaw with a 24 TPI Blade: A Step-by-Step Guide
Using a hacksaw effectively is all about technique. Don’t worry, it’s not complicated! Follow these steps, and you’ll be cutting like a seasoned pro in no time.
Step 1: Choose the Right Hacksaw Frame
Before you even touch a blade, make sure you have a sturdy hacksaw frame. Hacksaws come in different lengths (usually 10-inch or 12-inch blades). Ensure your frame is comfortable to hold and has an adjustable tensioning mechanism. A good hacksaw frame is essential for applying the correct pressure and keeping the blade straight.
Step 2: Install the Blade Correctly
This is a crucial step! Hacksaw blades have a “knock” or bend at each end to fit into the hacksaw frame. The teeth should always point away from the handle, in the direction you push the saw.
- Loosen the tension: Turn the wing nut or tensioning knob on the hacksaw frame to loosen the blade.
- Insert the blade: Place one end of the blade into the hook at the front of the frame. Then, place the other end into the slot at the back of the frame. Make sure the teeth are facing away from the handle.
- Tension the blade: Gradually tighten the wing nut. You want the blade to be taut, like a guitar string. A loose blade will bend, skip, and break easily. A common test is to flick the blade with your finger; it should make a slight “ping” sound. Don’t overtighten, as this can also break the blade.
Pro Tip: Blades are brittle. Handle them by the ends to avoid snapping them.
Step 3: Secure Your Workpiece
This is critical for safety and a clean cut. Your workpiece needs to be held firmly so it doesn’t move while you’re sawing.
- Use a vise: The best way to secure metal is in a vise. Clamp the material as close to the cut line as possible. This minimizes vibration and prevents the material from bending.
- Use clamps: If you don’t have a vise, use sturdy C-clamps or bar clamps to attach the material to a workbench or sturdy surface. Ensure the clamp is tight and the material won’t shift.
- Support long pieces: For long pipes or rods, use sawhorses or blocks to support the weight on both sides of the cut, preventing sag.
According to the Occupational Safety and Health Administration (OSHA), proper guarding and securing of workpieces are essential for preventing injuries in the workplace. While you might not be in a factory, these principles apply to your DIY projects too!
Step 4: Position Yourself and the Saw
Stand comfortably with your feet slightly apart for balance. Hold the hacksaw handle with one hand and the front of the frame with the other. Position the blade on your marked cut line.
Start the cut by placing the blade on the mark and drawing the saw back gently a few times. This creates a small groove, or “kerf,” that guides the blade. Some people like to start the kerf by using a file or a sharp object to create a small notch first.
Step 5: The Cutting Stroke
This is where the technique really comes in. You want to use long, smooth strokes, applying pressure on the forward stroke (when the teeth are cutting) and lifting slightly or applying very light pressure on the backward stroke.
- Forward Stroke: Push the saw forward with firm, steady pressure. Let the teeth do the work.
- Backward Stroke: As you pull the saw back, ease up on the pressure. This prevents the teeth from dulling or breaking on the return.
- Use the full blade: Extend your strokes to use as much of the blade’s length as possible. This distributes wear evenly and makes cutting more efficient.
- Maintain pressure: Aim for consistent pressure. Too little pressure will make cutting slow and cause the blade to skip; too much pressure can break the blade or damage the workpiece.
Think of it like this: You’re pushing the saw, not forcing it. Let the sharp teeth do the cutting.
Step 6: Finishing the Cut
As you get close to finishing the cut, the material will start to flex. To prevent the piece from breaking off suddenly and potentially damaging the cut edge or causing injury, ease up on the pressure. You can even switch to a lighter stroke or support the piece you are cutting off with your free hand (carefully!).
Step 7: Clean Up and Inspect
Once the cut is complete, carefully remove the blade from the workpiece. Inspect your cut. If there are any rough edges or burrs, you can smooth them down with a metal file. A file is another essential tool for any DIYer working with metal!
For more information on safe tool usage, you can refer to resources from organizations like the National Institute for Occupational Safety and Health (NIOSH), which provides valuable safety guidelines for hand tools.
Tips for Getting the Best Results with a 24 TPI Blade
Beyond the basic steps, a few extra tips can elevate your hacksawing game:
- Lubrication: For cutting harder metals or making many cuts, a little lubricant can go a long way. A drop of cutting oil or even WD-40 applied to the blade and cut line can reduce friction, keep the blade cooler, and help prevent clogging.
- Blade Angle: Try to keep the blade as perpendicular to the workpiece as possible. This ensures all teeth are engaged properly and leads to a straighter cut.
- Blade Tension: As mentioned, proper tension is key. A blade that’s too loose will bend and break. A blade that’s too tight can also snap. Find that sweet spot!
- Blade Storage: Store your blades carefully. Keep them in their original packaging or a blade organizer to prevent damage and keep the teeth sharp.
- Blade Wear: Hacksaw blades are consumables. When a blade starts to feel like it’s taking too much effort to cut, or the cuts are becoming rougher, it’s time to replace it.
When to Consider a Different Blade
While the 24 TPI blade is a fantastic all-rounder, there are times when another blade might be a better choice:
- Very Thin Metal (e.g., sheet metal, thin wire): For these materials, a 32 TPI blade is superior. It provides more teeth in contact with the thin material, preventing snagging and resulting in a much cleaner cut.
- Very Thick or Hard Metal (e.g., large diameter steel pipe, solid bar stock): For materials thicker than about 1/2 inch, or very hard metals, a 14 TPI or 18 TPI blade will cut faster and more efficiently. The fewer, larger teeth can remove material more quickly without clogging.
- Wood: While you can cut some plastics with a 24 TPI blade, it’s not suitable for wood. Wood requires a different type of blade, often with fewer teeth and a more aggressive tooth shape, designed specifically for wood.
Having a small assortment of blades (e.g., 18 TPI, 24 TPI, and 32 TPI) will equip you for a much wider range of projects.
Frequently Asked Questions (FAQ)
What is the difference between 18 TPI and 24 TPI hacksaw blades?
An 18 TPI blade has fewer, larger teeth per inch, making it better for cutting thicker metals (around 1/4 inch to 1/2 inch) faster. A 24 TPI blade has more, finer teeth, offering a good balance of speed and a cleaner finish for medium-thickness metals (around 1/8 inch to 1/4 inch).
Can I use a 24 TPI hacksaw blade on plastic?
Yes, you can use a 24 TPI blade on many types of plastic, especially thicker rods or pipes. For very thin or brittle plastics, a higher TPI blade (like 32 TPI) might provide a cleaner cut without chipping.
How do I know when my hacksaw blade is dull?
A dull blade will require significantly more effort to cut, will cut much slower, and the cuts will likely be rougher. If you find yourself really having to push hard or the blade seems to be “skipping” rather than cutting, it’s probably time for a new blade.
How do I store hacksaw blades safely?
It’s best to store hacksaw blades in their original packaging or a dedicated blade storage case. This protects the teeth from damage and prevents them from scratching other tools or surfaces, and also protects your hands.
Can I use a 24 TPI blade to cut bolts?
Absolutely! A 24 TPI blade is excellent for cutting through standard bolts and threaded rods, especially when you need to shorten them or remove a stubborn one.
What is the proper way to tension a hacksaw blade?
The blade should be taut, like a guitar string. You can test this by flicking it with your finger; it should make a slight “ping” sound. Overtightening can snap the blade, while undertightening will cause it to bend and break easily.
Conclusion
There you have it! You’ve learned that a 24 TPI hacksaw blade is your versatile, everyday hero for cutting a wide range of medium-hard metals and some plastics. By understanding TPI, properly installing and tensioning your blade, securing your workpiece, and using smooth, consistent strokes, you’re well on your way to achieving clean, efficient cuts every time.
Don’t be afraid to experiment a little with your technique. The more you use your hacksaw, the more comfortable and confident you’ll become. Remember, the right tool, used correctly, makes all the difference. So grab that 24 TPI blade, tackle that project, and enjoy the satisfaction of a job well done!