The drill bit size for plastic drywall anchors depends on the anchor size. Typically, you’ll use a drill bit that matches the anchor’s diameter. Check the anchor packaging for the exact size, but common sizes are 3/16″ or 1/4″ for standard anchors. Always pre-drill your holes to prevent wall damage and ensure a secure hold.
Ever stared at a wall, a drill in one hand, and a pile of drywall anchors in the other, wondering where to even begin? It’s a common DIY dilemma. Choosing the wrong drill bit size for your plastic drywall anchors can lead to stripped holes, cracked walls, and a whole lot of frustration. Don’t worry, though! This guide will walk you through everything you need to know, step by step. I’m Samuel H. Murphy, and I’ll help you avoid these pitfalls and get your projects done right the first time. Let’s dive in and make your next hanging project a success.
Understanding Drywall Anchors and Drill Bits
Before we get into the specifics, let’s clarify the basics. Drywall anchors are designed to provide a secure hold for screws in drywall, where screws alone often fail. Plastic drywall anchors, also known as wall plugs, are a popular choice for their ease of use and affordability. They expand within the drywall as you tighten the screw, creating a firm grip.
The drill bit, on the other hand, is the tool that creates the initial hole in the drywall. The correct size is crucial. Too small, and you risk damaging the wall or the anchor. Too large, and the anchor won’t grip properly, leaving your item wobbly or falling down. We’ll cover the exact sizes you need in the next section.
Choosing the Right Drill Bit Size: A Step-by-Step Guide
Getting the right drill bit size is the most critical step. Here’s a simple, step-by-step guide to ensure a perfect fit:
- Check the Anchor Packaging: This is your primary source of truth. The packaging of your plastic drywall anchors will almost always state the recommended drill bit size. This is usually printed in a small font, so grab your reading glasses if needed!
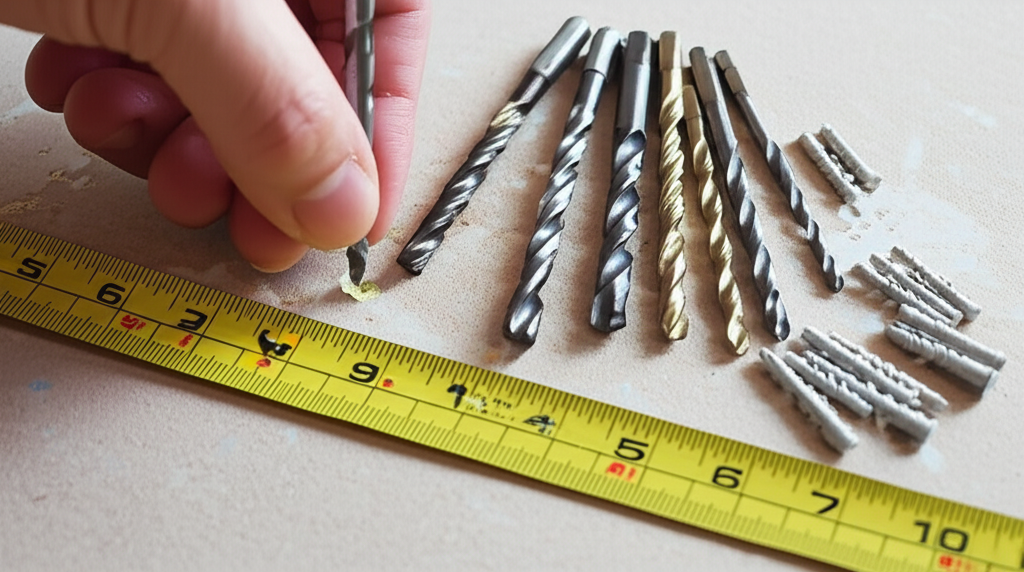
- Measure the Anchor (If Packaging is Missing): If you’ve lost the packaging, don’t panic. You can measure the diameter of the anchor itself. Use a ruler or a caliper for the most accurate measurement. This is the outer diameter of the anchor body.
- Match the Drill Bit Size: The drill bit size should generally match the outer diameter of the anchor. For example, if the anchor is 1/4 inch in diameter, use a 1/4 inch drill bit.
- Consider Anchor Type Variations: Some anchors have specific designs that might require slightly different drill bit sizes. Always defer to the packaging instructions when available.
- Test on Scrap Drywall: Before drilling into your wall, test the drill bit and anchor on a piece of scrap drywall. This helps you confirm the fit and get a feel for the process.
Common Drill Bit Sizes for Plastic Drywall Anchors
While the exact size depends on the anchor, here’s a handy table with common sizes for standard plastic drywall anchors:
| Anchor Size (Diameter) | Recommended Drill Bit Size | Common Uses |
|---|---|---|
| #4-#6 (Typically 3/16″) | 3/16″ | Lightweight items like picture frames, small shelves |
| #8 (Typically 1/4″) | 1/4″ | Medium-weight items like mirrors, larger shelves |
| #10 (Typically 5/16″) | 5/16″ | Heavier items, or items that need a stronger hold |
Important Note: These are general guidelines. Always double-check the anchor packaging for the most accurate information.
Tools You’ll Need
Besides the right drill bit and anchors, here’s a list of tools you’ll need to complete your project:
- Drill: A standard cordless drill is perfect for most DIY projects.
- Drill Bits: The correct size drill bit (as determined above).
- Drywall Anchors: Plastic drywall anchors of the appropriate size for your project.
- Screws: Screws that are compatible with your anchors and the item you are hanging. The screw length should be long enough to penetrate the anchor and extend into the item being hung.
- Level: To ensure your item is straight.
- Measuring Tape: To measure and mark the location of your holes.
- Pencil: To mark the location of your holes.
- Safety Glasses: To protect your eyes from debris.
Step-by-Step Guide to Installing Drywall Anchors
Now that you have all the tools and know the right drill bit size, let’s walk through the installation process:
- Mark the Spot: Using your measuring tape and pencil, mark the exact spot on the wall where you want to install the anchor. Make sure to check the level of your item before marking the spot.
- Drill the Hole: Place the drill bit perpendicular to the wall at your marked spot. Apply steady pressure and drill straight into the drywall. Drill to the depth recommended on the anchor packaging, or slightly deeper than the anchor’s length.
- Insert the Anchor: Push the plastic anchor into the drilled hole. If it doesn’t go in easily, you may need to gently tap it with a hammer. The anchor should sit flush with the wall surface.
- Insert the Screw: Place the item you are hanging against the wall, aligning it with the anchor. Insert the screw through the item and into the anchor.
- Tighten the Screw: Use a screwdriver or your drill (on a low setting) to tighten the screw. Don’t overtighten, as this can strip the anchor or damage the drywall. Stop when the item is secure.
- Test the Hold: Gently tug on the item to ensure it’s securely fastened. If it feels loose, you might need a larger anchor or a different type of anchor for heavier items.
Tips for Success
Here are some extra tips to help you achieve perfect results:
- Go Slow: When drilling, avoid rushing. Steady, even pressure is key.
- Use the Right Drill Speed: Start with a slower speed to prevent the drill bit from wandering. Increase the speed as needed.
- Keep it Straight: Ensure your drill is perpendicular to the wall to avoid angled holes.
- Avoid Stripping: Don’t overtighten screws, as this can strip the anchor.
- Choose the Right Anchor: For heavier items, consider using a different type of anchor, such as toggle bolts or self-drilling anchors. Check out resources like the Family Handyman for anchor recommendations.
- Inspect the Wall: Before drilling, check for any pipes, wires, or other obstructions behind the drywall.
Troubleshooting Common Problems
Even with the best preparation, things can go wrong. Here’s how to handle some common issues:
- Anchor Won’t Go In: The hole might be too small. Try using a slightly larger drill bit, or gently ream the hole with the drill bit.
- Anchor Spins in the Hole: The hole is too large. You may need to use a larger anchor or fill the hole with wood filler and re-drill.
- Screw Won’t Tighten: The anchor is stripped. Try a slightly larger screw or replace the anchor with a new one.
- Wall Cracks: You may have applied too much pressure when drilling or tightening the screw. Go slower next time, and consider pre-drilling a pilot hole if you are using a very large screw.
Alternative Anchor Types
While plastic drywall anchors are great for many projects, they aren’t always the best choice. Here are some alternative anchor types and when to use them:
- Toggle Bolts: Ideal for heavy items like shelves or cabinets. They provide a very strong hold but require a larger hole.
- Self-Drilling Drywall Anchors: These anchors have a sharp tip that allows them to be screwed directly into the drywall, eliminating the need for a pre-drilled hole. Great for lighter items.
- Molly Bolts: Similar to toggle bolts, but they expand behind the drywall as you tighten them. Good for medium-weight items.
- Threaded Drywall Anchors: These are often used for heavier items and offer a secure hold. They screw directly into the drywall.
Choosing the right anchor type is crucial for the safety and longevity of your project. For more in-depth information on various anchor types, visit resources like Lowe’s.
FAQ: Your Questions Answered
Here are some frequently asked questions about using drill bits and drywall anchors:
- Can I use a hammer drill for plastic drywall anchors?While you can use a hammer drill, it’s usually not necessary and can easily damage the drywall. A standard drill is sufficient and provides more control. Use the hammer drill for masonry or concrete.
- What if I don’t have the packaging for my anchors?Measure the anchor’s outer diameter and match it to a drill bit size. You can also find this information on the anchor itself or by searching online for the anchor’s specifications.
- Can I reuse plastic drywall anchors?It’s generally not recommended. They can lose their grip strength after being used once. For the best results, always use new anchors.
- What’s the best way to remove a stripped drywall anchor?You can try using a larger screw to see if it will grip. If that doesn’t work, remove the anchor with pliers or a screwdriver and fill the hole with wood filler. Let it dry, then re-drill and install a new anchor.
- How do I know if my wall is drywall?Drywall typically has a smooth, painted surface. If you’re unsure, you can gently tap the wall. Drywall will sound hollow. If you’re still unsure, you can drill a small pilot hole in an inconspicuous area to check the material.
- What if I hit a stud?If you hit a stud, you can simply screw directly into it, as it provides a much stronger hold than a drywall anchor. You may not need an anchor at all, depending on the item’s weight. You may need shorter screws.
- Is it okay to use a drill bit that is slightly smaller than the anchor?While it might seem like a good idea to ensure a tight fit, it can damage the drywall and make it difficult to insert the anchor. Always use the recommended drill bit size or slightly larger if the anchor is difficult to insert.
Conclusion
Congratulations! You now have the knowledge and confidence to choose the right drill bit size for your plastic drywall anchors and complete your hanging projects successfully. Remember to always check the anchor packaging, measure carefully, and take your time. By following these steps, you’ll avoid common frustrations and achieve professional-looking results. So grab your drill, gather your supplies, and get ready to hang those pictures, shelves, or whatever else you have in mind. Happy drilling!
“`