
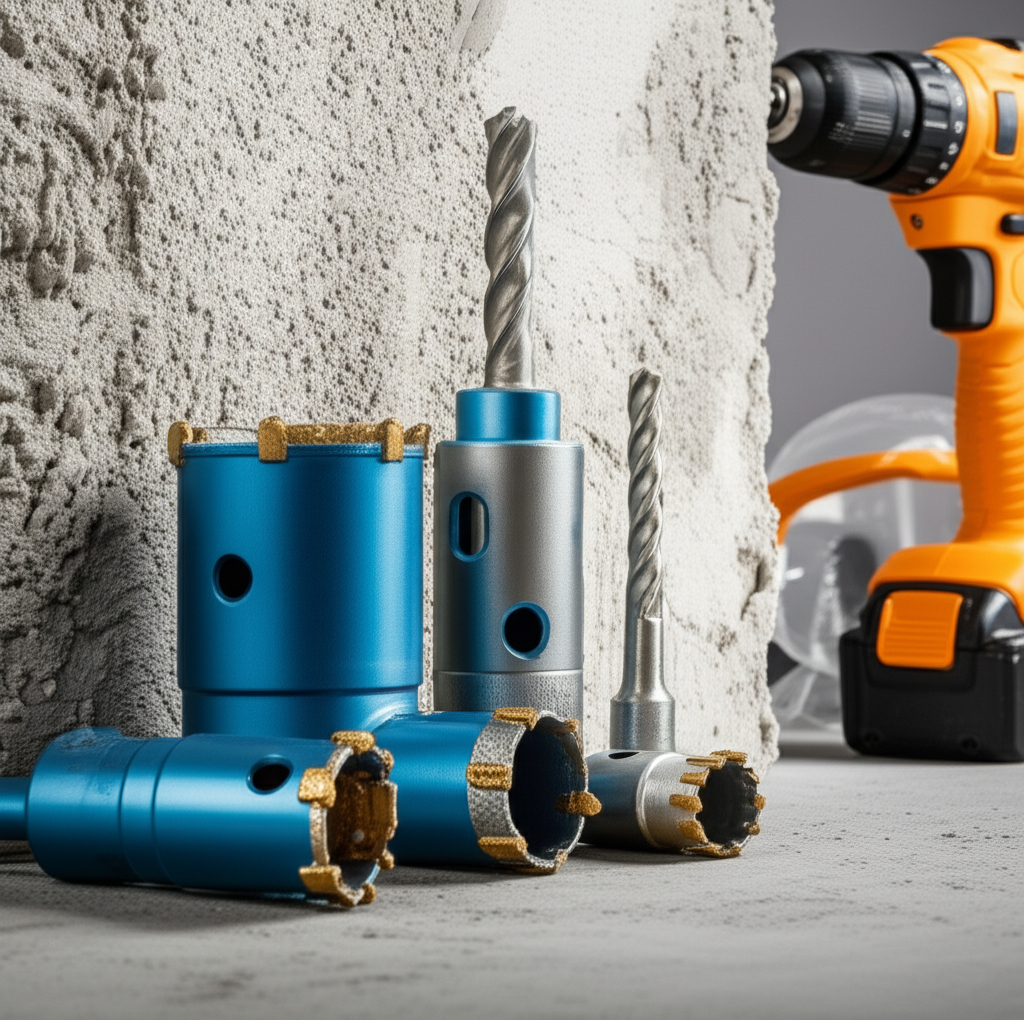
For cutting holes in stucco, a carbide-grit or diamond-grit hole saw is your best bet. These specialized hole saws are designed to handle abrasive materials like stucco, tile, and concrete, ensuring a clean cut without excessive wear on your tools. Avoid standard bi-metal or HSS saws, as they will dull quickly.
Working with stucco can be a bit tricky, can’t it? You’ve got a project in mind, maybe running some conduit or mounting a light fixture, and you need to make a clean hole. But when you look at hole saws, the options seem endless. Which one is tough enough for that gritty stucco surface? It’s a common question that can leave even seasoned DIYers scratching their heads. Don’t worry, though! I’m here to break down exactly what you need to know to choose the right hole saw for your stucco project. We’ll cover the best types, how to use them safely, and what to avoid, so you can get those holes drilled with confidence.
Understanding Stucco: The Gritty Truth
Before we dive into hole saws, let’s talk about stucco itself. Stucco is a cement-based plaster applied to the exterior of buildings. It’s made from a mix of cement, sand, and lime, often with water. This composition makes it incredibly durable and weather-resistant, which is great for your home’s exterior. However, that same hardness and gritty texture present a unique challenge for cutting tools.
Think of it like trying to cut through sandpaper with a regular knife – it’s going to wear down the blade fast. Stucco’s aggregate (the sand and cement particles) is abrasive. This means standard hole saws, typically made from bi-metal or high-speed steel (HSS), will struggle. Their teeth will dull rapidly, leading to slow cutting, overheating, and a messy, chipped hole. For stucco, you need a hole saw specifically engineered to tackle abrasive materials.
The Best Hole Saw Types for Stucco
When it comes to cutting through stucco, the key is to use a hole saw with an abrasive cutting edge rather than traditional teeth. This is where carbide-grit and diamond-grit hole saws shine.
1. Carbide-Grit Hole Saws
Carbide-grit hole saws are coated with small, hard carbide particles. These particles act like tiny grinding wheels, slowly but surely wearing away the material. They are an excellent choice for softer abrasive materials like stucco, plaster, and even some lighter tile.
- Pros:
- Effective on abrasive materials like stucco.
- More affordable than diamond-grit options.
- Good for occasional to moderate use.
- Cons:
- Can be slower than diamond-grit.
- May not be suitable for very hard or dense materials like thick ceramic or porcelain tile.
- Teeth can still wear down over time with heavy use.
2. Diamond-Grit Hole Saws
Diamond-grit hole saws are coated with industrial-grade diamond particles, the hardest known material. These are the heavyweights of abrasive cutting. The diamond particles grind through even the toughest materials, including dense ceramic tile, porcelain, glass, and of course, stucco.
- Pros:
- Superior cutting ability for very hard and abrasive materials.
- Longer lifespan when used for their intended purpose.
- Provides cleaner cuts on challenging surfaces.
- Cons:
- More expensive than carbide-grit options.
- Can be slower on softer materials where carbide-grit might be just as effective.
- Requires proper cooling (water) for optimal performance and longevity, especially on harder materials.
What to AVOID for Stucco
It’s crucial to understand what not to use. Using the wrong type of hole saw will lead to frustration, wasted time, and potentially damaged tools or surfaces.
- Bi-Metal Hole Saws: These are fantastic for wood, plastic, and soft metals. They have sharp teeth that cut through material. However, the abrasive nature of stucco will quickly dull these teeth, making them ineffective and prone to overheating.
- High-Speed Steel (HSS) Hole Saws: Similar to bi-metal, HSS saws are designed for softer materials. They are not built to withstand the grinding action required for stucco.
- Carbide-Tipped Hole Saws: These have small carbide teeth brazed onto a steel body. While tougher than standard bi-metal, they are still primarily designed for materials like wood, drywall, and some plastics. They are not ideal for the consistent abrasive grinding needed for stucco.
Key Features to Consider When Buying
Beyond the cutting edge material, a few other factors can influence your choice and experience:
Arbor Compatibility
Most hole saws use an arbor (the shaft that attaches to your drill) with a pilot drill bit. Ensure the arbor you choose is compatible with the hole saw size you need and your drill’s chuck. Many hole saws are sold as kits with an arbor, or you can buy them separately.
Pilot Drill Bit
The pilot bit helps center the hole saw and prevents it from wandering. For stucco, a sharp, durable pilot bit is essential. Some diamond-grit hole saws come with specialized pilot bits designed for harder materials.
Cutting Depth
Check the maximum cutting depth of the hole saw. Most standard hole saws have a cutting depth of around 1-1/2 inches, which is usually sufficient for typical stucco applications like running electrical conduit or mounting fixtures. If you need to cut through thicker material, you might need a deep-cut hole saw.
Shank Type
Arbors come with different shank types (round, hex, SDS). A hex shank is generally preferred for drilling into harder materials as it provides a better grip in the drill chuck, reducing the chance of slippage.
How to Use a Hole Saw on Stucco: A Step-by-Step Guide
Now that you know which type of hole saw to use, let’s get to the actual cutting. Safety and technique are paramount when working with stucco and power tools.
Tools and Materials You’ll Need:
- Correct Hole Saw: Carbide-grit or diamond-grit.
- Power Drill: A corded drill with variable speed and a clutch is often recommended for better control. A powerful cordless drill can also work.
- Arbor: With a pilot bit, compatible with your hole saw and drill.
- Safety Glasses: Essential for protecting your eyes from dust and debris.
- Dust Mask or Respirator: Stucco dust can be harmful to inhale.
- Work Gloves: For grip and protection.
- Measuring Tape and Pencil/Marker: For marking your hole location.
- Level: To ensure your hole is straight.
- Hammer and Chisel (Optional): For cleaning up edges.
- Water Spray Bottle (for Diamond-Grit): To keep the cutting area cool.
Step-by-Step Process:
- Mark Your Hole Location: Use your measuring tape and pencil to mark the exact center of the hole you need to cut. Use a level to ensure your mark is precise, especially if you’re installing something that needs to be plumb or level.
- Attach the Hole Saw to the Arbor: Securely screw the hole saw onto the arbor. Make sure it’s tightened properly. Insert the arbor into your drill’s chuck and tighten it firmly.
- Set Up Your Drill:
- Speed: Set your drill to a low to medium speed setting. High speeds can cause overheating and premature wear.
- Clutch: If your drill has an adjustable clutch, set it to a low torque setting. This will prevent the drill from kicking back if the hole saw binds.
- Drilling Mode: Ensure your drill is set to “drill” mode, not “hammer” or “impact” mode. Hammer action will damage the hole saw and the stucco.
- Position the Pilot Bit: Place the tip of the pilot drill bit directly on your marked center point.
- Start Drilling Slowly: Begin drilling at a very slow speed. Let the pilot bit establish a stable entry point.
- Apply Steady Pressure: Once the pilot bit has started to cut, gradually increase your speed to a steady, moderate pace. Apply consistent, firm pressure straight down. Don’t force it; let the hole saw do the work.
- Keep it Cool (Especially with Diamond-Grit):
- Carbide-Grit: Periodically pull the hole saw out of the hole to clear dust and allow the material to cool.
- Diamond-Grit: It’s highly recommended to use water to cool the cutting area. You can have a helper spray water into the cut as you go, or you can apply it yourself. This is crucial for diamond-grit saws to prevent overheating and prolong their life. The water also helps suppress dust.
- Clear Debris: As the hole saw cuts, dust and debris will accumulate. Periodically pull the drill back slightly to allow the debris to clear from the teeth and the hole. This also helps with cooling.
- Complete the Cut: Continue drilling, maintaining steady pressure and clearing debris, until you feel the hole saw break through the other side. Be prepared for a sudden release of pressure.
- Smooth the Edges (Optional): Once the hole is cut, you might find some rough edges. You can use a hammer and chisel to carefully chip away any loose stucco around the opening for a cleaner finish.
Tips for a Cleaner Cut and Longer Tool Life
Getting a clean hole in stucco isn’t just about the right tool; it’s also about the right approach.
- Don’t Rush: Patience is key. Forcing the drill will only lead to overheating, dulling, and a rougher cut.
- Maintain a Consistent Angle: Try to keep the drill as perpendicular to the surface as possible throughout the cut.
- Let the Tool Work: Apply steady pressure, but don’t lean excessively on the drill. The cutting action of the hole saw, combined with the drill’s rotation, should do the work.
- Clear Dust Regularly: Pulling the hole saw out of the cut every so often not only helps clear debris but also allows heat to dissipate.
- Use Water with Diamond-Grit: As mentioned, this is vital for longevity and performance with diamond-grit saws.
- Know When to Replace: Even the best hole saws will eventually wear out. If you notice significantly slower cutting, excessive heat, or rougher holes, it might be time for a new one.
Troubleshooting Common Stucco Cutting Issues
Even with the right tools, you might encounter a few snags. Here’s how to deal with them:
Issue: Hole saw is not cutting or cutting very slowly.
Possible Causes:
- Wrong type of hole saw used (e.g., bi-metal).
- Hole saw teeth are dull or worn out.
- Drill speed is too low or too high.
- Not enough pressure being applied.
- Material being cut is harder than expected.
Solutions:
- Ensure you are using a carbide-grit or diamond-grit hole saw.
- If the saw is old or has been used extensively, replace it.
- Adjust drill speed to a moderate setting.
- Apply steady, firm pressure.
- If using diamond-grit on a very hard section, ensure adequate cooling with water.
Issue: Hole saw is overheating.
Possible Causes:
- Drill speed is too high.
- Not clearing debris frequently enough.
- Lack of cooling (especially with diamond-grit).
- Excessive pressure applied.
Solutions:
- Reduce drill speed.
- Pull the hole saw out of the cut more frequently to clear dust and allow cooling.
- Use water with diamond-grit saws.
- Ease up on the pressure.
Issue: The hole is rough or chipped.
Possible Causes:
- Hole saw is dull.
- Drill speed is too high.
- Hole saw is binding or wobbling.
- Starting cut too aggressively.
Solutions:
- Use a sharp, new hole saw.
- Reduce drill speed.
- Ensure the arbor and hole saw are securely attached and the pilot bit is stable.
- Start the cut slowly and steadily.
- For a cleaner finish, consider using a diamond-grit saw and water for cooling.
Issue: Drill chuck slipping.
Possible Causes:
- Chuck is not tightened enough.
- Arbor shank is rounded or damaged.
- Hole saw is binding, causing excessive torque.
Solutions:
- Ensure the drill chuck is tightened securely.
- Use an arbor with a hex shank for better grip.
- If the arbor shank is damaged, replace it.
- Reduce pressure slightly if the saw binds.
Maintaining Your Hole Saws for Longevity
Proper maintenance ensures your tools perform well and last longer. This is especially true for specialized hole saws designed for tough materials.
- Clean After Use: After each project, remove any stucco dust or debris from the hole saw and arbor. A stiff brush or compressed air works well.
- Inspect for Damage: Check the cutting edge for excessive wear or damage. For diamond-grit saws, ensure the diamond coating is still intact.
- Store Properly: Store hole saws in a dry place, ideally in their original packaging or a dedicated tool case, to prevent rust and damage.
- Cooling is Key: For diamond-grit saws, always use water as recommended. This is the most critical maintenance step for these types of saws.
- Avoid Cross-Contamination: Don’t use your stucco-specific hole saws on wood or soft metals. This can load the abrasive coating with softer material, reducing its effectiveness on stucco and potentially damaging the coating.
When to Call a Professional
While many stucco projects are manageable for DIYers, there are times when it’s best to bring in a professional. If you’re dealing with:
- Structural Elements: If the hole you need to cut is in a load-bearing part of your wall, consult a structural engineer or contractor first.
- Complex Electrical or Plumbing: If you’re not comfortable with electrical wiring or plumbing systems, it’s safer to hire a qualified tradesperson.
- Very Large or Numerous Holes: For extensive work, professionals have specialized equipment and experience that can save time and ensure safety.
- Uncertainty About Stucco Type: Some older homes may have different stucco compositions or may have been reinforced with mesh that can be difficult to cut.
Knowing your limits is part of being a smart DIYer. If a project feels beyond your skill level or poses a safety risk, don’t hesitate to seek professional help. For instance, understanding historic stucco repair and preservation can be complex and might require expert knowledge.
Frequently Asked Questions (FAQs)
Q1: Can I use a standard bi-metal hole saw on stucco?
A1: No, it is strongly discouraged. Bi-metal hole saws have sharp teeth that will quickly dull when cutting the abrasive material of stucco, leading to poor performance and premature wear. You need a specialized abrasive-cutting hole saw like carbide-grit or diamond-grit.
Q2: How do I keep dust down when cutting stucco?
A2: Use a dust mask or respirator. For diamond-grit hole saws, using water to cool the cutting area will also significantly suppress dust. You can also try to attach a vacuum cleaner hose near the cutting point to capture dust as it’s produced.
Q3: What size hole saw do I typically need for electrical conduit?
A3: The size depends on the conduit you are using. For common 1/2-inch or 3/4-inch conduit, you’ll need hole saws of corresponding sizes, often around 7/8 inch to 1 inch for 1/2-inch conduit and 1-1/8 inch to 1-1/4 inch for 3/4-inch conduit, allowing for a snug fit. Always check the specific outer diameter of your conduit.
Q4: Do I need a special drill for stucco hole saws?
A4: You don’t necessarily need a “special” drill, but a powerful drill with variable speed and a clutch is highly recommended. Corded drills often provide more consistent power. Ensure your drill can handle the torque required and has a chuck that can securely grip the arbor.
Q5: How long will a carbide-grit or diamond-grit hole saw last on stucco?
A5: The lifespan depends on the quality of the hole saw, the specific stucco composition, the size of the hole, and how it’s used. Carbide-grit saws are good for moderate use, while diamond-grit saws, especially when cooled properly, will last much longer for more demanding tasks. Expect to replace carbide-grit saws sooner than diamond-grit ones.
Q6: Can I use a hole saw to cut through stucco with lath behind it?
A6: Yes, you can, but it will be more challenging. The lath (often metal mesh) behind the stucco can snag the cutting edge. A diamond-grit hole saw is your best option here, as it’s more capable of grinding through both materials. You may need to go slower and use more lubricant (water) to ensure a smooth cut without excessive binding.
Conclusion
Tackling stucco with a hole saw might seem daunting at first, but by understanding the material and choosing the right tool, you can achieve clean, precise results. Remember, for stucco, it’s all about abrasive cutting. Opt for carbide-grit for general use or diamond-grit for tougher jobs and maximum longevity. Always prioritize safety by wearing your protective gear and using your drill correctly.
With the right hole saw, a little patience, and these tips, you’ll be well-equipped to make those necessary cuts for your home improvement projects. Happy drilling!