
Quick Summary: To maximize efficiency and longevity, an air separator should be located as close as possible to the air compressor’s outlet, before any other air treatment components like filters or dryers. This placement ensures it effectively removes moisture and oil from the compressed air at the earliest stage, protecting downstream tools and equipment.
Hey there, fellow DIYers and tool enthusiasts! Samuel H. Murphy here from Capische. Ever found yourself scratching your head, wondering about the best spot for that little gadget called an air separator in your compressed air system? It’s a common question, and honestly, getting it wrong can lead to less-than-ideal performance and even shorten the life of your tools. Don’t worry, though! We’re going to break down exactly where this crucial component belongs, making sure your air compressor setup runs smoothly and efficiently. Let’s dive in and get your air system set up for success!
Understanding the Role of an Air Separator
Before we talk about placement, let’s quickly touch on what an air separator actually does. Think of it as the first line of defense for your compressed air. When your compressor works hard, it not only compresses air but also heats it up. As this hot, moist air cools, water vapor condenses into liquid water. Along with this, lubricants from the compressor itself can also get into the air stream. An air separator, often a type of coalescing filter or moisture trap, is designed to capture and remove this unwanted water and oil from the compressed air.
Why is this so important? Well, water and oil are the enemies of most air-powered tools. Water can cause rust and corrosion inside your tools, leading to malfunctions and premature wear. Oil can contaminate surfaces you’re painting or finishes you’re trying to protect. By removing these contaminants early, you ensure cleaner, drier air, which translates to better tool performance, longer tool life, and a more professional finish on your projects.
The Golden Rule: Proximity to the Compressor
The most crucial factor when deciding where to locate your air separator is its proximity to the air compressor’s outlet. The general consensus, and the most effective strategy, is to place it as close to the compressor as physically possible.
Think of it this way: the air coming directly from the compressor is the “dirtiest.” It’s hottest and contains the most moisture and oil. By installing the air separator immediately after the compressor, you’re intercepting these contaminants at their source, before they have a chance to travel through your air lines and potentially cause problems elsewhere.
Why “As Close As Possible”?
- Early Contaminant Removal: The sooner you remove water and oil, the less chance they have to condense further down the line or damage sensitive components.
- System Protection: Placing it early protects all subsequent parts of your air system, including air hoses, regulators, filters, and the tools themselves.
- Efficiency: While separators work best when air is cooler, their primary function is removal. Removing contaminants early prevents them from building up in your lines.
Placement Within the Air Treatment Chain
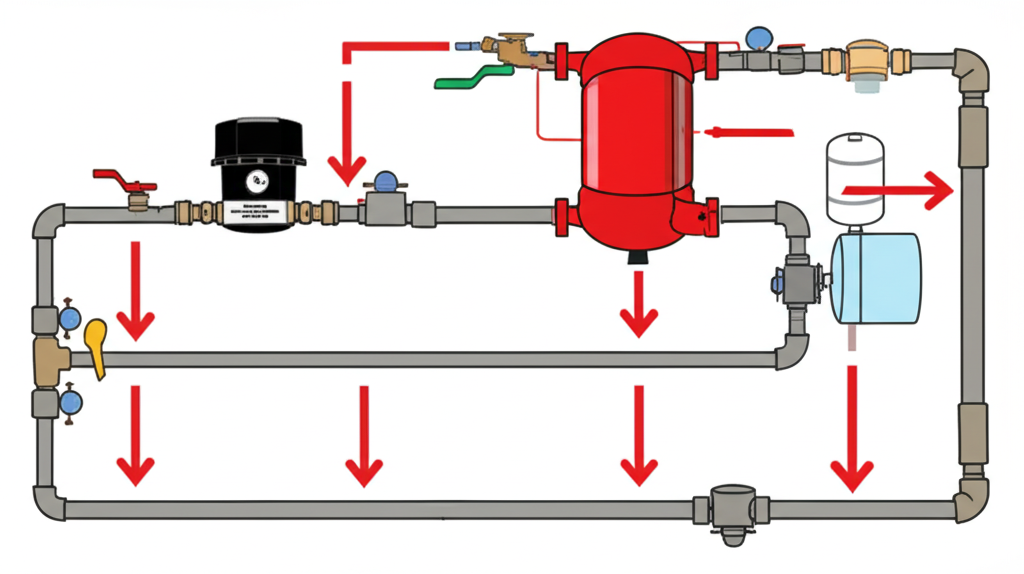
In a typical compressed air system, you’ll often have a sequence of components designed to clean and condition the air. The air separator is usually the first step in this treatment process. Here’s a common order:
- Air Compressor Outlet: Where the air first exits the compressor.
- Air Separator (Coalescing Filter/Moisture Trap): Removes bulk water and oil.
- In-line Air Filter: Removes finer particles and often some remaining oil.
- Air Dryer (Optional but Recommended for sensitive applications): Removes remaining moisture to very low dew points.
- Regulator: Controls air pressure.
- Lubricator (if needed for tools): Adds a fine mist of oil to air tools that require it.
So, to reiterate, the air separator should come right after the compressor outlet, before any other filters, dryers, or regulators. This ensures it’s doing its primary job on the least-treated air.
Factors to Consider for “Genius” Placement
While “as close as possible” is the rule, there are a few practical considerations to ensure your placement is truly genius:
1. Accessibility for Maintenance
Air separators, especially those with automatic drains or manual drain valves, need regular maintenance. You’ll need to drain the collected water and oil periodically. If your separator is tucked away in an impossible-to-reach spot, you’re less likely to perform this crucial task. This can lead to the separator becoming waterlogged and ineffective, or worse, the collected water backing up into your system.
- Drain Valve Access: Ensure you can easily open the drain valve to release accumulated moisture.
- Filter Element Replacement: If your separator has a replaceable element, make sure you have enough space to unscrew the housing and swap it out.
2. Airflow and Orientation
Most air separators are designed to be installed in a specific orientation to work correctly. Typically, they are mounted vertically, with the air flowing in at the bottom or side and exiting at the top. This allows gravity to assist in separating the heavier water and oil droplets, which then collect at the bottom. Always check the manufacturer’s instructions for the correct mounting orientation.
Incorrect orientation can significantly reduce the separator’s effectiveness, allowing water and oil to be carried through with the air.
3. Temperature Considerations
While you want the separator close to the compressor, avoid placing it directly on or immediately next to a very hot component (like the compressor motor or pump) if possible. Extreme heat can reduce the efficiency of condensation. Ideally, there should be a short length of air hose or pipe between the compressor outlet and the separator to allow the air to cool slightly before entering the separator. This slight cooling enhances the condensation process.
A good rule of thumb is to allow the air to cool for a few feet after leaving the compressor. This also helps to prevent heat damage to any plastic components on the separator.
4. Mounting Surface and Vibration
Your air separator will likely be mounted to a wall, a workbench, or directly onto the compressor’s frame. Ensure the mounting surface is sturdy and can handle the weight of the unit, especially when full of collected liquid. Compressed air systems can vibrate, so secure mounting is essential to prevent the separator from becoming loose or falling.
Consider using vibration-dampening mounts if you have a particularly noisy or vibrating compressor.
5. Future Expansion
Think about your future needs. Will you be adding more tools or components to your air system? If so, try to position your air separator in a location that allows for easy addition of more air treatment components or longer air lines without major reconfiguration.
Practical Placement Scenarios
Let’s look at some common scenarios and how to apply these principles:
Scenario 1: Portable Air Compressor in a Garage
For a typical portable compressor used by homeowners or auto hobbyists, the compressor itself is often on wheels. The air separator can be mounted directly onto the compressor’s frame, usually just after the tank outlet valve. If that’s not feasible, a short, flexible hose can connect the tank outlet to a wall-mounted separator. Ensure the wall mount is accessible for draining.
Example: Mount the separator on a sturdy piece of plywood screwed to the garage wall, near the compressor’s typical operating location. Connect the compressor’s tank valve to the separator’s inlet with a suitable air hose and fittings. Ensure the drain valve is low enough to access easily.
Scenario 2: Stationary Compressor for a Workshop
If you have a larger, stationary compressor, the placement becomes even more critical. The separator should be installed on the main air line immediately after the compressor tank. From there, you can run your main air distribution lines. Again, accessibility for maintenance is key.
Example: Mount the separator on a bracket bolted to the wall or a sturdy stand next to the compressor. Use hard piping or a reinforced hose to connect the compressor tank outlet to the separator inlet. Ensure adequate clearance around the separator for draining and potential filter changes.
Table: Pros and Cons of Different Placement Locations
To help visualize, here’s a table comparing potential placement strategies:
| Location | Pros | Cons | Best For |
|---|---|---|---|
| Directly on compressor outlet valve | Extremely close to source, compact. | Can be difficult to access for draining, might be too hot if directly attached. | Very small portable compressors where space is limited. |
| Short hose/pipe from compressor outlet | Allows slight cooling, good proximity, flexible. | Requires fittings and hose, potential for leaks if not installed correctly. | Most portable and smaller stationary compressors. |
| Wall-mounted near compressor | Good accessibility for maintenance, keeps compressor area tidy. | Requires mounting space, needs a connection from compressor. | Stationary compressors, workshops where a central air point is desired. |
| Downstream in the air line (e.g., near tools) | Might seem convenient if running lines anyway. | Less effective as contaminants travel further, doesn’t protect entire system, harder to manage multiple separators. | Generally not recommended for primary air separation. |
Connecting Your Air Separator: A Simple Guide
Connecting an air separator is usually straightforward. You’ll need a few basic fittings:
Tools and Materials You Might Need:
- Air separator unit
- Appropriate air fittings (e.g., NPT male/female adapters, quick-connects)
- Pipe thread sealant tape (PTFE tape) or pipe dope
- Adjustable wrenches or pipe wrenches
- A short length of air hose or pipe (if not mounting directly)
- Mounting hardware (screws, bolts, brackets)
Steps for Installation:
- Turn off and depressurize the compressor: Safety first! Ensure the compressor is off and any pressure in the tank is safely released.
- Identify inlet and outlet ports: Check your air separator for markings indicating the direction of airflow.
- Prepare fittings: Wrap the threads of your fittings with pipe thread sealant tape or apply pipe dope. This prevents air leaks.
- Connect to compressor outlet: Attach the appropriate fitting to the compressor’s tank outlet valve. Then, connect your short hose or pipe to this fitting.
- Connect to separator inlet: Attach the other end of your hose/pipe to the inlet port of the air separator. Ensure the separator is oriented correctly (usually vertical).
- Mount the separator: If wall-mounting, securely fasten the separator or its bracket to a sturdy surface.
- Connect to the rest of the system: Attach your main air line or the next component (like a filter or regulator) to the outlet port of the air separator.
- Leak check: Slowly repressurize the system and listen for any air leaks at the connections. Tighten fittings as needed.
For more detailed instructions, always refer to the specific manual provided by the manufacturer of your air compressor and air separator.
Frequently Asked Questions (FAQs)
Q1: Do I need an air separator if my compressor has a tank?
A: Yes, even compressors with tanks produce moisture and oil in the compressed air. The tank stores air, but it doesn’t inherently remove these contaminants. An air separator is still crucial for cleaning the air before it reaches your tools.
Q2: Can I put an air separator after my air dryer?
A: It’s generally not recommended. Air dryers are designed to remove moisture from already relatively clean air. Placing a separator after a dryer might catch some oil carry-over from the dryer itself, but the primary role of removing bulk water and oil is best done as early as possible, before the dryer, to protect the dryer’s components.
Q3: How often should I drain my air separator?
A: This depends on your compressor’s usage and the ambient humidity. For regular use, it’s a good practice to drain it at the end of each day’s work. If your separator has an automatic drain, ensure it’s functioning correctly. Check it visually periodically.
Q4: What’s the difference between an air separator and a moisture trap?
A: In many DIY and homeowner contexts, these terms are used interchangeably. Technically, a “moisture trap” often refers to a simple device that collects water, while an “air separator” or “coalescing filter” is a more advanced unit designed to remove both liquid water and oil aerosols, often using a filter element.
Q5: Can I use a simple inline filter instead of a dedicated air separator?
A: While inline filters remove particles, they are typically not as effective at removing bulk liquid water and oil as a coalescing air separator. A separator is designed specifically for that initial, heavy-duty moisture and oil removal. You’ll likely still want a dedicated separator as the first stage.
Q6: Does the size of the air separator matter?
A: Yes, the flow rate capacity of the air separator should match or exceed the maximum cubic feet per minute (CFM) output of your air compressor. Using an undersized separator can restrict airflow and reduce its effectiveness.
Q7: My air separator seems to be dripping water constantly. Is that normal?
A: If it has an automatic drain, a small drip might be normal as it cycles. However, if it’s a steady stream or if it doesn’t have an automatic drain and you’re manually draining it frequently, it indicates a lot of moisture is being removed, which is exactly what it’s supposed to do! Ensure the drain valve is functioning correctly and not stuck open.
Ensuring Longevity and Performance
Proper placement of your air separator is more than just a technicality; it’s a key step in ensuring your entire compressed air system operates efficiently and reliably. By placing it as close to the compressor outlet as possible, while still allowing for accessibility and proper orientation, you’re setting yourself up for success.
Remember to consult your specific component manuals, as they often contain valuable installation and maintenance tips tailored to your equipment. A little attention to detail during setup can save you a lot of headaches and money down the road, keeping your tools running smoothly and your projects looking great.
So, take a moment, assess your setup, and position that air separator wisely. Your tools will thank you for it! Happy building, fixing, and creating!