
Quick Summary
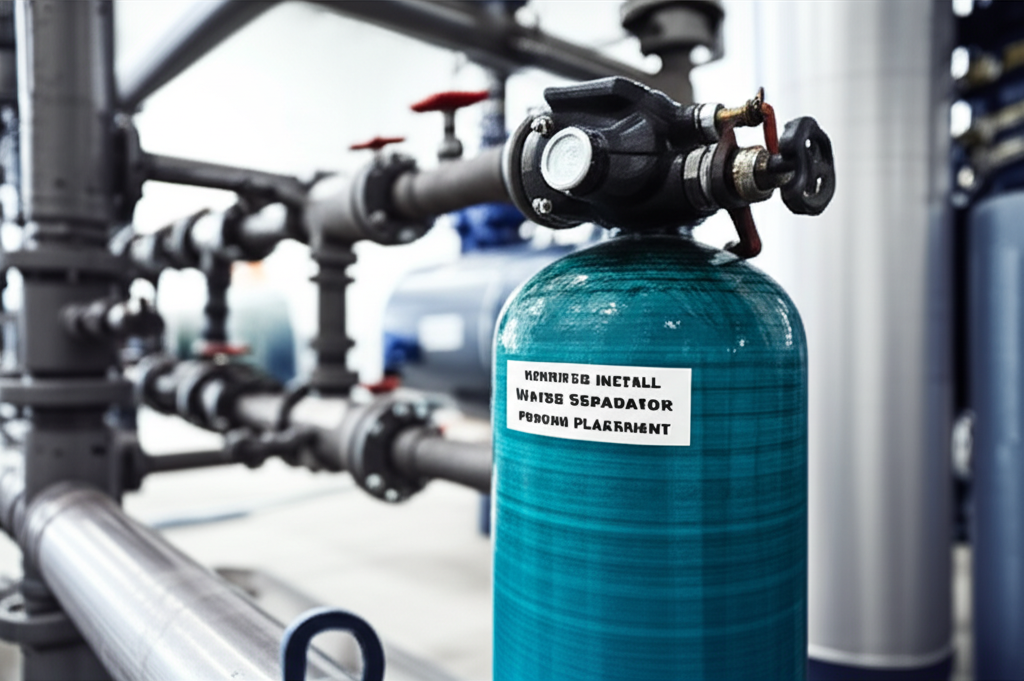
Install a water separator on your air compressor line as close to the compressor outlet as possible, before any air tools or other accessories. This placement effectively captures moisture generated by compression, protecting your tools and ensuring cleaner air.
Hey there! If you’re new to the world of air compressors, you’ve probably noticed that little gadget that looks like a filter or a small tank attached to your air line. That’s a water separator, and it’s a really important part of keeping your air compressor and the tools it powers in tip-top shape. Sometimes, figuring out exactly where this handy device goes can be a bit confusing. Don’t worry, though! We’re going to walk through the best spots to install your water separator so you can get the most out of your compressor and avoid common headaches. Let’s get your air system set up right!
Why Water Separators Are a Big Deal
Air compressors work by squeezing air. When air gets compressed, it heats up. As that hot, compressed air cools down, it releases moisture – much like how water droplets form on the outside of a cold glass on a humid day. This moisture can cause all sorts of problems. It can lead to rust inside your compressor tank, damage your air tools with corrosion, and even affect the quality of your work if you’re painting or using delicate pneumatic tools.
A water separator is designed to catch this moisture before it travels down your air line. It’s a simple but crucial component for anyone using an air compressor for tasks like inflating tires, running nail guns, or any DIY project that relies on clean, dry air. Getting the placement right ensures it does its job effectively, saving you from costly repairs and frustrating downtime.
Understanding the Goal: Clean, Dry Air
The main goal when installing a water separator is to remove as much water as possible from the compressed air stream. This means placing it in a location where the water can be easily separated and drained. Think of it like a first line of defense. You want to intercept the water right after it leaves the compressor, but before it has a chance to travel far and potentially cause issues.
The process of air compression inherently introduces moisture. Even in relatively dry environments, the air drawn into the compressor contains water vapor. As the compressor compresses this air, the water vapor becomes concentrated. When the air cools, this concentrated vapor condenses into liquid water. Your water separator is the hero that catches this liquid water.
The Golden Rule: Placement Near the Compressor
The most effective place to install a water separator is as close to the compressor’s outlet as possible. This is typically right after the air leaves the compressor pump and before it enters the storage tank (if your compressor has one) or the main air line. The reasoning is simple: you want to capture the water at the earliest stage of its journey through your air system.
Why is this so important? Because the air is hottest right at the compressor outlet. As the air cools in the tank or the initial part of the line, condensation begins to form. By placing the separator here, you catch this condensation when it’s most concentrated and before it can travel further down the line and potentially condense again in cooler sections of your piping or tools.
Step-by-Step Installation: Where to Connect
Let’s break down the typical installation process. Most water separators are designed to be inline components. This means they fit directly into your air hose or piping system.
Step 1: Identify the Compressor Outlet
Locate the main port where compressed air exits your air compressor unit. This is usually a threaded fitting. You might have a quick-connect coupler attached here already, or it might be a bare fitting.
Step 2: Determine the Separator’s Inlet and Outlet
Water separators have a clear inlet (where the air enters) and an outlet (where the air exits). These are usually marked on the unit itself. Always ensure you connect the air flow in the correct direction.
Step 3: Connect the Separator to the Compressor
This is where placement matters most. You’ll want to connect the water separator directly to the compressor outlet fitting. You might need an adapter or a short piece of hose, depending on the fittings on your compressor and the separator.
- Direct Connection: If the fittings match, you can screw the separator directly onto the compressor outlet.
- Using a Short Hose: If there’s a slight mismatch or you want a bit of flexibility, use a short, high-quality air hose rated for your compressor’s pressure. Connect one end to the compressor outlet and the other end to the separator’s inlet.
- Using Adapters: Threaded adapters can bridge different fitting sizes. Ensure you use thread sealant tape (like PTFE tape) for a secure, leak-free connection.
Step 4: Connect the Air Line to the Separator Outlet
Once the separator is securely attached to the compressor, connect your main air hose or piping system to the outlet of the water separator. Again, use appropriate fittings and thread sealant if necessary.
Step 5: Install a Drain Mechanism (If Needed)
Many water separators come with a manual drain valve or an automatic drain. If yours has a manual drain, ensure it’s accessible for regular draining. If it’s an automatic drain, it will expel water as it accumulates.
Alternative Placements and Considerations
While the ideal spot is right at the compressor outlet, there are other places you might consider, especially for larger or more complex systems. However, each comes with trade-offs.
1. After the Air Tank (But Still Early)
For some compressors, especially those with integrated tanks, the outlet might be directly from the tank. In this case, installing the water separator immediately after the tank outlet is the next best option. This still ensures you capture most of the condensation before it travels through the rest of your system.
Pros:
- Still captures a significant amount of moisture.
- May be easier to access on some compressor models.
Cons:
- Some condensation may have already formed and potentially settled within the tank.
- Less effective than placement directly at the compressor outlet.
2. At the Point of Use (Tool Connection)
Some DIYers install smaller inline water separators directly onto their air tools or at the end of the air hose, just before the tool connects. These are often called “in-line filters” or “tool filters.”
Pros:
- Provides an extra layer of filtration right at the tool.
- Can be useful for very sensitive tools.
Cons:
- Significantly less effective at removing bulk water. Much of the water will have already traveled through the entire hose.
- Adds weight and bulk to the tool itself.
- Doesn’t protect the air hose or the rest of the system from moisture.
Recommendation: While tool-mounted filters are beneficial for fine particulate filtration, they are not a substitute for a primary water separator placed closer to the compressor. Think of them as a secondary defense, not the first line.
3. In the Main Air Line (Further Downstream)
For larger workshop setups with extensive piping, you might install additional water separators at various points in the main air line. This is often done in conjunction with a primary separator near the compressor.
Pros:
- Helps remove any remaining moisture that might have condensed in the piping.
- Useful in larger systems with long runs of pipe.
Cons:
- Requires more fittings and installation effort.
- The primary separator near the compressor is still the most critical.
Expert Tip: For most homeowners and DIYers, a single, well-placed water separator near the compressor is sufficient. If you have a very long air line or operate in extremely humid conditions, consider a secondary separator.
Types of Water Separators and Their Placement Implications
There are a few common types of water separators, and understanding them can help reinforce why placement is key.
1. Manual Drain Separators
These have a small valve at the bottom. You need to manually open this valve periodically to drain the collected water. For these, ensure the drain valve is accessible.
Placement Consideration: If you’re placing it near the compressor outlet, make sure you can easily get to the drain valve to open it without having to move the entire compressor or disconnect the line.
2. Automatic Drain Separators
These have a float mechanism or a sensor that automatically opens a drain valve when a certain amount of water has collected. They are more convenient.
Placement Consideration: While placement is still best near the compressor, automatic drains are generally more forgiving if the initial placement isn’t perfectly at the lowest point, as they manage drainage themselves. However, ensuring the drain outlet has a clear path to drain is still important.
3. In-Line Desiccant Dryers/Filters
These are more advanced and use a desiccant material (like silica gel) to absorb moisture. They are often used after a primary water separator for ultra-dry air.
Placement Consideration: These are always installed after a primary water separator. They are designed to remove the last traces of moisture, not the bulk of it. Placing them too early can saturate the desiccant material quickly.
Table: Optimal Placement Scenarios
Here’s a quick guide to help you decide the best spot based on your setup:
| Scenario | Recommended Placement | Reasoning |
|---|---|---|
| Standard Home/DIY Use (Tire inflation, small air tools) | Directly after compressor outlet, before storage tank or main hose. | Captures bulk moisture immediately, protecting all downstream components. |
| Workshop with Long Air Lines | Primary: After compressor outlet. Secondary: At key junctions or ends of long runs. | Initial capture at source, with additional removal points to combat moisture buildup in piping. |
| Painting or Delicate Tool Use | Directly after compressor outlet, potentially followed by a finer filter/regulator. | Ensures the cleanest, driest air possible reaches sensitive equipment, preventing finish defects or tool damage. |
| Seasonal Use (e.g., Winterizing Irrigation) | After compressor outlet, before the line going to the system. | Ensures no moisture is introduced into sensitive systems that could freeze and cause damage. |
Tools You Might Need
Gathering the right tools before you start will make the installation smooth and efficient.
- Adjustable Wrench or Pliers: For tightening fittings.
- PTFE Thread Seal Tape (Teflon Tape): Crucial for creating airtight seals on threaded connections. You can find reliable information on its use from resources like Engineering Toolbox.
- Pipe Dope (Thread Sealant Compound): An alternative or supplement to thread tape for sealing.
- Short Air Hose or Nipple Fitting: May be needed to connect the separator if direct connection isn’t possible.
- Safety Glasses: Always protect your eyes when working with compressed air systems.
- Gloves: For a better grip and to keep your hands clean.
Common Mistakes to Avoid
Even with the best intentions, some common errors can undermine your water separator’s effectiveness.
- Installing it too far downstream: As we’ve discussed, this is the biggest mistake. It allows too much moisture to travel through your system.
- Incorrect Airflow Direction: Forgetting to check the inlet/outlet markings means the separator won’t function.
- Not Sealing Connections Properly: Leaks reduce system pressure and efficiency, and can allow contaminants in. Always use thread tape or pipe dope.
- Forgetting to Drain: If you have a manual drain, regular draining is essential. A full separator won’t separate any more water.
- Over-tightening Fittings: This can damage threads on the separator or your compressor, leading to leaks. Tighten snugly, then give a slight extra turn.
Maintaining Your Water Separator
Once installed, your water separator needs a little attention to keep working its best.
- Regular Draining: If you have a manual drain, make it a habit to drain it after each use or at the end of the day. For automatic drains, check periodically to ensure they are functioning correctly.
- Periodic Cleaning: Some separators can be disassembled for cleaning. Check your manufacturer’s instructions. You might want to clean the bowl and the filter element (if it has one) every few months, depending on usage and air quality.
- Replacement: Like any filter, water separator elements can become clogged or less effective over time. Follow the manufacturer’s recommendation for replacement, which is often annually or based on hours of use.
FAQ: Your Water Separator Questions Answered
Here are some common questions people have about installing and using water separators:
Q1: Do I need a water separator if I live in a dry climate?
A: Yes, even in dry climates, air contains some moisture. The process of compression concentrates this moisture, and it will condense as the air cools. A water separator is still beneficial to remove any water that forms, protecting your tools.
Q2: Can I install a water separator on my air hose instead of directly on the compressor?
A: You can, but it’s not ideal. Installing it on the hose means water has already traveled through the compressor and potentially the hose itself. The best placement is as close to the compressor outlet as possible to catch moisture early.
Q3: What happens if I don’t use a water separator?
A: You risk internal rust and corrosion in your compressor tank and air lines, damage to pneumatic tools from moisture and rust particles, and potentially poor results if you’re painting or using sensitive equipment.
Q4: How often should I drain my water separator?
A: If it has a manual drain, drain it after each use or at least daily. For automatic drains, ensure they are working by checking the drain outlet periodically. Heavy usage or humid conditions may require more frequent draining.
Q5: Can I use a water separator with a regulator and filter combo?
A: Yes, many systems use a combination unit that includes water separation, pressure regulation, and fine particulate filtration. However, the principle of placing the water separation component closest to the compressor still applies.
Q6: My water separator has a bowl. Do I need to remove it to drain?
A: Most bowls have a drain valve or petcock at the bottom. You typically just open this valve to let the water out. Some older or simpler models might require bowl removal, but this is less common now.
Q7: Is it okay to connect multiple water separators in a line?
A: While possible, it’s usually not necessary for typical DIY use. One well-placed separator is generally sufficient. If you have very demanding applications requiring extremely dry air, you might add a desiccant dryer after a primary water separator.
Conclusion: Your Air System Will Thank You
Properly installing your water separator is a small step that makes a huge difference in the life and performance of your air compressor and tools. By placing it as close to the compressor outlet as possible, you’re setting up the most effective defense against damaging moisture. Remember to use thread sealant, ensure the correct airflow direction, and make regular draining a habit. This simple maintenance will save you money, prevent frustration, and ensure you get the best results from your compressed air projects.
So, take a moment to check your setup. Is your water separator in the prime spot? If not, a quick adjustment can provide significant long-term benefits. Happy compressing!