
Making a bow saw is easier than you think. With the right tools, anyone can do it.
A bow saw is a handy tool for cutting wood. It’s perfect for woodworking projects or outdoor use. You can buy one from the store, but making your own can be fun and rewarding. Plus, it allows you to customize the saw to your needs.
In this guide, we’ll walk you through the steps to make your own bow saw. You’ll learn about the materials you need and the process of putting everything together. By the end, you’ll have a reliable tool and the satisfaction of having built it yourself. Let’s get started!
Introduction To Bow Saws
Crafting a bow saw involves selecting sturdy wood, shaping the frame, and attaching a strong blade. Follow clear steps to build a durable tool for cutting.
A bow saw is a versatile and essential tool for woodworking and outdoor tasks. It’s known for its lightweight design and efficient cutting ability. This guide will help you understand what a bow saw is and its historical background.What Is A Bow Saw?
A bow saw is a hand tool with a thin, straight blade. The blade is held in tension by a metal or wooden frame shaped like a bow. It’s used for cross-cutting wood, trimming trees, and other cutting tasks. The teeth of the blade are designed to cut on the push and pull strokes, making it efficient for various cutting tasks.Historical Background
Bow saws have a rich history. They date back to ancient times. Early versions were simple but effective. They were used by carpenters and craftsmen. Over time, the design evolved. Modern bow saws are more efficient and durable. The basic principle remains the same: a tensioned blade in a sturdy frame. This design has stood the test of time. It continues to be a valuable tool for many. “`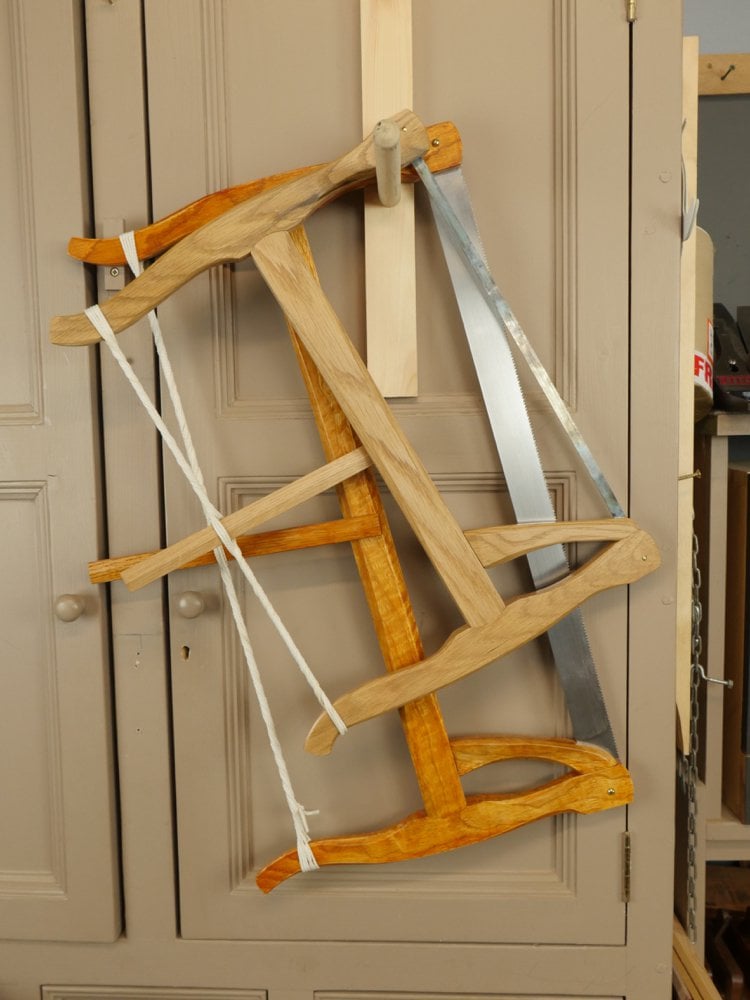
Credit: paulsellers.com
Materials And Tools Needed
Creating a bow saw is a rewarding DIY project. Knowing the right materials and tools is crucial for success. This section will guide you through the essential materials and required tools. Follow these steps to ensure you have everything you need.
Essential Materials
| Material | Description |
|---|---|
| Wood | Choose a strong, durable wood like oak or ash. |
| Saw Blade | Pick a blade designed for bow saws. Ensure it fits your frame. |
| Twine | Sturdy twine helps tighten the saw blade securely. |
| Wood Screws | Use screws to attach the saw blade to the wood frame. |
Required Tools
- Hand Saw - To cut the wood to size.
- Drill - For making holes in the wood.
- Screwdriver - To insert the wood screws.
- Measuring Tape - Ensures accurate measurements of wood and blade.
- Clamps - Holds wood pieces in place while working.
- Sandpaper - Smooths the wood for a better finish.
Preparing The Frame
Creating a bow saw frame is the first step to making a functional tool. A strong and durable frame ensures the saw works efficiently. This section will guide you through the process of selecting and cutting the wood for your bow saw.
Choosing The Wood
Start by selecting the right type of wood for your bow saw frame. Hardwoods like oak, maple, or beech are ideal due to their strength and durability. Softwoods are easier to work with, but they may not be as sturdy.
Here’s a quick comparison of suitable woods:
| Type of Wood | Properties |
|---|---|
| Oak | Very strong, durable, and heavy |
| Maple | Hard, dense, and resistant to wear |
| Beech | Hard, tough, and smooth |
Choose wood that is straight-grained and free from knots. This ensures your frame is strong and less likely to break.
Cutting The Pieces
Once you have chosen the wood, it’s time to cut it into pieces. You will need three main parts: two arms and one crossbar.
- Measure the length of each piece. The arms should be around 16-20 inches long, and the crossbar about 12-14 inches.
- Mark the measurements on the wood with a pencil.
- Cut the pieces using a saw. Ensure the cuts are straight and clean.
After cutting, sand the edges to remove any rough spots. This helps in assembling the frame smoothly and ensures a comfortable grip.
With the pieces ready, you are one step closer to assembling your bow saw. In the next sections, we will cover how to join these pieces together.
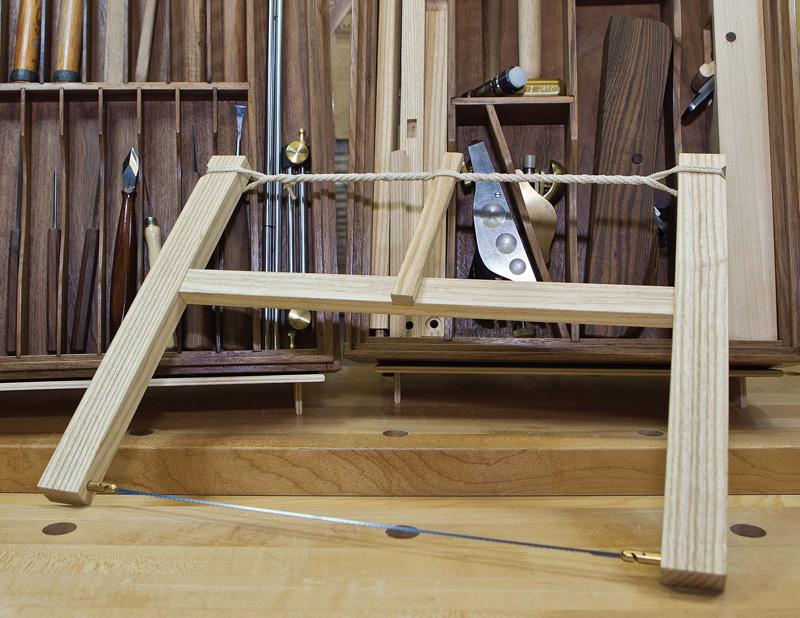
Credit: canadianwoodworking.com
Assembling The Frame
Assembling the frame of your bow saw is a crucial step. This part determines the saw’s stability and durability. Proper assembly ensures your saw will function effectively and last longer.
Joining Techniques
Choosing the right joining technique is essential. The most common methods are dowel joints, mortise and tenon, and lap joints. Each method has its benefits and challenges.
Dowel joints are easy to make and provide decent strength. Mortise and tenon joints are stronger but require more precision. Lap joints are simple and effective for beginners. Select the method that suits your skill level and tools.
Securing The Joints
Securing the joints ensures the frame is stable. Use wood glue to add extra strength. Apply it generously to the surfaces before joining them.
After applying glue, clamp the pieces together tightly. This ensures a strong bond. Leave the clamps on until the glue dries completely. Check the manufacturer’s instructions for drying times.
For added security, use screws or nails. Drill pilot holes to prevent the wood from splitting. Insert the screws or nails carefully to avoid damaging the frame.
Adding The Blade
Adding the blade is a crucial step in making a bow saw. The blade determines the saw’s cutting ability and overall performance. In this section, we’ll cover selecting the right blade and attaching it securely to the frame. Follow these steps to ensure your bow saw is effective and safe to use.
Selecting The Blade
Choosing the right blade is essential for a functional bow saw. Here are some tips to help you make the best choice:
- Material: Opt for high-carbon steel blades. They are durable and retain their sharpness longer.
- Teeth per inch (TPI): A blade with 4-6 TPI is ideal for general use. It balances speed and smoothness in cutting.
- Length: Measure your bow saw frame before buying. Ensure the blade fits snugly.
High-quality blades make a significant difference. They ensure efficient and clean cuts.
Attaching The Blade
Attaching the blade securely is vital for your safety. Follow these steps to attach the blade:
- Position the blade: Align the blade with the frame slots.
- Insert the blade: Slide the blade into the slots. Ensure both ends are equally inserted.
- Secure with bolts: Use bolts to fasten the blade to the frame. Tighten them securely.
For added safety, double-check the blade’s attachment. It should not wobble or move.
Here’s a quick reference table for common blade specifications:
| Blade Type | Material | TPI |
|---|---|---|
| Standard Blade | High-Carbon Steel | 4-6 |
| Fine-Cut Blade | High-Carbon Steel | 8-10 |
With the right blade and secure attachment, your bow saw will be ready for any cutting task. Enjoy your crafting!
Tensioning The Blade
Properly tensioning the blade is crucial for a bow saw. It ensures smooth cutting and extends the blade’s life. Let’s dive into the methods to tension the blade effectively.
Using A Turnbuckle
A turnbuckle is a simple tool that helps adjust the tension. Attach it between the ends of the bow saw. Twist the turnbuckle to increase the tension. Make sure the blade is taut but not overstretched. This method provides precise control over the tension.
Adjusting The Tension
Check the tension regularly. The blade should be firm with minimal flex. If it’s too loose, the saw will not cut properly. If it’s too tight, the blade might snap. Adjust the turnbuckle slightly to achieve the perfect tension. Test by making a few cuts to ensure the blade is properly tensioned.
Finishing Touches
The final steps in making a bow saw involve perfecting its appearance and ensuring its durability. These finishing touches not only enhance the saw’s look but also its functionality. Let’s dive into the essential steps to achieve a smooth and polished finish.
Sanding And Smoothing
Start by sanding all wooden parts of your bow saw. Use fine-grit sandpaper. This removes any rough spots and sharp edges. Sanding makes the wood smooth and pleasant to touch. It also prepares the wood for finishing.
Work carefully around the edges and curves. Ensure all surfaces are even. Take your time. Smooth wood not only looks better but also prevents splinters. Your hands will thank you later.
Applying Finish
Once the wood is smooth, apply a finish. Choose a finish that protects the wood. It could be oil, varnish, or even wax. Each type of finish has its benefits. For a natural look, use tung oil or linseed oil. These penetrate the wood and highlight its grain.
Apply the finish evenly with a brush or cloth. Let it soak into the wood. Wipe off any excess. Allow it to dry completely. You may need to apply multiple coats. Sand lightly between coats for the best result.
Finishing your bow saw not only protects it but also enhances its beauty. A well-finished saw is a joy to use and a sight to behold.
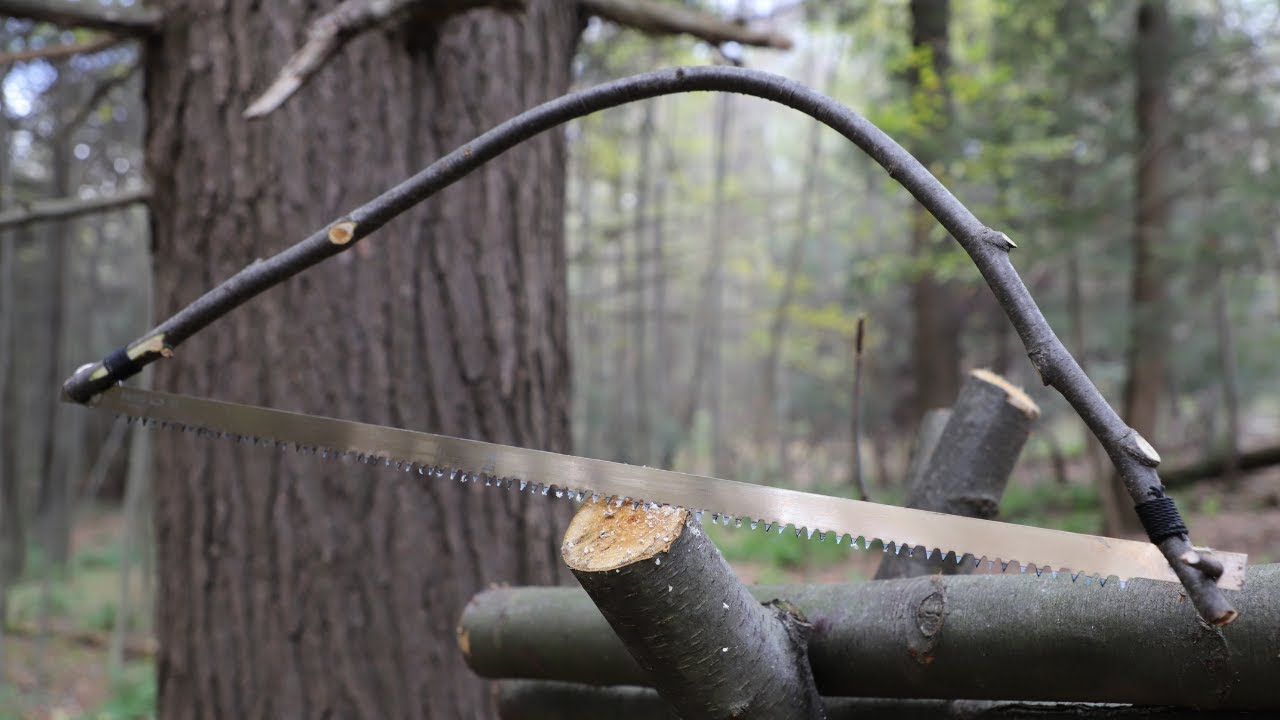
Credit: www.youtube.com
Safety Tips
Creating a bow saw can be a rewarding project. But safety is crucial. Below, we cover essential safety tips to keep you safe.
Protective Gear
Before starting, gather your protective gear. This includes:
- Safety glasses: Protect your eyes from debris.
- Gloves: Prevent cuts and splinters.
- Ear protection: Shield your ears from loud noises.
- Dust mask: Avoid inhaling sawdust.
Safe Usage Practices
Follow these safe usage practices to ensure a smooth project:
- Keep your workspace clean: A tidy area reduces accidents.
- Use sharp blades: Dull blades can slip and cause injuries.
- Secure materials: Clamp your materials to prevent movement.
- Work slowly: Take your time to avoid mistakes.
- Store tools properly: Put tools away to prevent tripping hazards.
Remember, safety is the top priority. Stay alert and work carefully.
Maintenance And Care
Maintaining and caring for your bow saw ensures it remains effective and long-lasting. Regular maintenance can prevent rust, dullness, and other issues. Follow these simple steps to keep your bow saw in top condition.
Cleaning The Saw
After each use, clean the saw blade to remove sap, dirt, and debris. Use a wire brush or a clean cloth to wipe down the blade. For stubborn residue, apply a small amount of mineral spirits.
- Scrape off any sticky sap with a putty knife.
- Wipe the blade with a cloth soaked in mineral spirits.
- Dry the blade thoroughly to prevent rust.
Regular cleaning prevents buildup, which can dull the blade and make cutting difficult.
Storing Properly
Proper storage of your bow saw is crucial to its lifespan. Store the saw in a dry place to avoid moisture, which can cause rust. Hang the saw on a pegboard or wall hook to keep it off the ground.
- Choose a dry, cool place for storage.
- Hang the saw to avoid bending the blade.
- Cover the blade with a protective sheath if possible.
Proper storage also prevents accidents by keeping the sharp blade out of reach.
Regular maintenance and proper storage ensure your bow saw remains an effective tool for years to come. Keep these tips in mind to protect your investment and make your woodworking projects easier.
Frequently Asked Questions
What Materials Are Needed To Make A Bow Saw?
To make a bow saw, you’ll need hardwood, a saw blade, bolts, and twine. Hardwood ensures durability, while the saw blade is crucial for cutting. Bolts secure the blade in place. Twine helps tighten the frame.
How Do You Shape The Bow Saw Frame?
Shape the bow saw frame by cutting the hardwood into desired lengths. Use a plane or rasp to smooth and contour the wood. Ensure the frame is sturdy and balanced for effective sawing.
How To Attach The Saw Blade Securely?
Attach the saw blade by drilling holes in the frame for the bolts. Insert bolts through the blade and frame. Tighten nuts to secure the blade. Ensure the blade is taut and aligned.
What Type Of Wood Is Best For A Bow Saw?
Hardwood like oak, ash, or hickory is best for a bow saw. These woods are strong and durable. They ensure the frame withstands tension and pressure during use.
Conclusion
Creating a bow saw can be a fun and rewarding project. With the right tools and materials, you can build a sturdy saw. This skill not only saves money but also provides a sense of accomplishment. Practice safety and precision throughout the process.
By following these steps, you will have a reliable tool for your woodworking needs. Start your project today and enjoy the benefits of a handmade bow saw. Happy crafting!